WFX 200, 300, 200 P Fe/Ss, 300 P Fe/Ss, 200-T, 300 P-T, 300-T, 200 AMC, 300 AMC
16
EN
2.15 Main switch I/O
When you turn the main switch of the FastMig power source into I-position, the pilot lamp
closest to this switch will illuminate, indicating the power source is ready for welding. The
equipment will return to the same operation state where it was before the last shutdown.
Always start and switch o the machine with the main switch, never use the mains plug as a
switch.
2.16 Operation of cooling unit, Cool X
When liquid-cooling unit Cool X is connected to the FastMig power source for the rst time,
the cooler function is normally active. To deselect the cooler function, follow the instructions
stated in the Cool X operating manual.
2.17 Hanging kit
The WFX wire feeders can be mounted on a welding boom using the KFH 1000 hanging
device available as an accessory. This allows the wire feed unit to be suspended above the
work area.
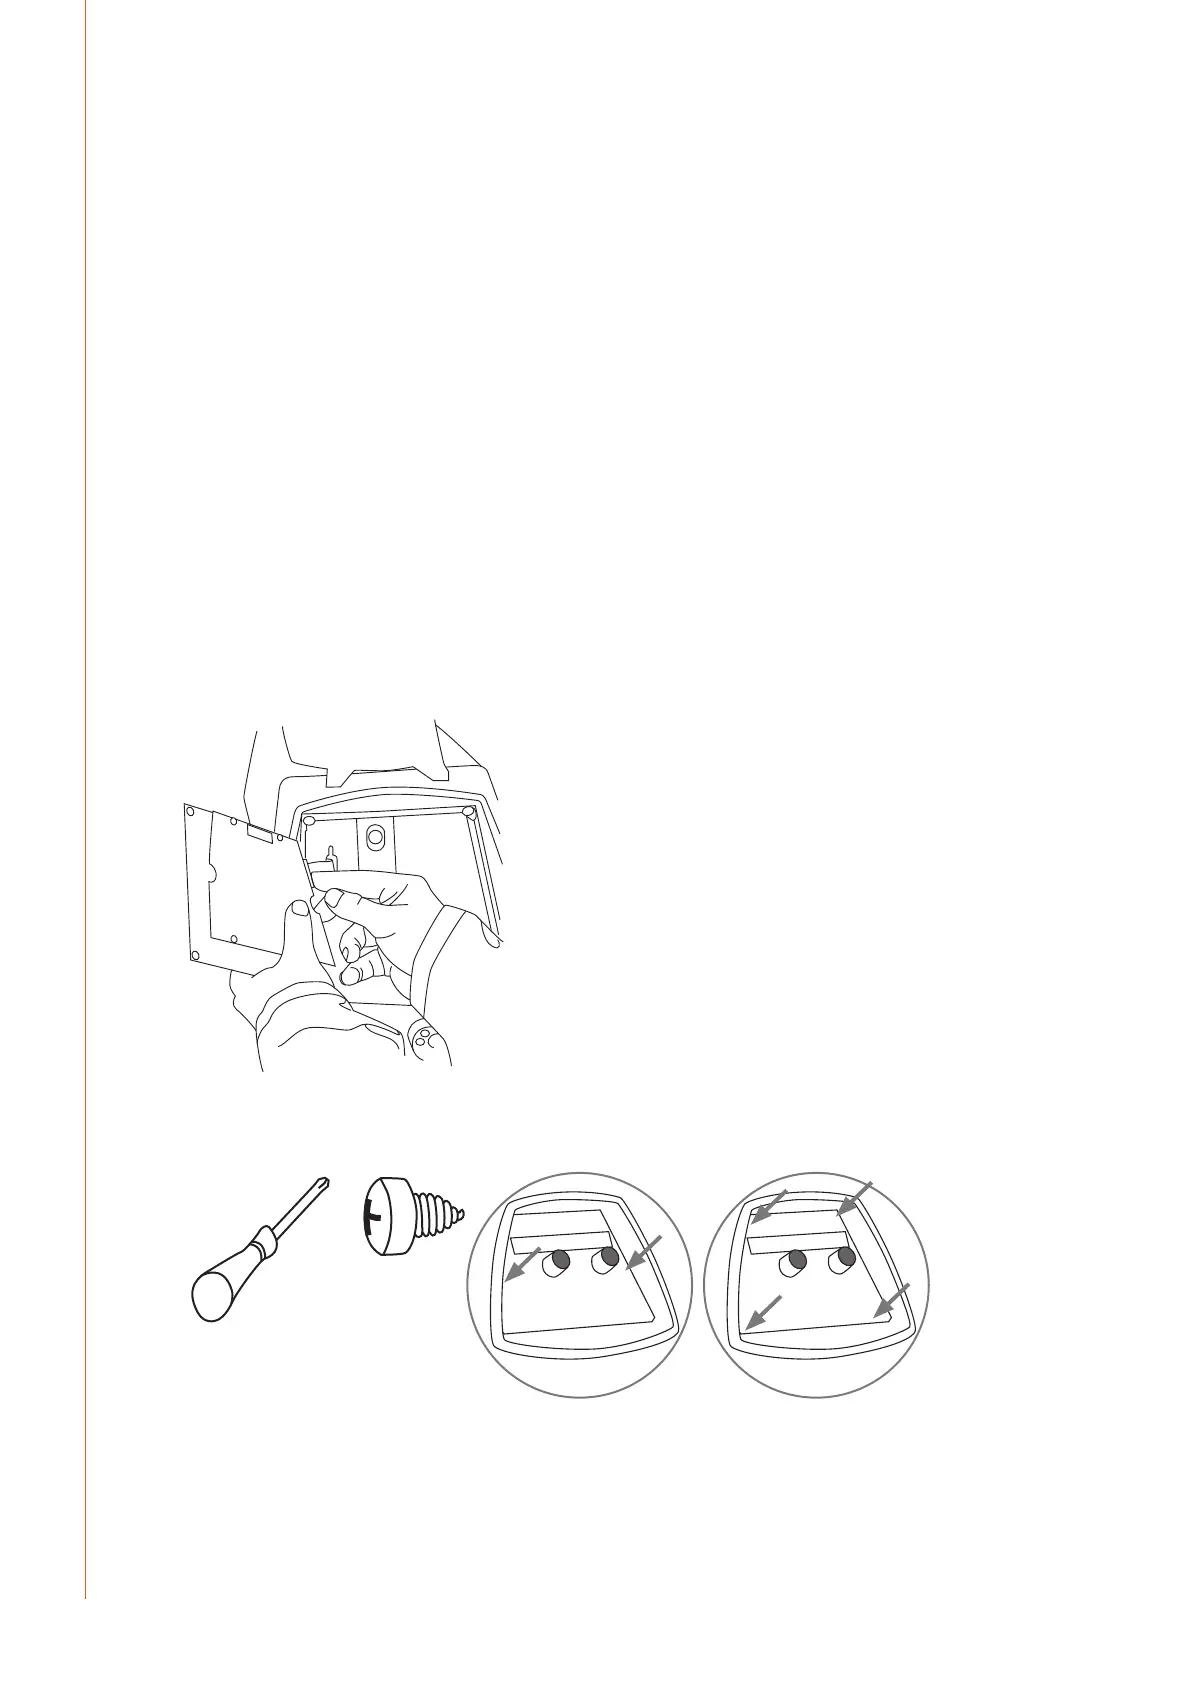
3. XF 37 AND XF 38 CONTROL PANEL
3.1 Connecting and mounting
Fasten the ribbon cable connector from the WFX wire feed unit to the control panel. Attach
the yellow-green earth lead into the fork connector on the XF control panel.
XF 37 XF 38
+
 Loading...