11
Draining the Brewer
(Refer to Fig. 8)
To drain the brewer, the following steps should
be followed:
1. If the Brewer is plumbed:
A) Brew a Large Mug without a K-Cup
®
portion pack OR, verify that the water level
is well below the full mark on the Water
Level Indicator.
B) Shut off water supply to the Brewer.
C) Turn off power switch.
D) Wait three seconds, turn on power
switch, the brewer will display:
answering YES, will activate the inlet water
valve and relieve pressure in the water line.
E) Turn off Brewer and disconnect power cord.
F) Disconnect the water supply fitting at the
inlet of the filter.
G) Proceed to Step 3 below.
2. If Brewer is
not
plumbed. Turn off the
Brewer and unplug power cord.
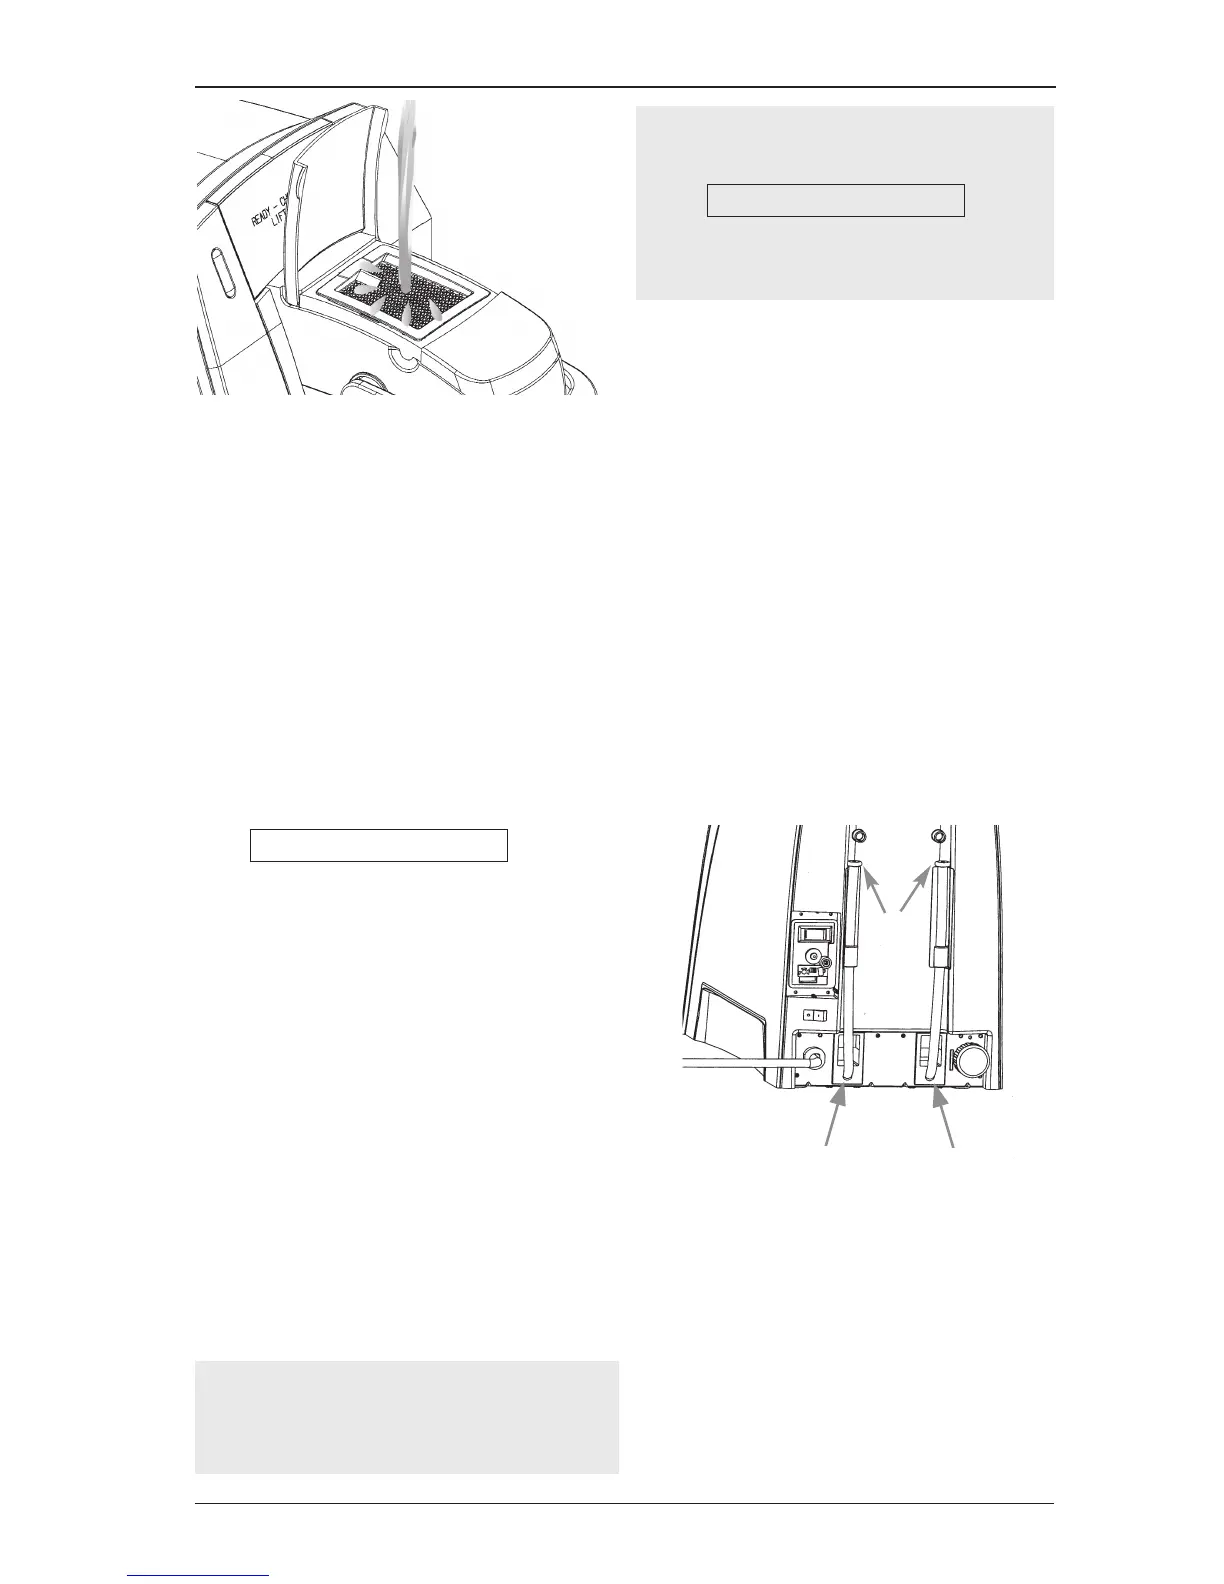
3. Turn the brewer around so the back is
facing you.
4. Unclip the drain hose(s) from their holders
and lower them. Move the brewer close to
the edge of the counter so that the drain
hoses over hang.
5. Place a container under the hoses and
remove the drain plugs.
6. When the flow of water stops, replace both
drain plugs and clip the hoses back into
place. The brewer’s internal hot water tank
and cold water tank are now empty.
Brewing Hot Water
Your Brewer is able to produce a cup of hot
water for making hot chocolate, for use in
cooking, for making soups, etc. Simply raise
and lower the handle on the Brewer without
adding a K-Cup
®
portion pack. The brewer will
step you through the process as normal.
If you are experiencing any problems with
your Brewer, please contact your Keurig
Authorized Distributor.
NOTE: When you power up the brewer again
it will display:
Answer YES to the question so that it will
start to prime the brewer
HOT
WATER
DRAIN
COLD
WATER
DRAIN
Fig. 8
Fig. 7
DRAIN
PLUGS
WAS THE BREWER DRAINED? YES NO
WAS THE BREWER DRAINED? YES NO
CAUTION: The water may be very hot!
NOTE: The process to completely drain the
brewer takes about 2 minutes.
 Loading...