8
IL Series-IM_E
The initial reset initializes all settings except for the calibration setting.
The initial reset can also be used to change the judgment output and analog output
settings.
1 While holding down the [MODE] button on the basic display,
press the [SET] button 5 times.
[] will be displayed on the main display.
2 Press / button to select [] and press the
[MODE] button.
If [] is selected, initial reset is omitted, and you can only
change the settings of output polarity and analog output.
3 Press / button to select the output polarity
and press the [MODE] button.
4 Press the / button to select the analog
output and press [MODE] button.
(for IL-1000/IL-1500 only)
After the initialization is complete, [] blinks several times on the sub display
and the basic display is restored.
When the model of the connected head is changed, it is necessary to initialize the
zero shift and calibration functions.
Once the model of the connected head is changed, the screen appears as follows:
Selecting [] triggers initialization, including the calibration function.
When initialization is completed, [] flickers on the sub display several times, and
then the basic display appears again.
Selecting [] suppresses initialization. Separately, set the zero-shift and calibration
function.
Calling the setting display
Hold the [MODE] button for approx. 2 seconds on the basic display.
The setting display appears.
Basic operations on the setting display
To change the setting, press the / button
To move the next item, press the [MODE] button or button
To return to the previous item, press the button
To skip the rest of the settings and finish, press and hold the [MODE] button for
approx. 2 seconds
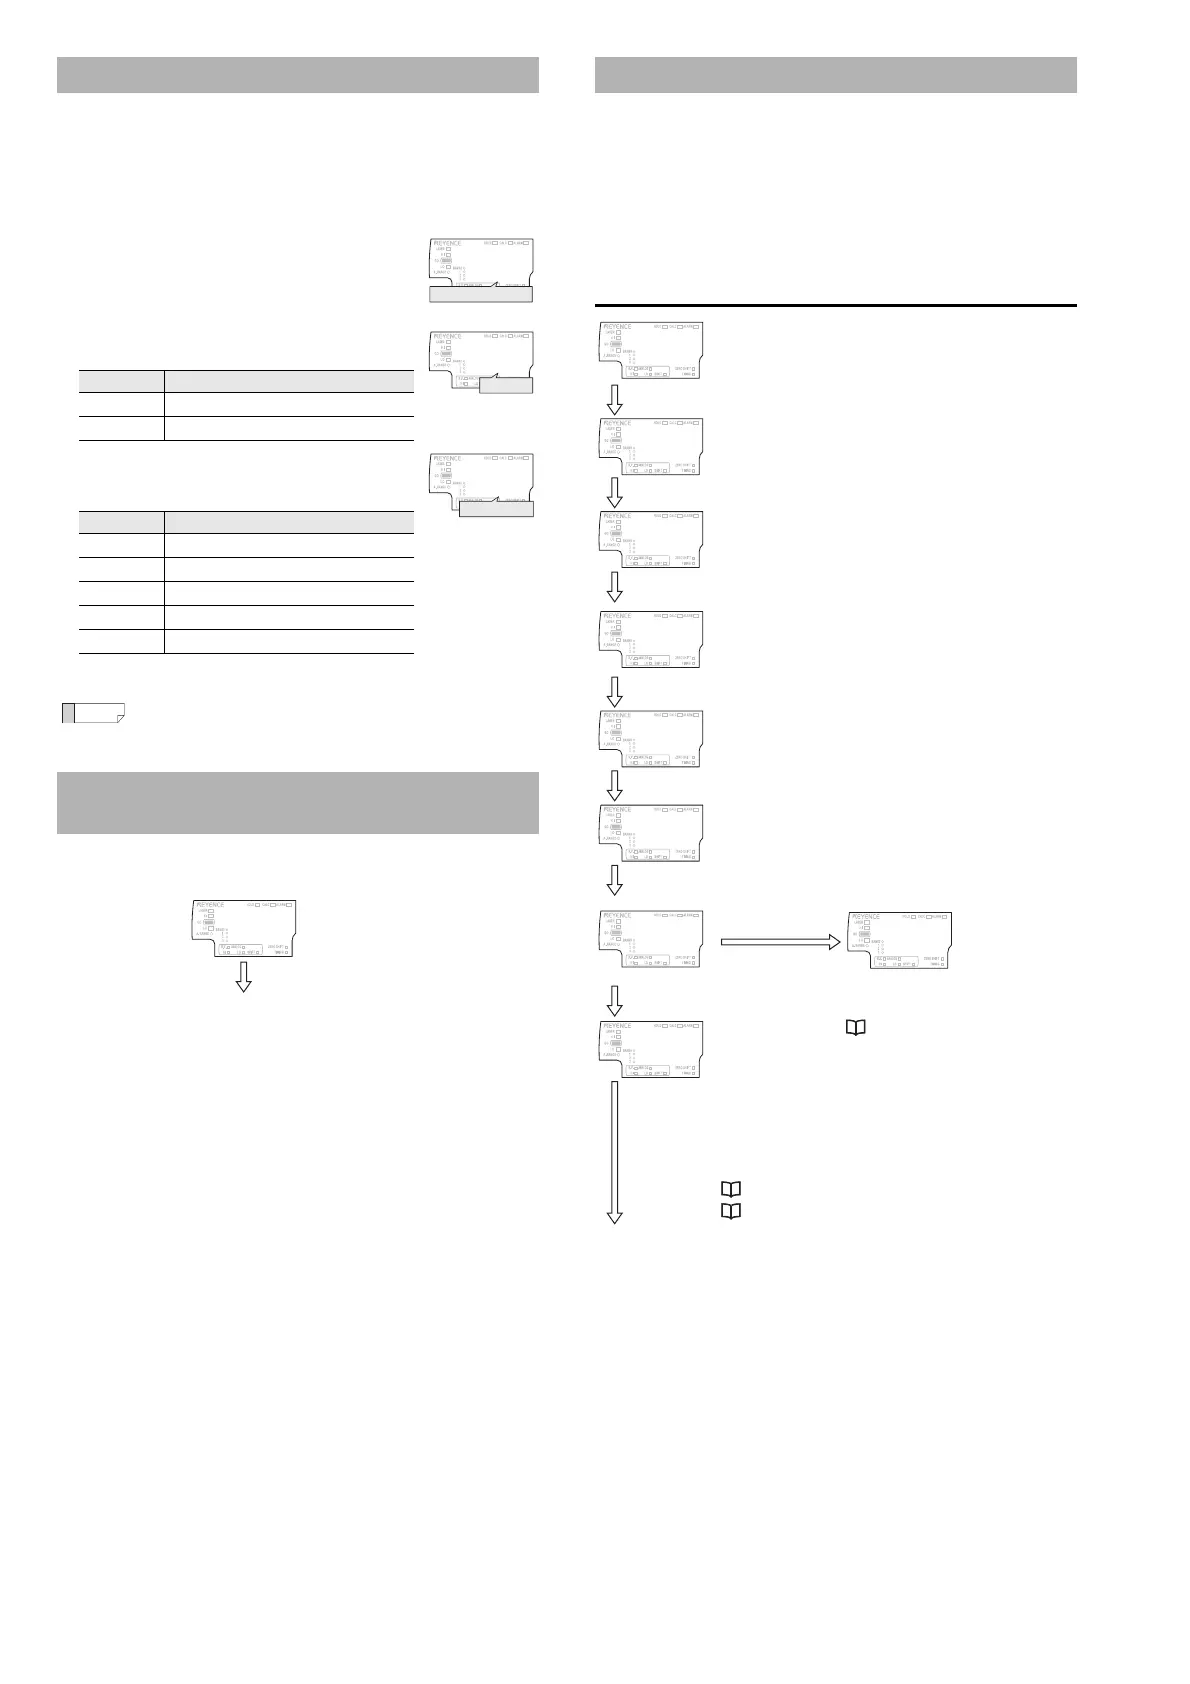
Setting procedures (Basic)
Initial Reset (Initialize)
Setting value Description
NPN output
PNP output
Setting value Description
Not using the analog output
Analog output range is from 0 to 5 V.
Analog output range is ±5 V.
Analog output range is from 1 to 5 V.
Analog output range is from 4 to 20 mA.
If any button other than the / button and [MODE] button are
pressed halfway through the initial reset procedure, the initial reset is
stopped and returned to the screen displayed in step 2.
Operations required when the model of
the connected head is changed
;GU
T'5'V
Performing the initial reset
PRP
QWV
Output polarity
[QT0
4GUG6
or
button
Setting Method
Basic display
Press the [MODE] button for 2 seconds.
"1. Measurement
direction"
Use / to select.
Setting the measurement direction.
Press the [MODE] or button.
"2. Sampling rate"
Use / to select.
Setting the sampling rate.
Press the [MODE] or button.
"3. Averaging rate,
Step count filter,
High-pass filter"
Use / to select.
Setting the averaging
When selecting diFF it will be set as Step
count filter, when selecting HPF it will be set
as High-pass filter.
Press the [MODE] or button.
"4. Alarm setting"
Use / to select.
Setting the default, clamp, and user.
Press the [MODE] or button.
"5. Output state"
Use / to select.
Setting N.O. (Normally Open) and N.C.
(Normally Closed)
"Basic setting
complete"
Press the [MODE]
or button.
Press the [MODE]
button or the
button to return to
the basic display.
Press the or button.
"Advanced settings"
See User's Manual
Press the button to return to the basic display.
When the advanced setting is selected, the following items can be
set. For details, see the User's Manual.
"6. Hold function" "7. Timing input" "8. Delay timer" "9. Hysteresis"
"11. External input" "12. Bank switching method" "13. Zero shift
value memory function" "14. Interference prevention function" "16.
Power saving function" "17. Head display mode" "18. Display color"
"10. Analog output scaling (IL-1000/IL-1500)" (Page 10)
"15. Number of digit displayed" (Page 10)
Advanced setting
Press the
[MODE] or
button.