NETCOM2P/CIM Installation
For installing a NETCOM2P mounted on a CIM, follow the directions in this section of the
installation guide.
Install Keyscan NETCOM Program Tool Utility
Each NETCOM2P that you are installing must be programmed with the Keyscan NETCOM
Program Utility. Ensure you have the latest NETCOM Program Utility software installed
which is on the enclosed CD; otherwise you may encounter communication difficulties. You
require a PC or laptop that has a direct serial connection with the NETCOM2P via the CIM
terminal block to program the device. To install the Keyscan NETCOM Program Tool utility,
load the Keyscan Utilities & Drivers CD into the CD-ROM or DVD drive. Locate and double
click on the Keyscan NETCOM Setup and follow the on-screen prompts.
Important
If you program the NETCOM2P with a previous version of the NETCOM Program Utility, you
may experience technical difficulties. You may have to re-program the NETCOM following
the procedures outlined in Manually Configure the NETCOM2 via a Serial Connection
located on page 18.
Connection Diagrams
Connection diagrams are on the succeeding pages of the guide as outlined:
See Figure 1 to Figure 4 for temporary serial programming connections to the
laptop/PC with the Keyscan NETCOM Program Tool utility software.
See Figure 5 for NETCOM2P/CIM permanent operating connections on the network.
Steps to Program and Install a NETCOM2P with a CIM
The NETCOM2P can only be programmed using a direct serial connection via the CIM
terminal block.
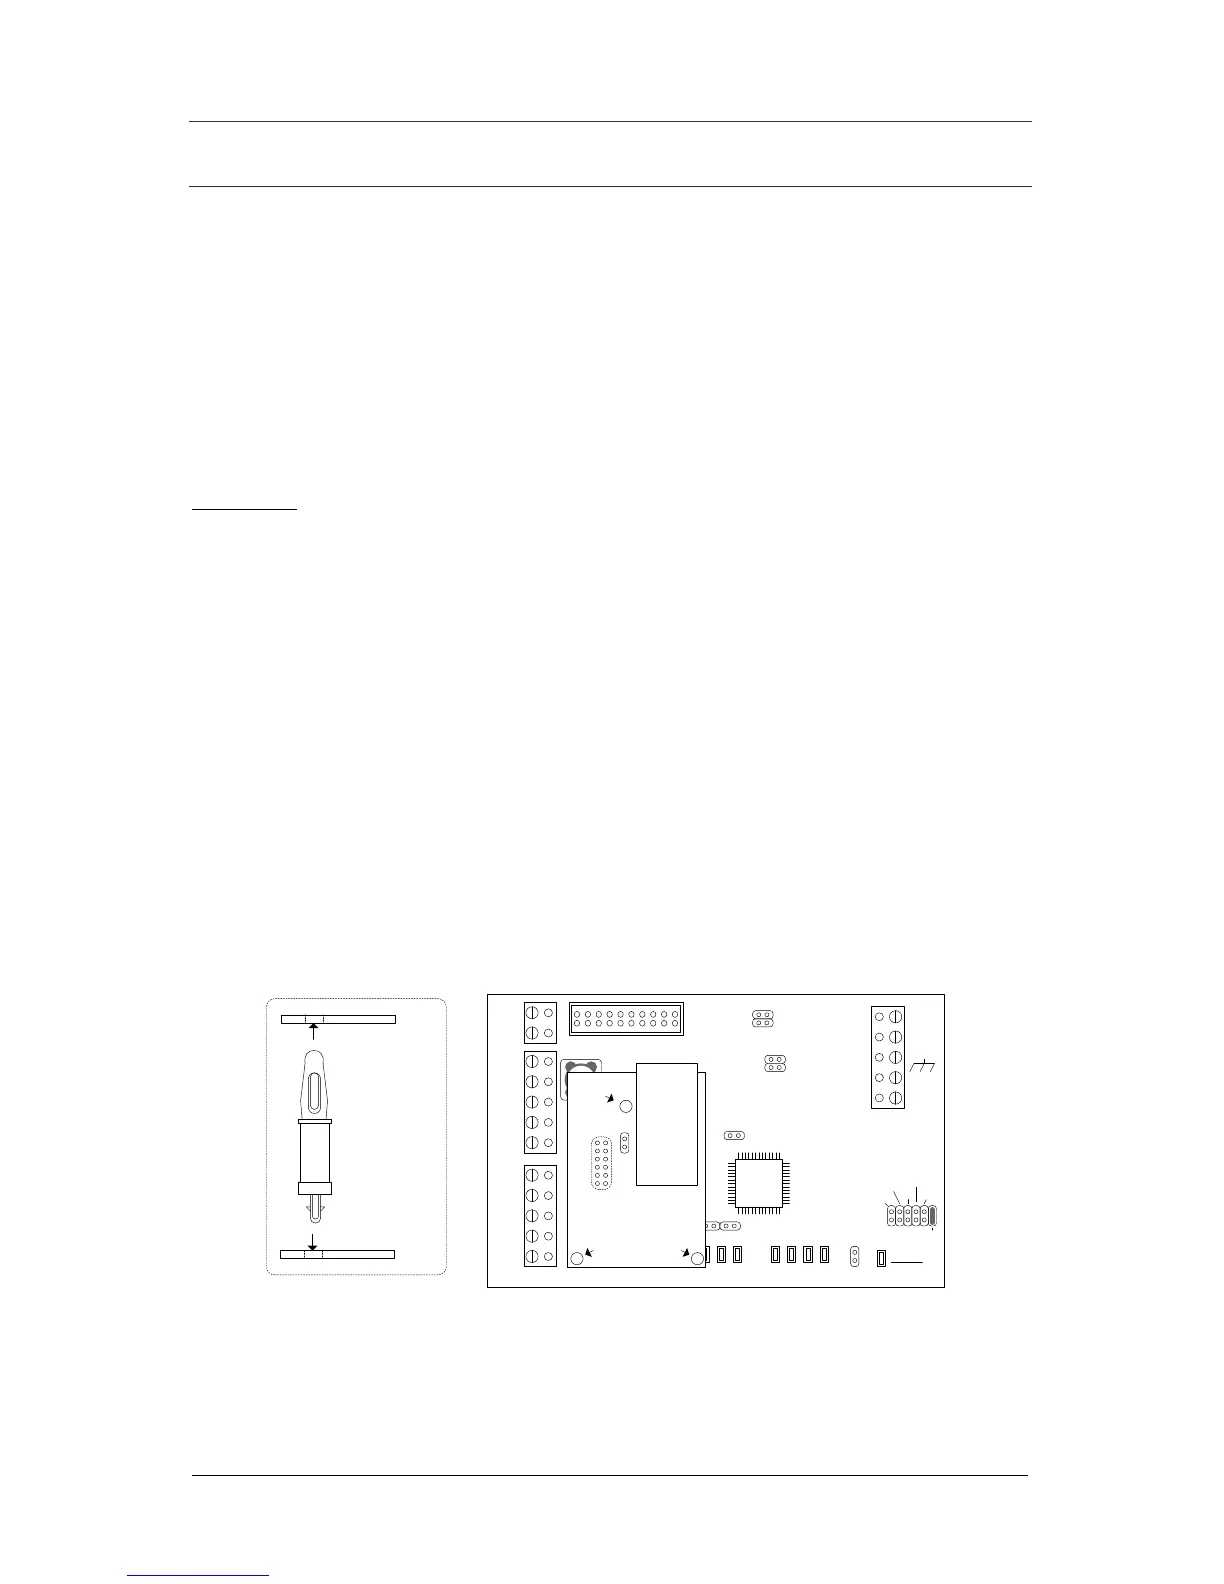
1. Mount the NETCOM2P in the socket on the CIM as shown below. Press down so the
standoffs secure the NETCOM2P to the CIM circuit board. Do not change the
orientation of the standoffs.
2. Mount the CIM/NETCOMP in the designated location in the metal enclosure.
As an option the NETCOMP can be programmed off-site before installation,
providing you have a 12 VDC power supply that can be connected to the CIM’s
TB4 power terminal.
Continued on the next page…