Rack Mounting
This section contains information for installing an RP7909A Rack Mount Kit. The rack mount kit allows
the RPS units to be mounted in a 19-inch EIA rack cabinet.
Before getting started, check the following list and verify that you have received these items.If
anything is missing, please contact your nearest Keysight Sales and Support Office.
Rack Mount Kit Contents Keysight Part number
Slide rails, 2 pair (includes mounting hardware) 5003-1128
Rack Flange kit without handles - includes: 5067-6705
Flange mount, qty 2 5022-9638
Flange attachment screws, qty 6 (M4x0.7 10mm) 0515-1114
Front dress screws, qty 4 (10-32 x 0.625) 3030-1768
Metal clip-nuts, qty 4 (10-32 x 0.5) 0590-0804
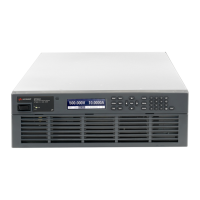
Installing the Instrument
Keysight RP7900A series power supplies weigh as much as 70 lbs. (31.8 kg). Two
people are required for installation. Do not lift or move the unit alone. Avoid moving the
unit by hand. If unavoidable, lift only the unit’s chassis; do not lift the unit using the
output terminals.
Do not block the air intake at the front, or the exhaust at the rear of the instrument.
Tools required: Phillips driver, T22 Torx driver, T10 Torx driver.
1. Remove the four feet from the bottom of the instrument.
2. Install the ESD cover flange to the side of the instrument using the two screws provided. The
flange and the screws (0515-1946) are provided in the Cover Kit (5066-1930) that is shipped with
the instrument.
3. Install the slide rails 5003-1128. Refer to the slide rail instructions.
a. Install the movable part of each slide rail to the sides of the instrument using the four screws
provided (0515-1013).
b. Install four clip-nuts on the rack frame where your instrument will be located. Install one clip
nut on each corner (0590-0804).
c. Install the stationary part of each slide rail to the sides of the rack frame using the four screws
provided (2680-0104).
4. Install the two flange mounts to the front panel corners of the instrument using the six screws
provided (0515-1114).
2 Installing the Instrument
64 Keysight RP7900 Series Operating and Service Guide