Keysight P937xA PXIe Service Guide 69
Removal and Replacement Procedures
Chassis Replacement Procedure
Replacement Procedure
1. Reverse the order of the removal procedure.
2. Remember to place the light pipe back into the module. Refer to the Figure
5-5 on page 67.
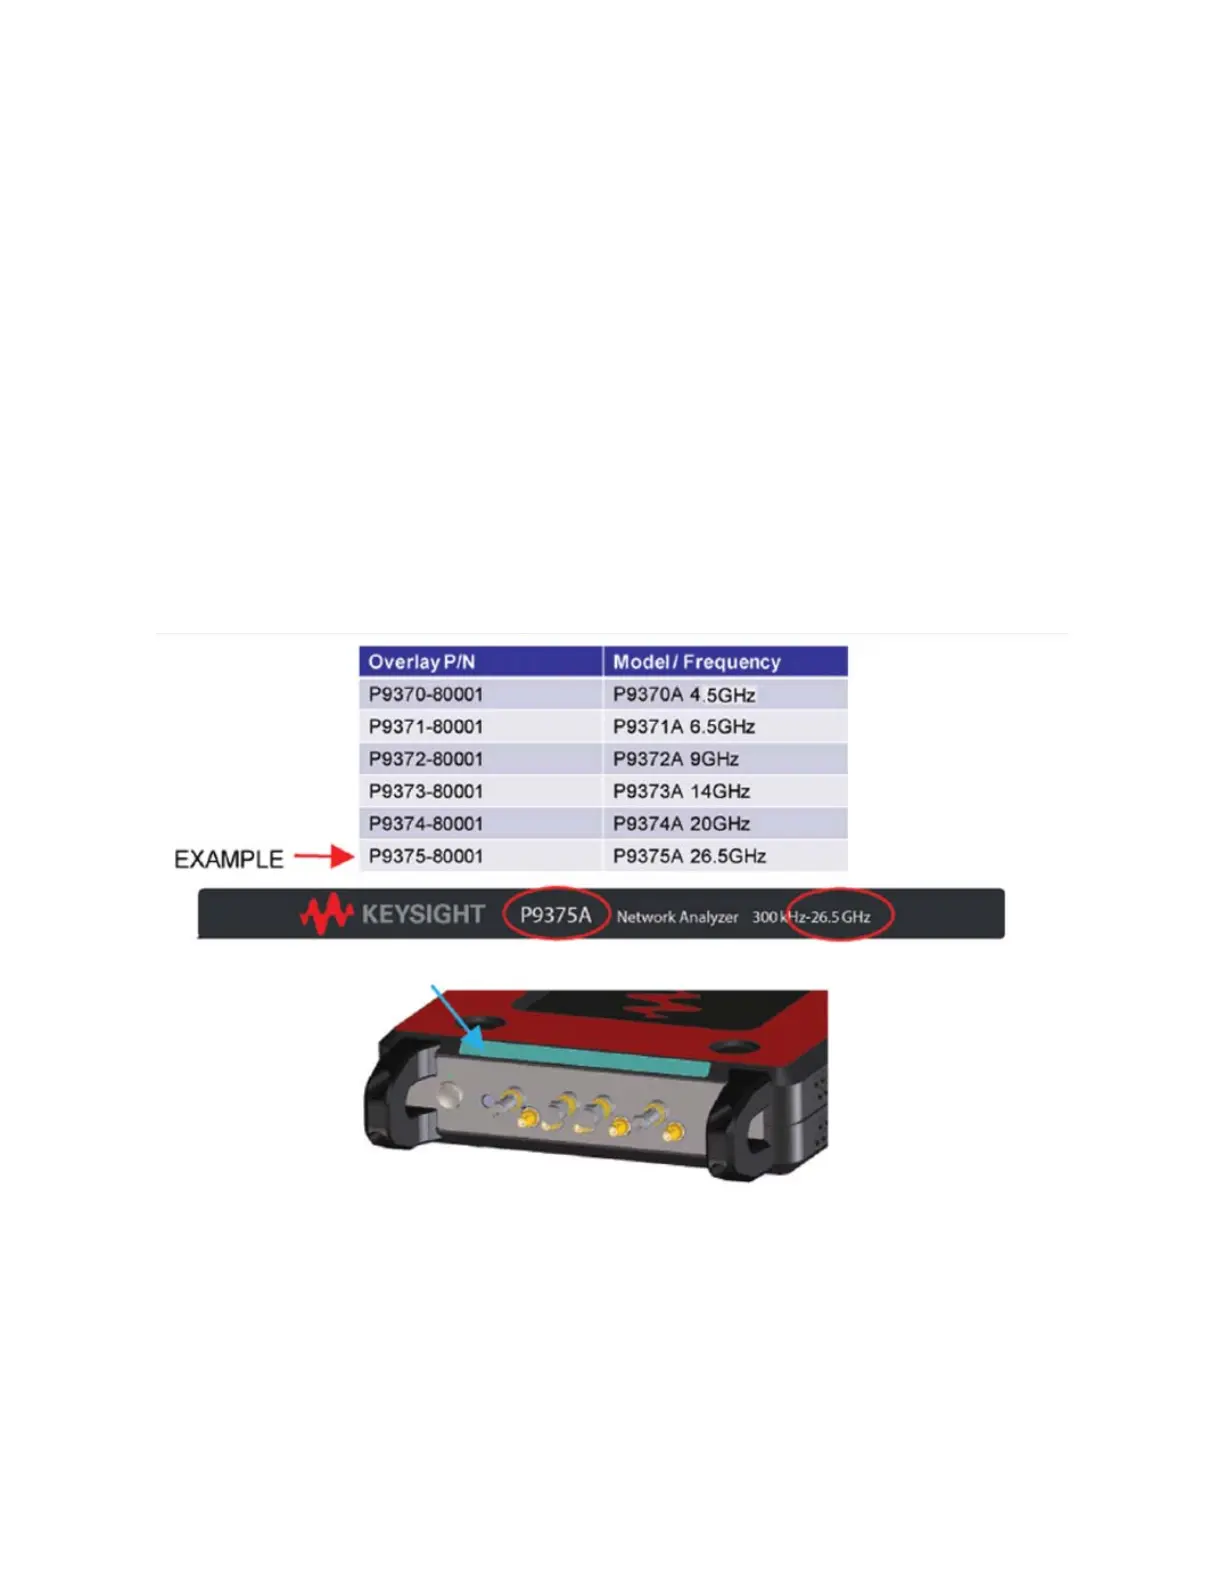
3. Adhere and properly align appropriate nameplate overlay into the pocket
shown below Figure 5-6 on page 69. There should also be a nameplate
overlay included with the kit that matches your analyzer. Rub down the
overlay with moderate finger pressure.
4. Attach the secondary plate P9375-00007 using 0515-1227 (x4) screws to
the new chassis.
5. Perform the post-repair steps, verifications, and performance tests that
pertain to this removal procedure. Refer to Chapter 3, “Tests, Adjustments,
and Troubleshooting”, on page 25
Figure 5-6 Nameplate Overlay for P937xA
 Loading...