Tattoo™
Seating - Ganger Kit
Assembly Instructions
Assemble units as described herein only. To do otherwise
may result in instability. All screws, nuts and bolts must be
tightened securely and must be checked periodically after
assembly. Failure to assemble properly, or to secure parts
may result in assembly failure and personal injury.
3
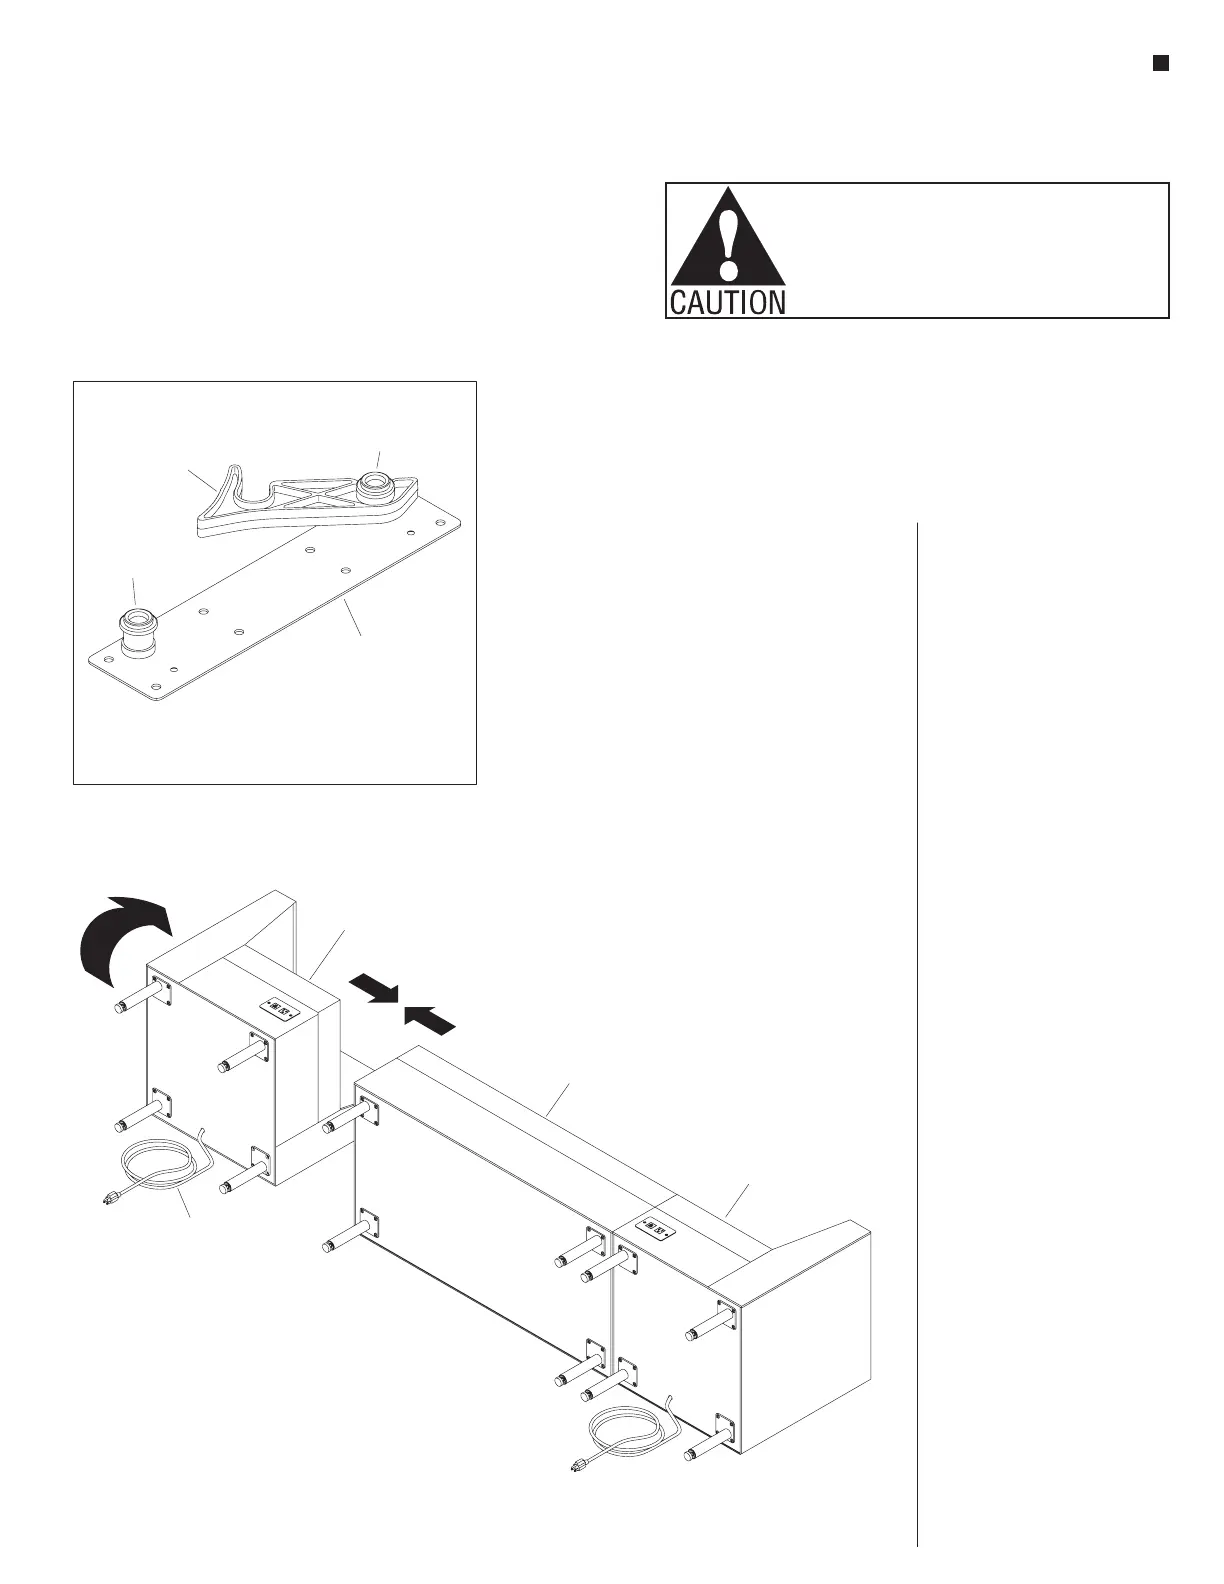
Tattoo Ganger Overview
The Ganger kit consists of a pair
of ganging plate assemblies. Each
ganging plate of the pair comes fully
assembled with two pegs, one hook
and eight #10 x 1” mounting screws
per assembly (Detail A).
Important: Depending on size,
only two to three modular seating
units may be ganged together at one
time when turned upright from their
backs. If more than three units need
to be ganged, assemble ganging
plate assemblies to them in groups
of two or three. Then unhook the
ganging plate assemblies, turn the
units upright and put into position
before final re-hooking.
Caution: Tattoo seating units
containing any power options must
not be plugged into the power
supply receptacles until all units
are at their final upright installation
location and all ganging assemblies
are connected together properly.
Tools Required
• Power drill driver
• #2 Phillips driver bit
•
1
/
8
" drill bit
• Tape measure
Tattoo Ganging Assembly
Note: Two or more people are
needed to complete the steps in
this instruction. Care must be
taken to align seating units in
a uniform manner and to press
them tightly together for the
ganging process.
1. Reference the space-planning
layout to arrange seating units at
their approximate final location in
the room.
2. To gang side-to-side (in-line),
carefully tip two or three seating
units onto their backside on a soft
protective surface to position for
ganging (Figure 1).
3. Position Tattoo seating units
together so that bottoms are
aligned and flush (Figure 1).
A
Figure 1
hook
peg
peg
ganging plate
assembly
Tattoo seating
unit #1
Tattoo seating
unit #2
power
cord
Tattoo seating
unit #3