(fKICKER
MODEL:
Authorized
KICKER
Dealer:
Purchase Date:
Model Number:
Serial Number:
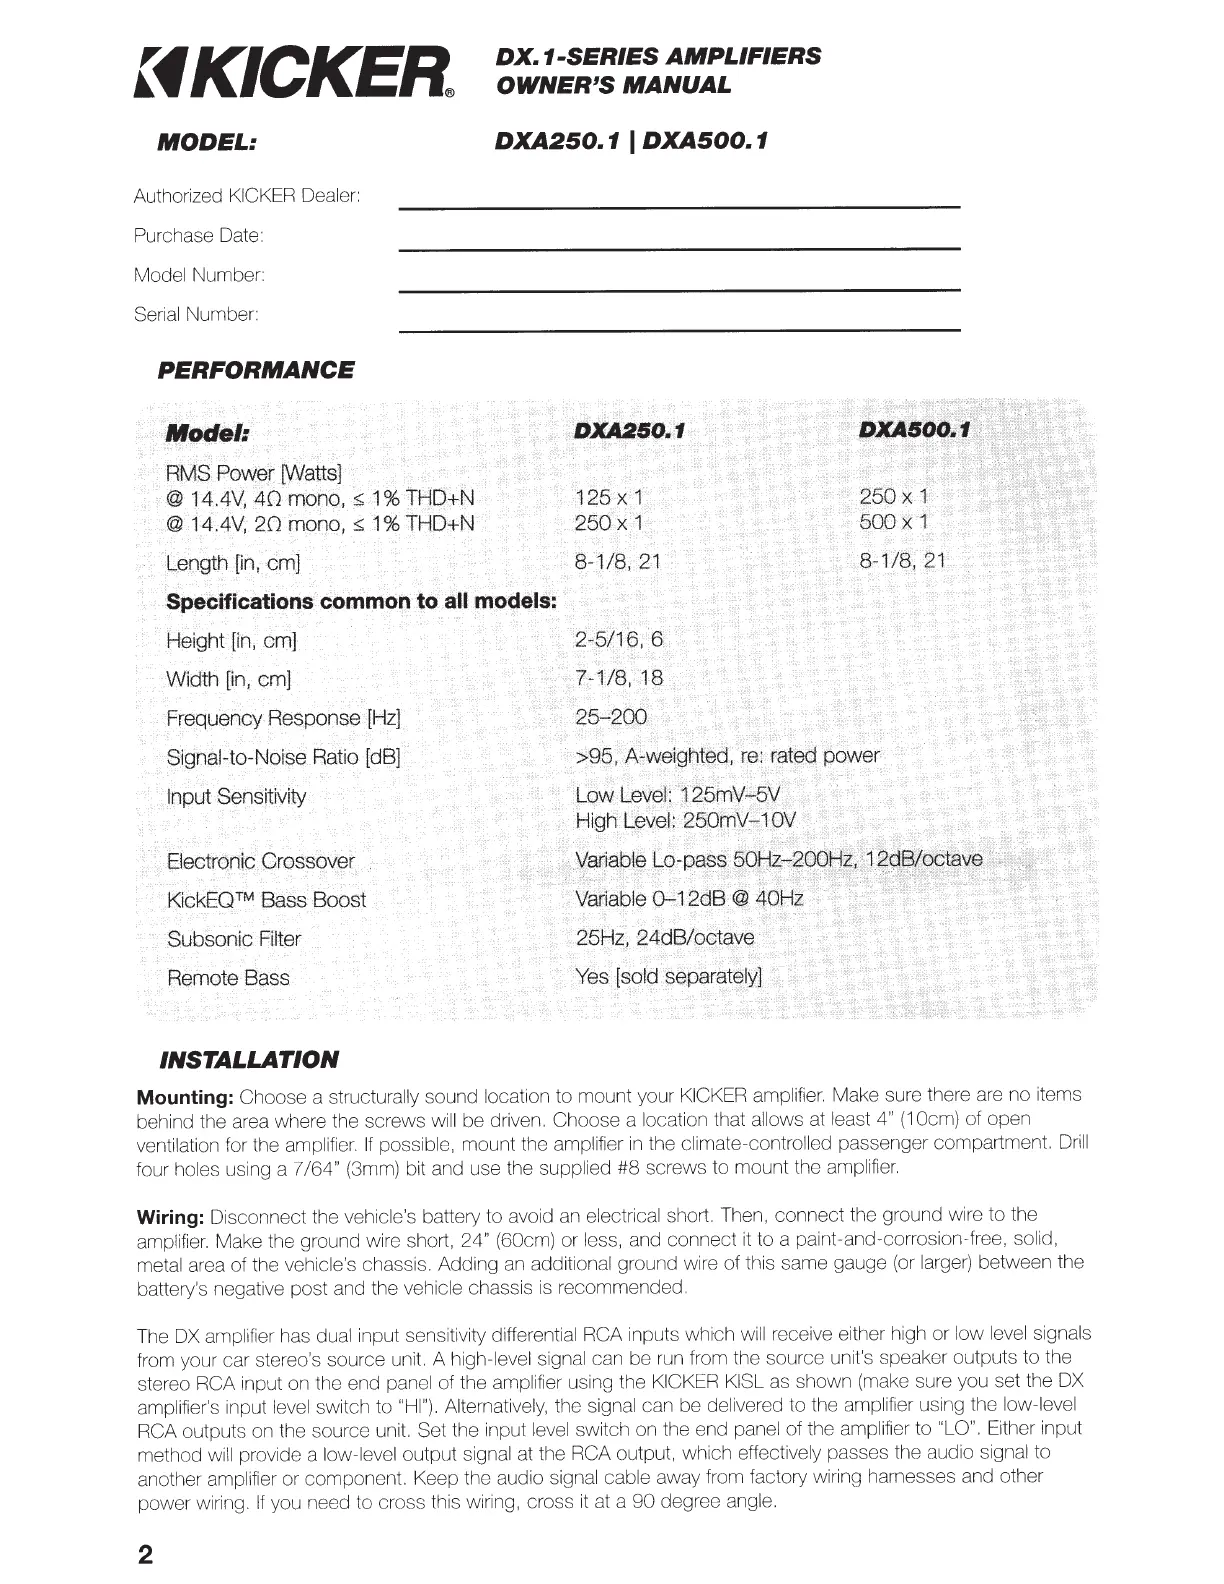
PERFORMANCE
Model:
AMS
Pow~r
[VVa~~l
@
l4.4V~
40
mono,
@
l4.4V,
20mono,
:s:
1
Length
[in,
em]
S~cificationscommon
to
Height
[in,
em]
Width
[in,
em]
Frequency Response
[Hz]
SignaHo-Noi$e
Ratio [dB]
Input
Sensitivity
Electronic Crossover
KickEO
™
Bass Boost
Subsonic Filter
Remote Bass
INSTALLATION
DX.1-SERIES
AMPLIFIERS
OWNER
1
S
MANUAL
DXA250.1
I
DXA500.1
Mounting:
Choose a structurally sound location to mount your
KICKER
amplifier. Make sure there
are
no items
behind the area where the screws will be driven. Choose a location that allows at least
4"
(1
Ocm)
of open
ventilation for the amplifier.
If
possible, mount the amplifier
in
the climate-controlled passenger compartment.
Drill
four holes using a 7
/64"
(3mm) bit and use the supplied #8 screws to mount the amplifier.
Wiring:
Disconnect the vehicle's battery to avoid an electrical short. Then, connect the ground wire to the
ampl
ifier.
Make the ground wire short,
24" (60cm) or less, and connect
it
to a paint-and-corrosion-free, solid,
metal area of the vehicle's chassis. Adding
an
additional ground wire of this same gauge
(or
larger) between the
battery's negative post and the vehicle chassis
is
recommended.
The
OX
amplifier has dual input sensitivity differential RCA inputs
whfch
will receive either high or low
level signals
from your car stereo's source unit. A high-level signal can be
run
from the source unit's speaker outputs to the
stereo RCA input on the end panel of the amplifier using the
KICKER KISL
as shown (make sure you set the
OX
amplifier's input level switch to
"HI").
Alternatively, the signal can be delivered to the amplifier using the low-level
RCA outputs on the source unit. Set the input level switch on the end panel of the amplifier to "LO".
Either input
method
will
provide a low-level output signal at the RCA output, which effectively passes the audio signal to
another amplifier or component. Keep the audio signal cable away from factory wiring harnesses and other
power wiring.
If
you need to cross this wiring, cross
it
at a
90
degree angle.
2