17
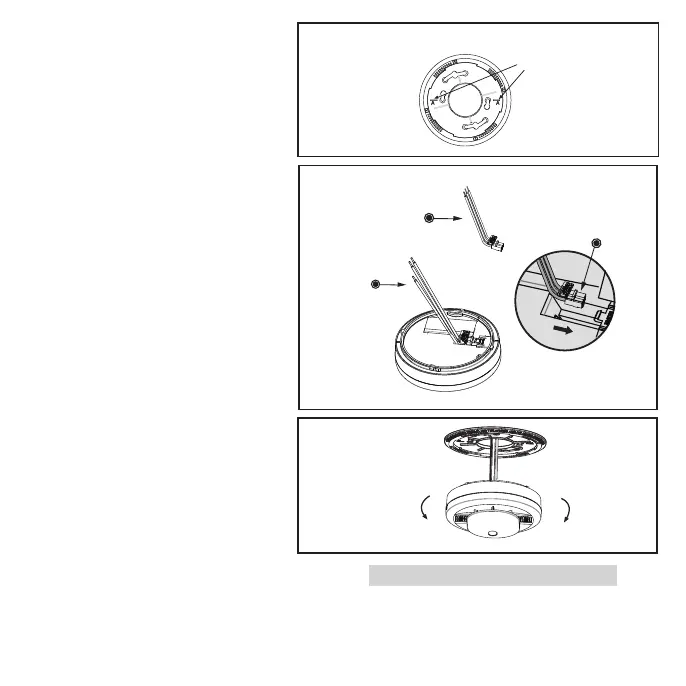
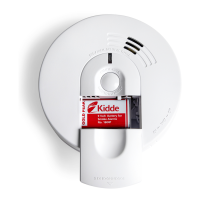
• After selecting the proper location
for your alarm, and wiring the AC
QUICK CONNECTOR harness as
described previously, attach the
mounting bracket to the electrical
box. To ensure aesthetic alignment
of the alarm with the hallway, or
wall, the “A” line on the mounting
bracket should be parallel with the
hallway when ceiling mounted, or
horizontal when wall mounted.(See
Figure 9-F)
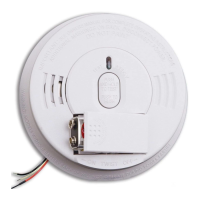
• Pull the AC QUICK CONNECTOR
through the center hole in the
mounting bracket and secure the
bracket, making sure that the
mounting screws are positioned
in the small ends of the keyholes
before tightening the screws.
• Plug the AC QUICK CONNECTOR
into the back of the unit, making
sure that the connector snaps into
place. Then push the excess wire
back into the electrical box through
the hole in the center of the
mounting bracket.
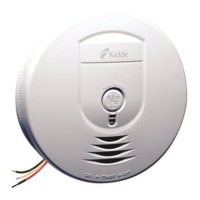
• Install the alarm fully on the
mounting bracket by rotating the
alarm in a clockwise direction. (see Figure 9-C for orientation)
NOTE: The alarm will mount to the bracket in 4 positions (every 90 degrees).
NOTE: Installing the alarm on the mounting bracket will automatically activate the battery backup.
Figure 9-F
Insert the AC
Quick connector
into the slot.
Alignment Marks
(”A” Line) on
Mounting
Bracket
Remove
Install
AC Quick Connector
harness shipped
with product
AC connector