6.3.2 Perform the output diagnostic
Once the connection to the measurement device is performed, you can carry out the analogue output diagnostics on
several check points.
The transmitter is powered on.
➢ Press OK.
➢ Enter the activation code (see page 9).
➢ Press OK.
➢ Press Up key to go to F303 folder.
➢ Press OK.
F 303 blinks, corresponding to the folder of the channel 1 diagnostic.
➢ Press OK.
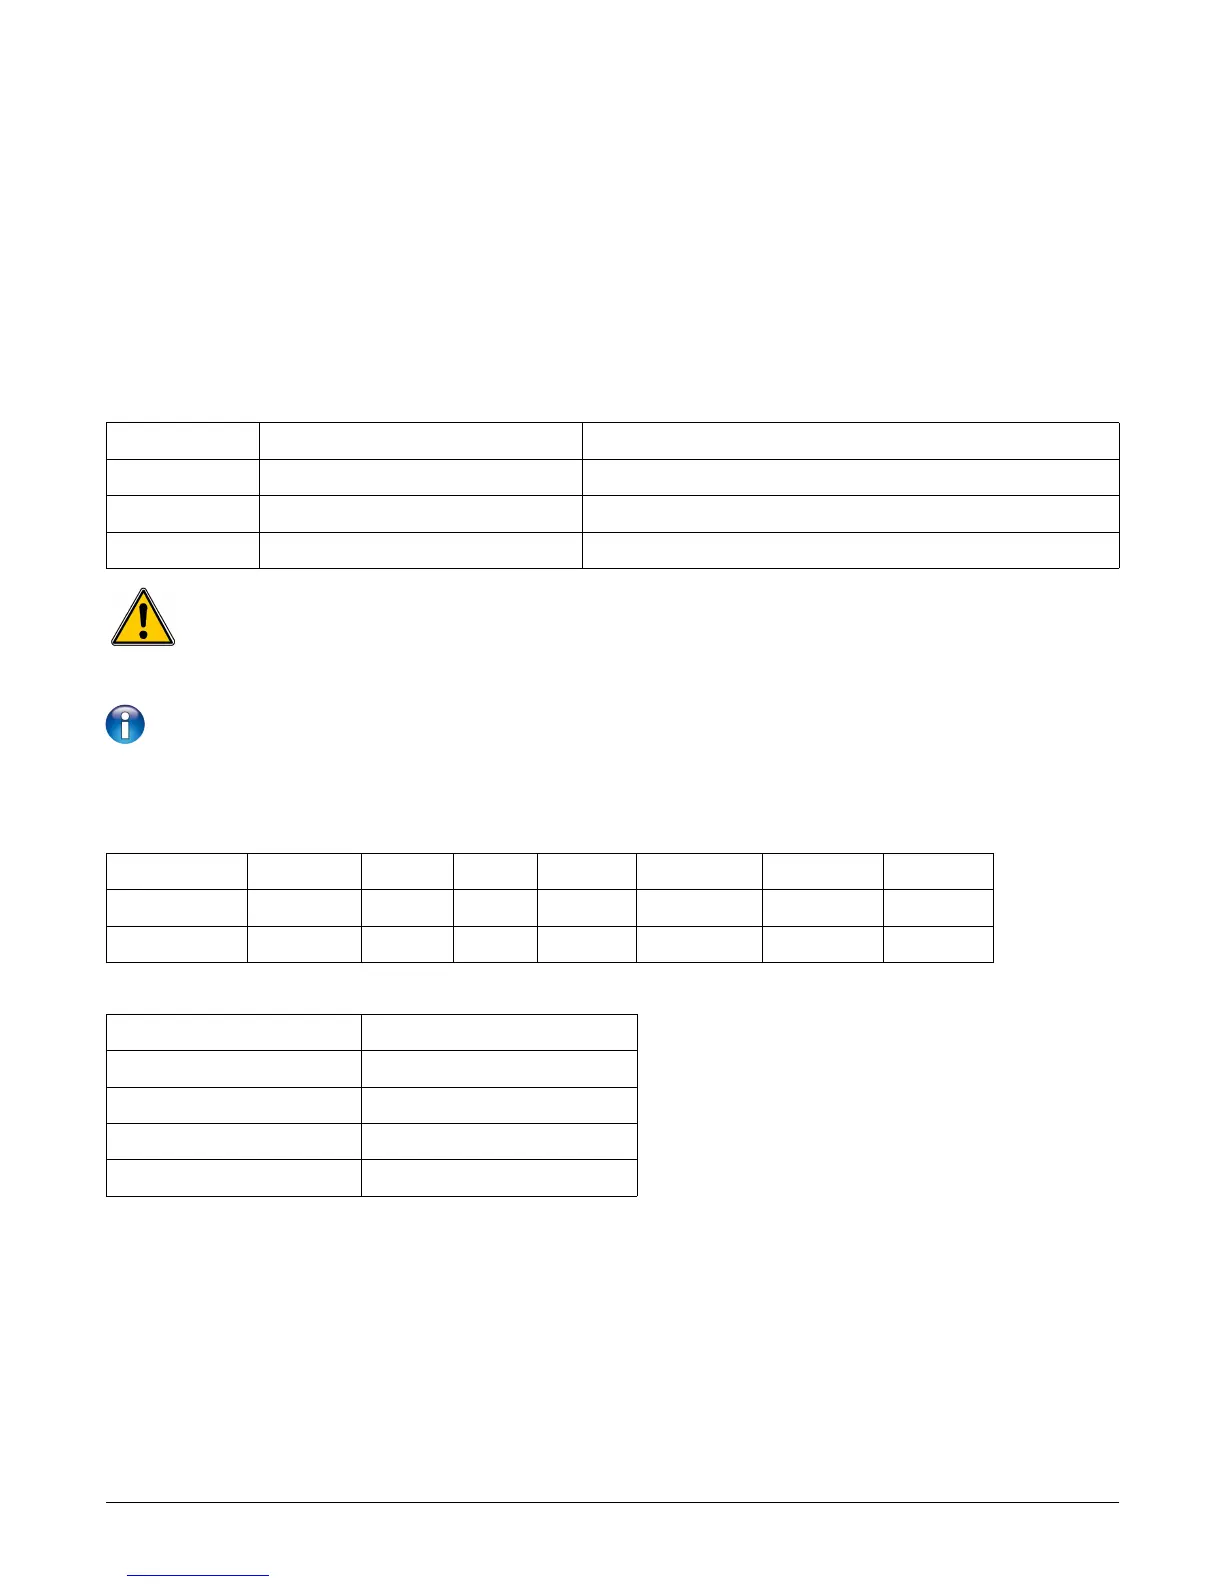
➢ Press Up and Down keys to select the signal the transmitter must generate.
Display Generated output Example
1/3 Simulates 0% of the output range On the range 0-10V, the transmitter will generate 0 V.
2/3 Simulates 50% of the output range On the range 0-10V, the transmitter will generate 5 V.
3/3 Simulates 100% of the output range On the range 0-10V, the transmitter will generate 10 V.
If the deviations are too large (>0,05V or >0,05mA) between the signal issued and the value displayed on
the multimeter, we recommend that you return the transmitter to our factory.
For the diagnostic of the channel 2, go to F 313 folder and perform the same procedure as for the channel 1.
For the diagnostic of the channel 3, go to F 323 folder and perform the same procedure as for the channel 1.
Measurement conversion charts:
• Pressure
Pa mmH
2
O InWG mbar mmHG kPa daPa hPa
±100 ±10.2 ±0.40 ±1.00 ±0.75 ±0.100 ±10.0 ±1.00
±1000 ±102.0 ±4.01 ±10.00 ±7.50 ±1.000 ±100.0 ±10.00
• Temperature
°C °F
From 0.0 to +50.0 From +32.0 to +122.0
From -20.0 to +80.0 From -4.0 to +176.0
From -40.0 to +180.0 From -40.0 to +356.0
From -100.0 to +400.0 From -148.0 to +752.0
16 F 300: Manage the analogue outputs
 Loading...