Do you have a question about the Kinetico 2025s and is the answer not in the manual?
Read all guides and rules carefully before installing and using the Kinetico Softening System.
Close or remove PVC containers and flammable materials to prevent fire or explosions; ensure ventilation when using PVC cleaner or glue.
Wear protective eyewear to prevent potential eye injury from splattering materials or shavings during installation.
Use a scorch pad to protect surfaces from torch flame or heat; use only lead-free solder.
Install grounding straps before cutting lines on plastic components to ensure the ground is never broken.
Use a ladder for overhead work, employing appropriate safety devices for continuous work at heights of six feet or more.
Locate and identify all parts shown in the parts section before proceeding with installation.
Confirm water quality parameters such as Total Hardness, pH, Ferrous Iron, and Ferric Iron for proper setup.
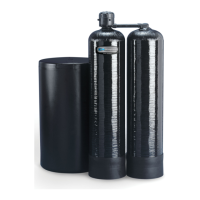
Assemble the Mach Head and connect tanks, lubricating O-rings as required for larger units.
Position the softener and brine tank on a level surface, considering proximity to hot water tanks and environmental conditions.
Lube O-rings, insert adapters, adapter bracket, and adapter pin for classic control valve systems.
Install O-rings, lube O-rings, insert adapters, and insert E-clips for Mach control valve systems.
Use of an external 3-valve by-pass or equivalent is recommended for installation.
Connect the softener to the main plumbing via the by-pass, taking care to avoid contact with solder and flux.
Set the number of gallons between regenerations based on system size and inlet water quality using the meter disc components.
Adjust the float cup and adjuster tube settings based on measurements and imprinted numbers or letters.
Select the appropriate meter disc based on inlet compensated hardness using the provided chart for different models.
Apply Teflon tape to nipples, attach tube elbows, and hand-tighten nuts, ensuring tubing is not kinked.
Apply Teflon tape to the nipple, attach the elbow, and connect the drain line, ensuring it's not kinked and meets height/diameter requirements.
Ensure waste connections or drain outlets provide an air gap of 2 pipe diameters or 25 mm for sanitary waste system connection.
Install the drain line on the brine tank overflow fitting and connect it to a drain, ensuring it's not higher than the fitting.
Flush both inlet and outlet lines by opening the by-pass valve, allowing water to rinse out debris for 10 minutes.
Put by-pass into service position, depress and turn actuator clockwise to backwash, then to alternate tank.
Add a clean grade of salt at this time; do not use rock salt or solar salt.
After pressurization, open a faucet to purge air from lines and manually cycle the unit between tanks.
Regenerate both tanks using bleach solution, cycling through brine, rinse, and backwash positions.
| Brand | Kinetico |
|---|---|
| Model | 2025s |
| Category | Water Filtration Systems |
| Language | English |




 Loading...