10
ASSEMBLY INSTRUCTIONS
CASTING INSTALLATION
CONTENTS
(1) Cooker Frame
(4) Legs
(1) Casting/Air Shutter
(1) Hose/Regulator
(1) Windguard Shield
(1) Thermometer
TOOLS NEEDED
Adjustable Wrench
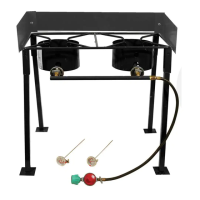
A) Remove top nut from casting bolt. Leave bottom nut attached and tightened (if applicable.)
B) Place the casting bolt through the hole on the flat bar casting support bracket as pictured
below. The venturi tube of the burner should be located underneath the windshroud.
C) Reinstall nut to casting bolt. Tighten. Check to see if casting is pointing straight up and is
sturdy.
Bottom Nut
(If Applicable)
Top Nut
Casting Bolt
Casting Bolt
Venturi Tube
Shroud
Flat Bar
Casting Support
Bracket
* Model May Vary From Picture
Leg
Windguard
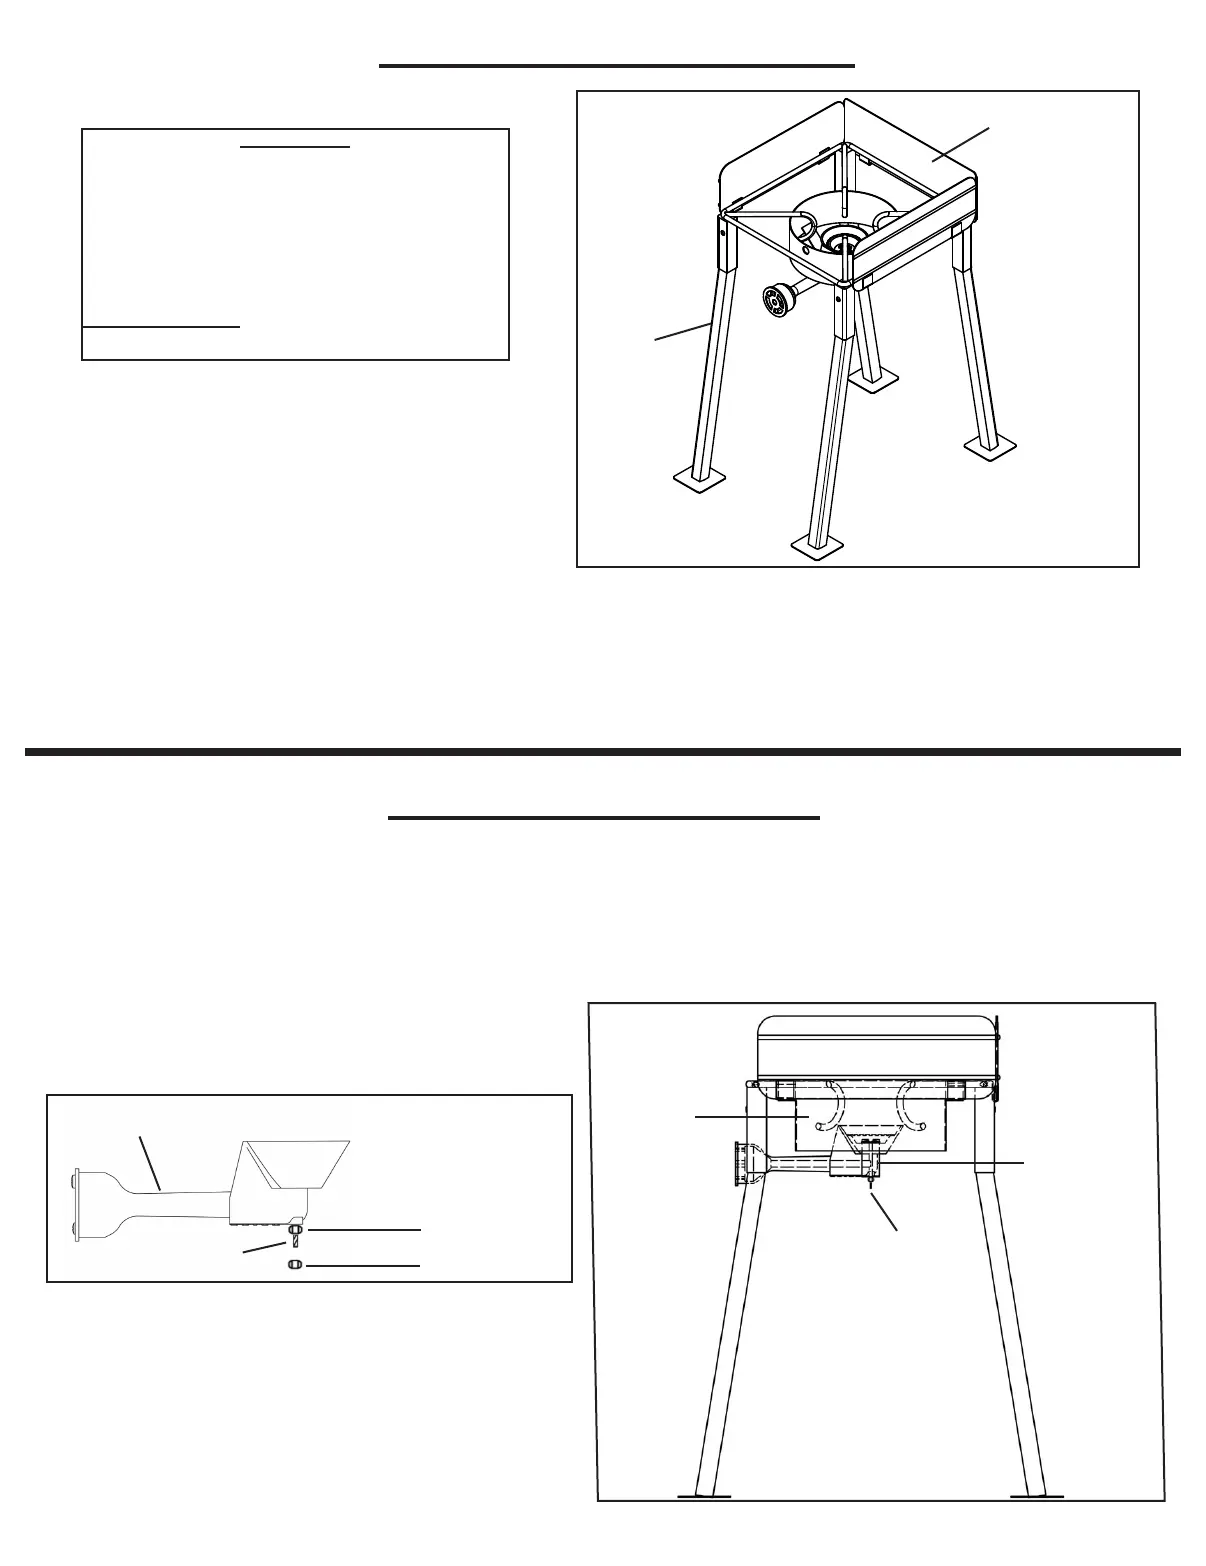
1) Review the contents in your package. Make sure all listed components for your model are included.
2) Install the four legs into the top frame as pictured above. Snap in leg bolts through the receiving holes on
the frame. Make sure the leg bolts pop completely out and legs are securely locked in position.
3) To attach windguard shield to the top frame, align the windguard shield to top frame as per
above diagram. Slide windguard into receiving U Clips welded to the cooker frame.
* Model May Vary From Picture