Repair and Adjustments
Issue: 04/2011
• Loosen the bulb support and put it down.
• Put the protective bonded fabric or a strong cloth around the unpacked bulb.
• Loosen the bulb xing screw with an Allen key through the lamphouse opening.
• Remove the bulb and then the adapter on the bulb socket by loosening the xing
screw.
• Pack the used xenon bulb.
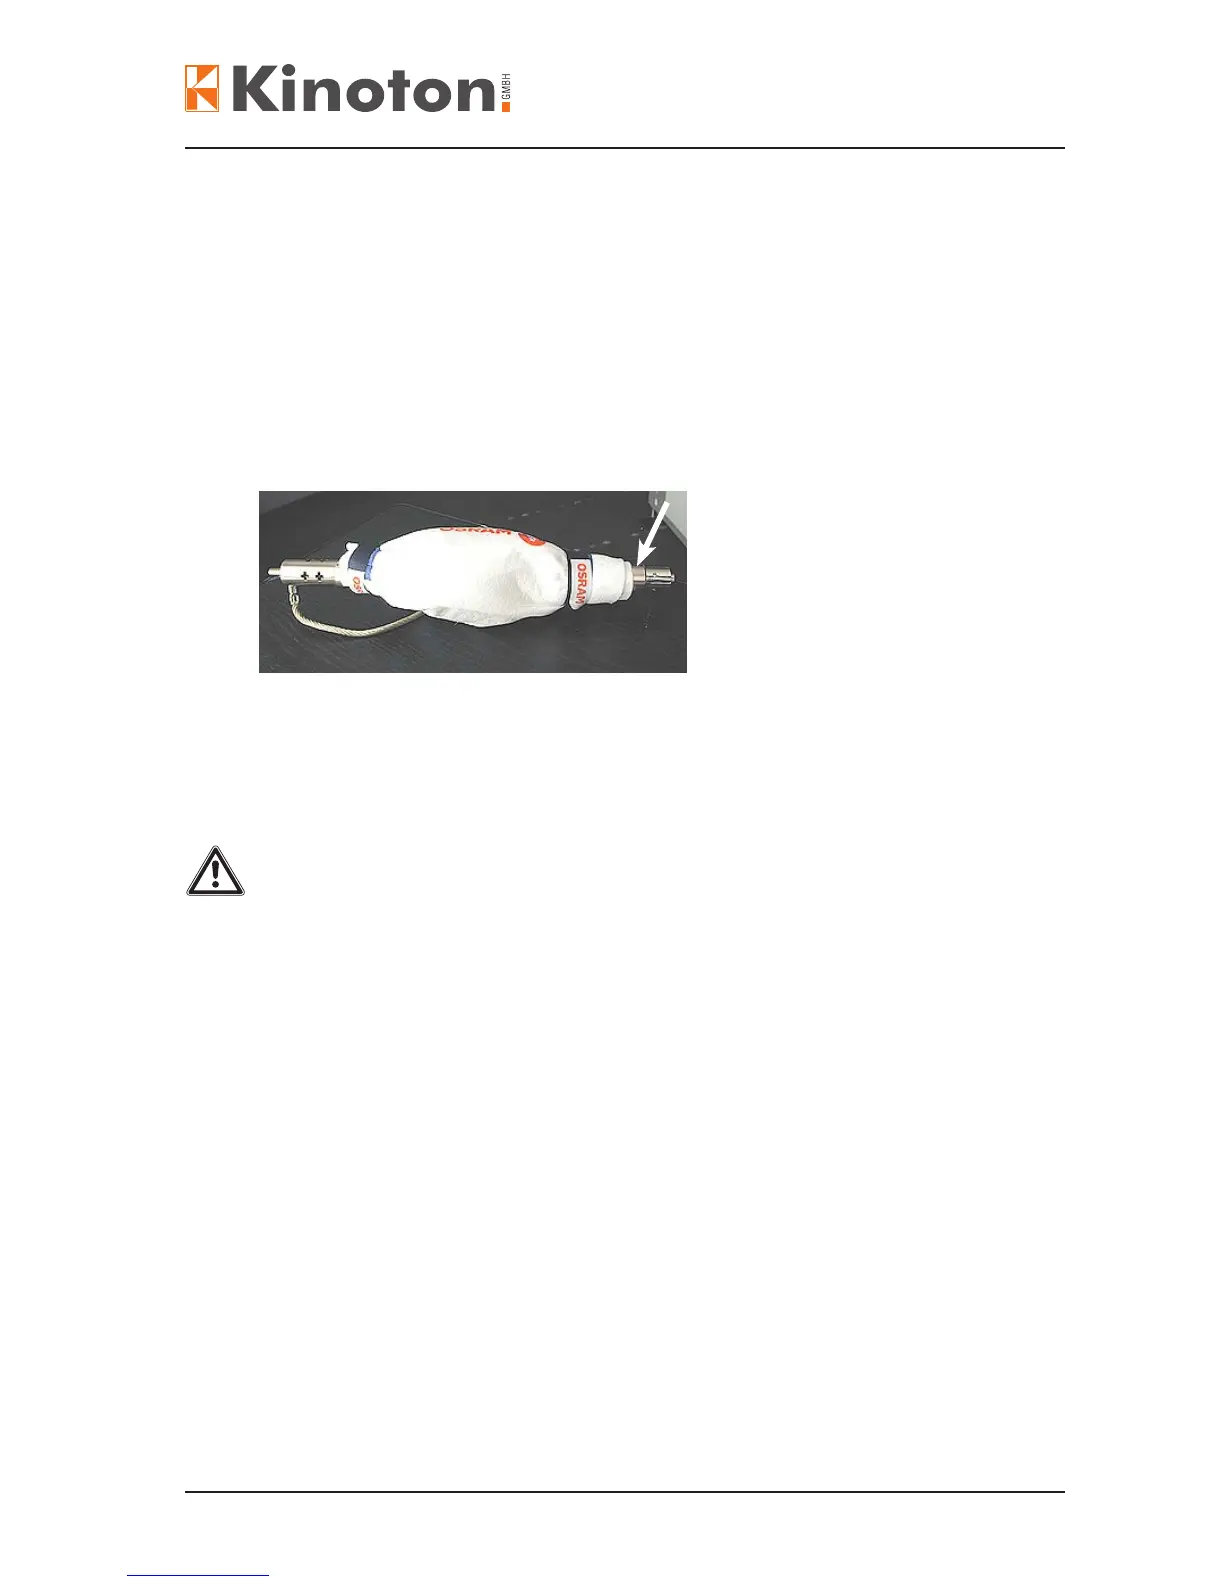
• Fasten adapter onto the new xenon bulb (arrow) - bulb is packed in protective bonded
fabric.
• Thread the xenon bulb through the central mirror hole and fasten it by tightening the
Allen screw from the lamphouse outside.
Before inserting the 7,000 W bulb, turn the axial adjustment so far as possible in
forward direction to get more space.
• Remove the protective coat and connect the anode cable to the lamphouse socket.
U Position the anode cable away from any metal components as far as possible espe-
cially when inserting xenon bulbs with 40 cm anode cable.
U Do not mechanically stress the anode cable to avoid bulb explosion.
$The bulb support stays down for adjusting the screen illumination.
• Close the lamphouse door.


 To Next Page