3
4
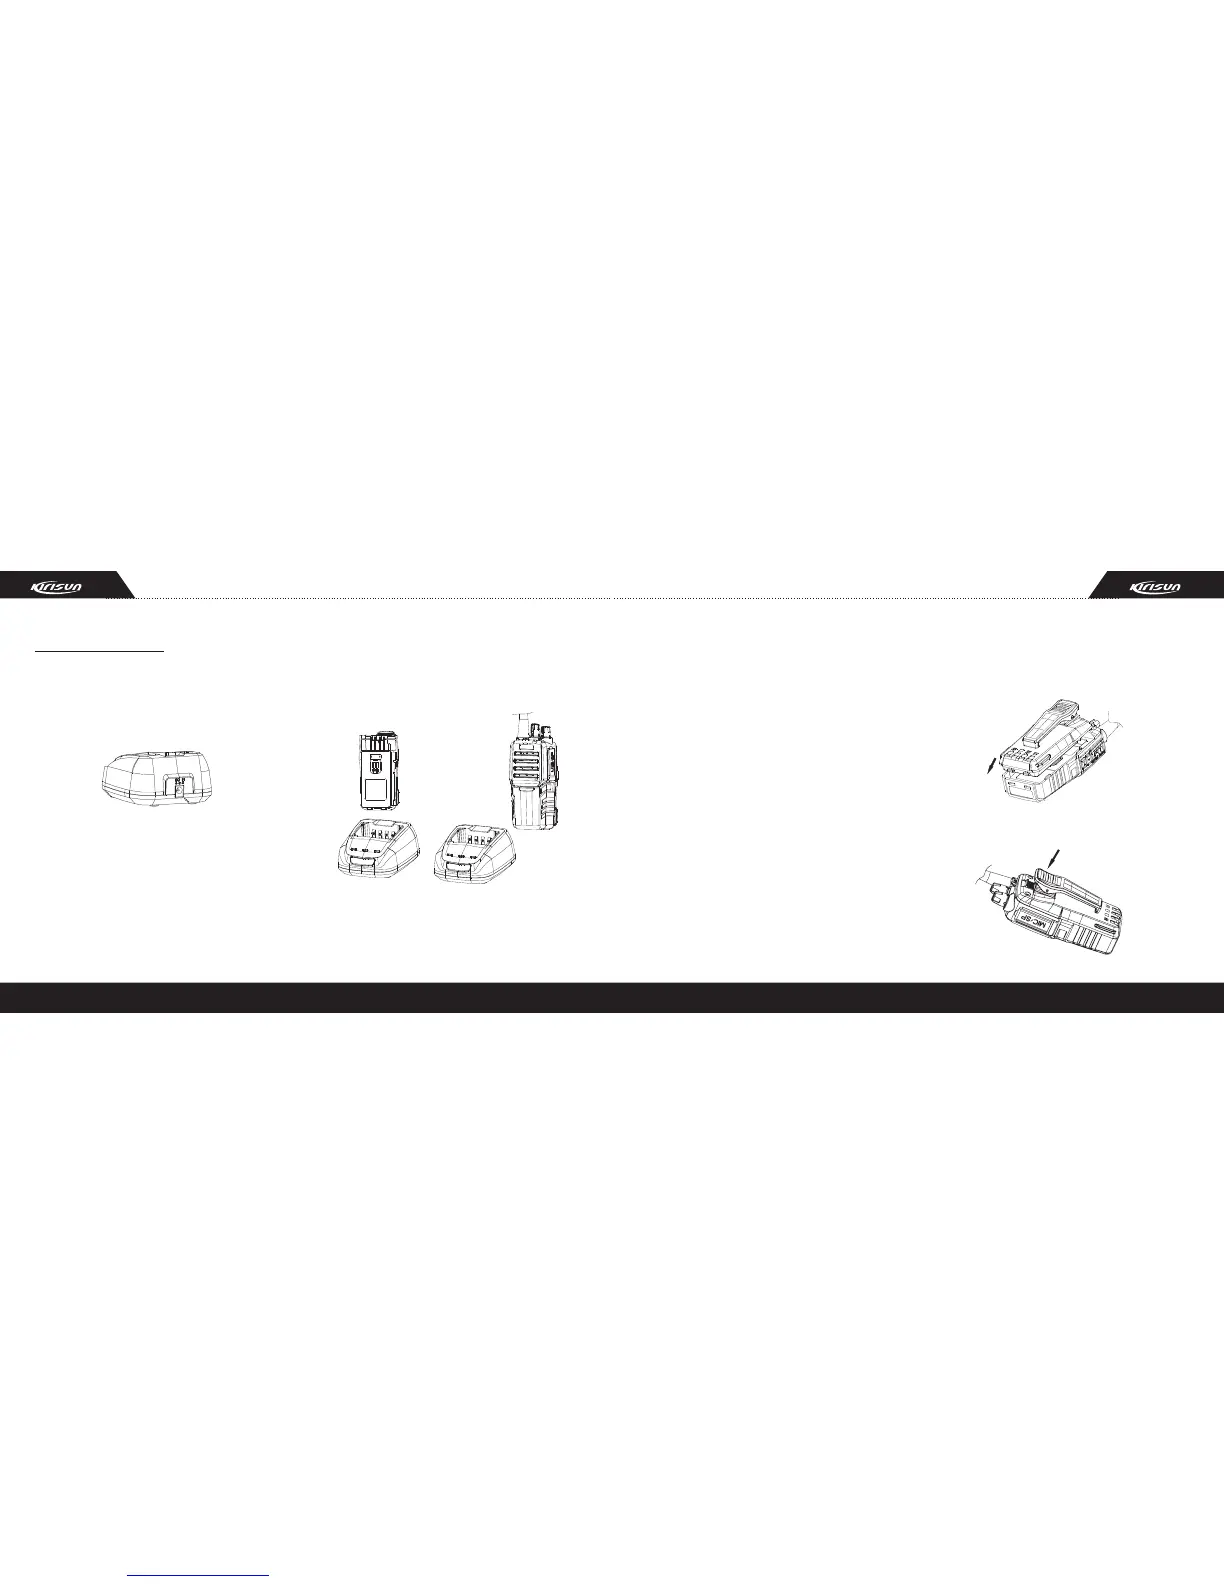
2.2 Installing/Removing the Battery
Match the two bulges at the bottom of the battery
pack with the corresponding slots at the rear bottom
of the radio.
2. Preparation
2.1 Charging the Battery
Plug the power adapter into an applicable AC outlet
and connect the power adapter to the battery charger.
The green LED will light up.
Insert the battery to be charged or the radio into the
charger slot.
Make sure the battery is well connected with the
charger. Then the red LED will light up, and the green
LED will be out, which indicates that the charging
starts.
After about 3~4 hours of charging, the red LED will be
out, and the green LED will light up, which indicates
M
I
C
that the battery is fully charged, then you can remove
the battery from the charger.
Note:
• The radio battery is not fully charged in the factory.
Before the initial use, please charge the new battery.
• KB-31A Li-poly battery of Kirisun is applicable to this
radio.
• When charging the battery for the first time after
purchase or long-time storage (over 2 months),
please repeat charging several times for the battery
to achieve normal capacity.
• Do not recharge the battery if it has been fully
charged or the radio is not in the low battery alarm
state; otherwise, it will have bad effects on the
battery's service life and performance. Remove the
battery from the charger after charging.
Press the top part of the battery towards the radio to
lock it in place until a click is heard.
 Loading...