EasyManua.ls Logo

Kirisun PT7200-02 - User Manual

Kirisun PT7200-02
35 pages
Print Icon
To Next Page IconTo Next Page
Loading...
PROFESSIONAL
TWO-WAY RADIO
PT7200
V071215
FM PORTABLE RADIO
SERVICE MANUAL

Questions and Answers

  • M
    Melissa GarciaJul 31, 2025
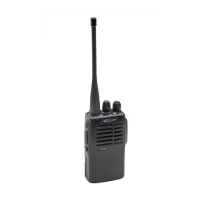
    What to do if I cannot hear other people on my Kirisun PT7200-02 Two-Way Radio?
    • D
      Darrell BlackwellJul 31, 2025
      If you cannot communicate with your group using the Kirisun Two-Way Radio, consider these potential causes: * Verify that all radios are tuned to the same frequency channel. * Confirm that the CTCSS/DCS tone settings match those of your group. * Ensure you are within the effective communication range. Move closer to the group if necessary.
  • G
    greenanthonyAug 4, 2025
    What to do if I cannot program the Kirisun PT7200-02 parameters?
    • R
      rojasrichardAug 4, 2025
      If you're experiencing issues programming your Kirisun Two-Way Radio, consider the following: * Ensure the programming cable is properly connected. * The computer RS-232 serial port output is abnormal: Please fix the computer. * The MIC is not well connected with the SPK socket: Check the socket and if it is unable to work normally please change it with a new one.
  • M
    Martha LewisAug 9, 2025
    Why won't my Kirisun PT7200-02 turn on?
    • A
      Amber TurnerAug 9, 2025
      If your Kirisun Two-Way Radio fails to power on, the possible causes include: * Insufficient battery power: Recharge or replace the battery pack. * Faulty power switch: Replace the power switch. * Defective CPU: Replace the CPU. * Remotely turned off: Reprogramming is required.
  • M
    Mrs. Jennifer SanchezAug 13, 2025
    How to fix a Kirisun PT7200-02 that cannot receive signals?
    • D
      Dr. Barbara LucasAug 13, 2025
      If your Kirisun Two-Way Radio is not receiving signals, here are several things you can check: * Ensure the antenna is securely connected by screwing it on tightly. * A broken high frequency amplification tube Q81: Please replace it. * The squelch level may be set too high: Reset the squelch level using a computer. * A broken mixer tube Q79: Please replace it. * A broken MF processing chip U9: Please replace it.
  • C
    cherylboyleAug 18, 2025
    Why does the Kirisun PT7200-02 indicator light red when transmitting but no voice is heard?
    • K
      Karen WhiteAug 18, 2025
      If the indicator light on your Kirisun Two-Way Radio turns red during transmission but no voice is audible, it could be due to: * A broken power amplifier tube Q68, resulting in no power output: Replace it with a new tube. * A defective microphone: Replace it with a new one. * A broken operational amplifier IC14: Replace it with a new one.
  • S
    scotthartAug 22, 2025
    What to do if the Kirisun Two-Way Radio indicator light is green but there is no sound?
    • B
      Brooke KingAug 22, 2025
      If the indicator light is green on your Kirisun Two-Way Radio when receiving, but you hear no sound, it may be caused by: * A broken speaker: Replace it with a new one. * A broken audio amplifier Q92: Replace it with a new one. * Broken switch tubes Q86 and Q87: Replace them with new ones. * A broken operational amplifier IC13: Replace it with a new one.
  • S
    Sarah RobinsonAug 26, 2025
    Why is my Kirisun PT7200-02 beeping because the phase-locked loop is unlocked?
    • D
      David WhiteAug 26, 2025
      If your Kirisun Two-Way Radio is beeping because the phase-locked loop is unlocked, it might be due to: * The PLL crystal oscillator X4 is broken: Please replace it. * The oscillating tube is broken: Please replace it. * Phase-locked loop chip IC9 is broken: Please replace it.

Summary

Introduction

1.1 Introduction

Provides an overview of the manual's purpose and scope for engineers and technicians.

1.2 Service Precautions

Outlines safety guidelines, including electrical and environmental hazards.

1.3 Service

Details warranty terms and conditions for the radio and its accessories.

Radio Overview and Function Keys

2.1 Radio Overview

Identifies and describes the main parts and indicators of the radio.

2.2 Function Keys

Explains the operation of the radio's function keys and buttons.

Electrocircuit

3.1 Frequency Configuration

Explains the receiver's intermediate frequency and local oscillation signals.

3.2 Receiver Elements (RX)

Details the functional blocks of the receiver circuit.

Electrocircuit (continued)

3.3 Transmitter (TX)

Details the transmitter power amplifier and audio signal processing.

3.4 Frequency Synthesizer

Explains the PLL frequency synthesizer for generating RF signals.

3.5 Voice Prompt Circuit

Describes the feature that provides voice announcements for channel selection.

3.6 Power Supply

Details the radio's power source and voltage regulation circuits.

Electrocircuit (continued)

3.7 MCU

Lists the MCU's functions and port descriptions.

3.8 Semiconductor Component

Provides a description of the microprocessor's ports.

Electrocircuit (continued)

Table 3.4: Semi-Conductor Component Function

Lists components and their descriptions.

Table 3.5 Diode Function Description

Lists diodes and their functions.

Table 3.6: XF203 crystal filter features

Provides specifications for the crystal filter.

Electrocircuit (continued)

Table 3.7 CF201 LTWC450 F functions and features

Lists features and functions of CF201.

Table 3.8 CF202 LTWC450 G functions and features

Lists features and functions of CF202.

Table 3.9 Semiconductor Component Packaging Illustration

Shows illustrations of component packaging.

Function Description and Parameter Setting

4.1 Major Functions

Details the primary operational functions of the radio.

4.1.1 16 Channels

States the radio supports 16 programmable channels.

4.1.2 Scanning Channel Function

Explains how to use and configure channel scanning.

4.1.3 CTCSS and DCS

Describes the use of CTCSS/DCS for selective calls.

Function Description and Parameter Setting (continued)

4.1 Major Functions (continued)

Continues detailing radio functions.

4.1.4 TOT function

Explains the Time-Out Timer function and its settings.

4.1.5 Auto Power Saving

Describes the programmable battery power saving modes.

4.1.6 Low Power Warning

Explains how the radio indicates low battery status.

4.1.7 Squelch enabled function

Describes how to enable/disable squelch for monitoring.

4.1.8 5 TONE signaling

Details the 5Tone encoding and decoding features.

4.1.11 PC Programmable

Explains how to program radio functions via PC.

4.1.12 Squelch Level Selection

Describes how to adjust squelch sensitivity levels.

4.1.13 Beep Tone Volume

Explains how to set beep tone volumes for various alerts.

4.2 Parameter Setting (PC Mode)

Outlines steps for setting radio parameters using PC software.

Function Description and Parameter Setting (continued)

4.2 Parameter Setting (PC Mode) (continued)

Lists parameters that can be programmed via PC.

4.3 Computer Test Mode

Explains how to connect the radio for testing and modification.

4.4 Wired Clone Parameters

Describes the process for cloning radio settings via cable.

Service, Assembly and Disassembly

5.1 Removing and Installing the Battery

Provides instructions for removing and installing the battery pack.

5.2 Removing and Installing the Belt Clip

Details the steps for attaching and detaching the belt clip.

Service, Assembly and Disassembly (continued)

5.3 Removing the Casing from the Chassis

Instructions for disassembling the radio casing.

5.4 Remove the Chassis from the Main Board

Steps for separating the chassis from the main circuit board.

Radio Debugging

6.1 Service Equipment and Software

Lists necessary equipment and software for service.

Radio Debugging (continued)

6.2 Debugging

Provides debugging procedures for various radio functions.

Radio Debugging (continued)

6.2 Debugging (continued)

Continues debugging procedures for reception and transmission parameters.

Technical Specifications

7.1 General Specification

Lists general technical specifications for the radio.

7.2 Receiver

Details the technical specifications for the receiver section.

Technical Specifications (continued)

7.2 Receiver (continued)

Continues listing receiver technical specifications.

7.3 Transmitter

Details the technical specifications for the transmitter section.

Technical Specifications (continued)

7.3 Transmitter (continued)

Continues listing transmitter technical specifications.

Troubleshooting

Problem

Lists common problems and their potential causes and solutions.

Troubleshooting (continued)

Problem (continued)

Continues troubleshooting common radio issues.

KBC-70 C Charger

9.1 General Description

Overview of the intelligent rapid charger's function.

9.2 Operating environment

Specifies the operating temperature and humidity for the charger.

9.3 Safety requirements

Lists safety standards the charger complies with.

9.4 Technical Specifications

Details the technical specifications of the charger.

KBC-70 C Charger (continued)

9.4 Technical Specifications (continued)

Continues charger technical specifications.

9.5 LED Status Table

Explains the meaning of LED indicators on the charger.

KBC-70 C Charger (continued)

9.6 Description of interfaces

Describes the charger's interfaces and connectors.

Appendix 1 Abbreviations

Appendix 2: Spare List

Appendix 3: STRUCTURE PART LIST

Appendix 4: Electronic Component List (136-174 MHz)

Appendix 4: Electronic Component List (136-174 MHz) (continued)

Appendix 4: Electronic Component List (400-470 MHz)

Appendix 4: Electronic Component List (400-470 MHz) (continued)

Appendix 4: Electronic Component List (400-470 MHz) (continued)

Appendix 4: Electronic Component List (400-470 MHz) (continued)

Appendix 4: Electronic Component List (400-470 MHz) (continued)

Appendix 5: Accessory List

Figure 1 PT7200 Top Board Position Mark Diagram(136-174)

Figure 1 PT7200 Top Board Position Mark Diagram(136-174) (continued)

Figure 1 PT7200 Top Board Position Mark Diagram(400-470)

Figure 1 PT7200 Top Board Position Mark Diagram(400-470) (continued)

PT7200电路原理图(136-174)

Figure 6 PT7200 Schematic Circuit Pane Diagram (400-470 MHz)

Figure 7 Schematic Circuit Pane Diagram

Kirisun PT7200-02 Specifications

General IconGeneral
Frequency Range400-470 MHz
Output Power5W
IP RatingIP54
Channel Spacing12.5/25 kHz
Operating Voltage7.4V
Frequency Stability±2.5ppm
Operating Temperature-20°C to +60°C
Antenna Impedance50Ω
Audio Output500mW
Channel Capacity16

Related product manuals