EasyManua.ls Logo

Kirisun DP990 - User Manual

Kirisun DP990
54 pages
Print Icon
To Next Page IconTo Next Page
Loading...
DP990 DMR Two Way Radio User Manual
III
User Manual
DP990
DMR Two Way Radio
We are very grateful for your purchasing Kirisun brand two-way radio produced by Kirisun
Communications Co., Ltd
We believe Kirisun two-way radio, which always incorporates the latest technology, can bring
great convenience to your life and work. We also believe that the quality and function of
Kirisun two-way radio can meet your demands for reliable communication.

Table of Contents

Other manuals for Kirisun DP990

Questions and Answers

  • J
    Jennifer Long DDSJul 31, 2025
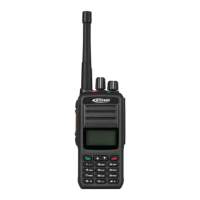
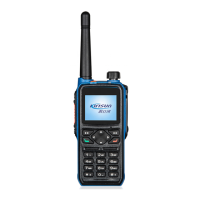
    How to troubleshoot abnormal frequency programming on Kirisun Radio?
    • K
      kmasonJul 31, 2025
      To troubleshoot abnormal frequency programming on your Kirisun Radio: * **Wiring:** Check the wiring. * **USB Driver:** Check whether a USB driver is installed. * **Earphone Interface Board:** Check the contact of the earphone interface board. In case of poor contact, replace the USB socket.
  • J
    Julie VillaAug 5, 2025
    What to do if communication fails on my Kirisun Radio?
    • H
      Heather PorterAug 5, 2025
      If communication fails on your Kirisun Radio, consider these potential causes and solutions: * **Frequency Mismatch:** Ensure both radios are communicating on the same frequency. * **CTCSS/DCS Codes:** Verify that the radios are using the same CTCSS/DCS signaling codes. If not, set the same one via PC. * **Communication Range:** You may be out of communication range. Try moving within the specified range.
  • G
    Gina FranklinAug 8, 2025
    Why can't my Kirisun Radio receive signals?
    • M
      melissawelchAug 8, 2025
      If your Kirisun Radio is not receiving signals, here are a few things to check: * **Antenna Connection:** Make sure the antenna is securely screwed onto the connector. * **Squelch Level:** If the squelch is disabled due to a high level, set a lower level using a PC. * **Component Issues:** The LNA Q205, mixer Z201, or FM chip U201 may be broken and require replacement.
  • J
    Julian CastroAug 13, 2025
    How to fix power-on issues with my Kirisun Radio?
    • K
      Kevin OwenAug 13, 2025
      If you're experiencing power-on issues with your Kirisun Radio, consider these potential causes: * **Low Battery:** The remaining battery capacity may be low. Charge or replace the battery. * **Broken Power Switch:** The power switch may be broken and need replacement. * **Internal Component Issues:** The power management chip U1 or Zener diode D1 could be broken and require replacement.
  • T
    Theresa MitchellAug 17, 2025
    What to do if the red light is on during transmitting on my Kirisun Radio, but the receiver hears no voice?
    • D
      Dan PorterAug 17, 2025
      If the red light is on during transmitting, but the receiver hears no voice, it could be due to: * **Power Amplifier Transistor:** The power amplifier transistor may not be outputting any power, requiring a replacement. * **Microphone Malfunction:** The microphone may not be working correctly, and you should replace it.
  • E
    elarsonAug 22, 2025
    Why is the green light on during receiving on my Kirisun Radio, but I cannot hear any voice?
    • D
      David WilsonAug 22, 2025
      If the green light is on during receiving but you cannot hear any voice, consider the following: * **Speaker Issues:** The speaker may not be working well, so replace it with a new one. * **Audio Amplifier IC:** The audio amplifier IC5 may be malfunctioning, requiring replacement. * **Switch Diode Q9:** Replace the switch diode Q9.
  • A
    Annette WalkerAug 26, 2025
    What causes PLL failure in Kirisun Radio?
    • M
      Megan RosarioAug 26, 2025
      PLL failure in your Kirisun Radio can be caused by: * **PLL Crystal Oscillator:** If the PLL crystal oscillator U9 is broken, replace it. * **Oscillator Transistor:** If the oscillator transistor is broken, replace it. * **PLL Chip:** If the PLL chip U103 is broken, replace it.

Summary

Notice

Safety Precaution

Battery

1 Unpacking and Checking

1.1 Supplied Accessories

Lists all the accessories included in the package for the radio.

2 Battery Information

2.1 Battery Charging

Details the steps for charging the radio's battery and indicators.

2.2 Attaching the Battery

Provides instructions on how to properly attach the battery to the radio unit.

2.3 Detaching the Battery

Explains the procedure for safely removing the battery from the radio.

2.4 Attaching the Antenna

Guides users on how to connect the antenna to the radio securely.

2.5 Attaching the Audio Accessories

Describes how to connect external audio accessories like microphones or headsets.

2.6 Attaching the Belt Clip

Details the process of attaching the belt clip to the back of the radio.

3 Introduction

4 Basic Operation

4.1 Powering on;off

Instructions for turning the radio on and off using the power/volume knob.

4.2 Adjusting the Volume

Explains how to increase or decrease the audio volume of the radio.

4.3 Selecting the Zone

Guides users on grouping channels into zones for easier navigation.

4.4 Selecting the Channel

Details how to switch between different channels, including analogue and digital.

4.5 PTT Key

Explains the functions and usage of the Push-To-Talk (PTT) button.

4.6 Menu Operation

Covers navigation within the radio's menu system using various keys.

4.7 Icon

Explains the meaning of various icons displayed on the radio's LCD screen.

5 Initiating;Receiving a Call

5.1 Initiating a call to the default contact

Describes how to make a call to a pre-set default contact on the channel.

5.2 Selecting the Contact and Initiating a Call

Guides on selecting contacts from a list and initiating a call.

5.3 Dialing Manually and Initiating a Call

Explains how to manually dial a contact ID to initiate a call.

6 Short Message

6.1 Edit and send short message

Details the process of composing, editing, and sending text messages.

6.2 Sending Quick Message

Covers sending pre-defined quick messages, often programmed by a dealer.

6.3 Sending Status Message

Explains how to send pre-programmed status messages.

6.4 Receiving Short Message

Details how to receive and read incoming short messages.

6.5 Deleting Short Message

Provides methods for deleting sent, received, or saved messages.

7 Emergency

Siren Only Alarm Type

Emergency alarm mode where only local siren sounds, no remote alert.

Conventional Alarm Type

Emergency alarm with audio/visual alerts sent to others.

Secret Alarm Type

Emergency alarm without audio/visual alerts, requires PTT to talk.

Secret with Voice Alarm Type

Emergency alarm with voice, no audio/visual alerts, requires PTT to talk.

7.1 Sending Emergency Alarm

Instructions on how to activate an emergency alarm from the radio.

7.2 Receiving Emergency Alarm

How the radio alerts the user and displays information upon receiving an alarm.

7.3 Exiting Emergency Alarm

Methods for deactivating the emergency alarm mode on the radio.

8 Call Log

8.1 Checking Latest Call

How to view recent outgoing, incoming, and missed calls recorded by the radio.

8.2 Saving ID in the Contact List

Procedure to save call log records into the radio's contact list.

8.3 Deleting Call from the Call List

Instructions for removing call records from the call log.

9 General Setting

9.1 Language Selection

How to change the radio's display language.

9.2 Alert Tone Setting

Options to enable/disable and adjust various alert tones for the radio.

9.2.1 Enable;disable the Alert Tone

Specifics on enabling or disabling individual alert tone types.

9.2.2 Adjusting the Volume of Alert Tone

How to set the volume level for different alert tones.

9.3 Vibration Setting

Configuration options for enabling or disabling vibration alerts.

9.4 Power Level Setting

How to set the transmission power level (high/low) for channels.

9.5 Keypad Lock Setting

Options for manually or automatically locking the radio's keypad.

9.5.1 Manually Locking the Keypad

Steps to lock the keypad immediately.

9.5.2 Automatically Locking the Keypad

Setting up the radio to automatically lock the keypad after inactivity.

9.5.3 Locking the Keypad Quickly

A shortcut method to lock the keypad.

9.5.4 Unlocking the Keypad

How to unlock the keypad when it is locked.

9.6 Screen Brightness Setting

Adjusting the brightness of the radio's display screen.

9.7 Screen Backlight Setting

Configuring the duration the screen backlight remains on.

9.8 Indicator Setting

Turning the LED indicators on or off.

9.9 Talk Around;Repeater Setting

Switching the radio's operating mode between Talk Around and Repeater.

9.10 Squelch Level Setting

Adjusting the squelch level for analogue channels to filter noise.

9.11 Checking Radio Information

Viewing details like radio ID, firmware, and hardware versions.

10 Advanced Features

10.1 Radio Check

Checking if a target radio is active in the system.

10.2.1 Receiving and Responding to Call Alert

How to handle incoming call alerts and respond.

10.2.2 Initiating Call Alert

How to request a callback from another radio.

10.3.1 Receiving Stun;Un-stun Signaling

How the radio reacts to stun/un-stun commands.

10.3.2 Sending Stun and Un-stun Signaling

How to remotely stun or un-stun another radio.

10.4 Radio Kill

Remotely disabling a radio by clearing its configuration data.

10.5 Remote Monitor

Remotely activating the microphone to listen to the surroundings of a target radio.

10.6.1 Checking the Scan List

Viewing the channels configured in a scan list.

10.6.2 Editing the Scan List

Adding, deleting, or prioritizing channels within a scan list.

10.6.3 Enabling;disabling Scan

Turning the channel scanning feature on or off.

10.6.4 Responding during Scan

How to transmit when the radio detects activity during scanning.

10.7 Man Down

Enabling or disabling the Man Down safety feature.

10.8.1 Enabling;Disabling VOX

Specific steps to turn the VOX feature on or off.

10.8.2 Adjusting VOX Level

Setting the microphone sensitivity level for VOX operation.

10.9.1 Checking the Current Location

Displaying current GPS location data, time, and satellite status.

10.9.2 Enabling;disabling GPS

Turning the GPS receiver on or off.

10.9.3 Enabling;disabling GPS

Enabling or disabling the GPS Report feature.

10.10 Time

Setting the radio's clock and date display.

10.11 Network

Checking the current channel's transmitting and receiving frequencies.

10.12 Bluetooth

Enabling, disabling, and searching for Bluetooth devices.

11 Troubleshooting

Failed to power on

Solutions for when the radio does not power on.

Communication failed

Troubleshooting steps for when radio communication is unsuccessful.

Failed to receive signals

Solutions for issues with not receiving radio signals.

The green indicator glows but no sound is received

Diagnosing why there's no audio despite the green indicator being on.

GPS failed to locate

Troubleshooting steps when the GPS cannot determine the location.

Abnormal programming

Solutions for problems related to radio programming or configuration.

12 Major Technical Specification

13 FCC STATEMENT

Kirisun DP990 Specifications

General IconGeneral
Channel Capacity16
Power Output5W
IP RatingIP54
Operating Voltage7.4 V
Operating Temperature-20°C to +60°C
Digital ProtocolDMR
Channels16
Frequency RangeUHF: 400-470MHz; VHF: 136-174MHz
Battery Capacity2000mAh (Li-ion)

Related product manuals