4
INSTALLATION
INSTALLATION
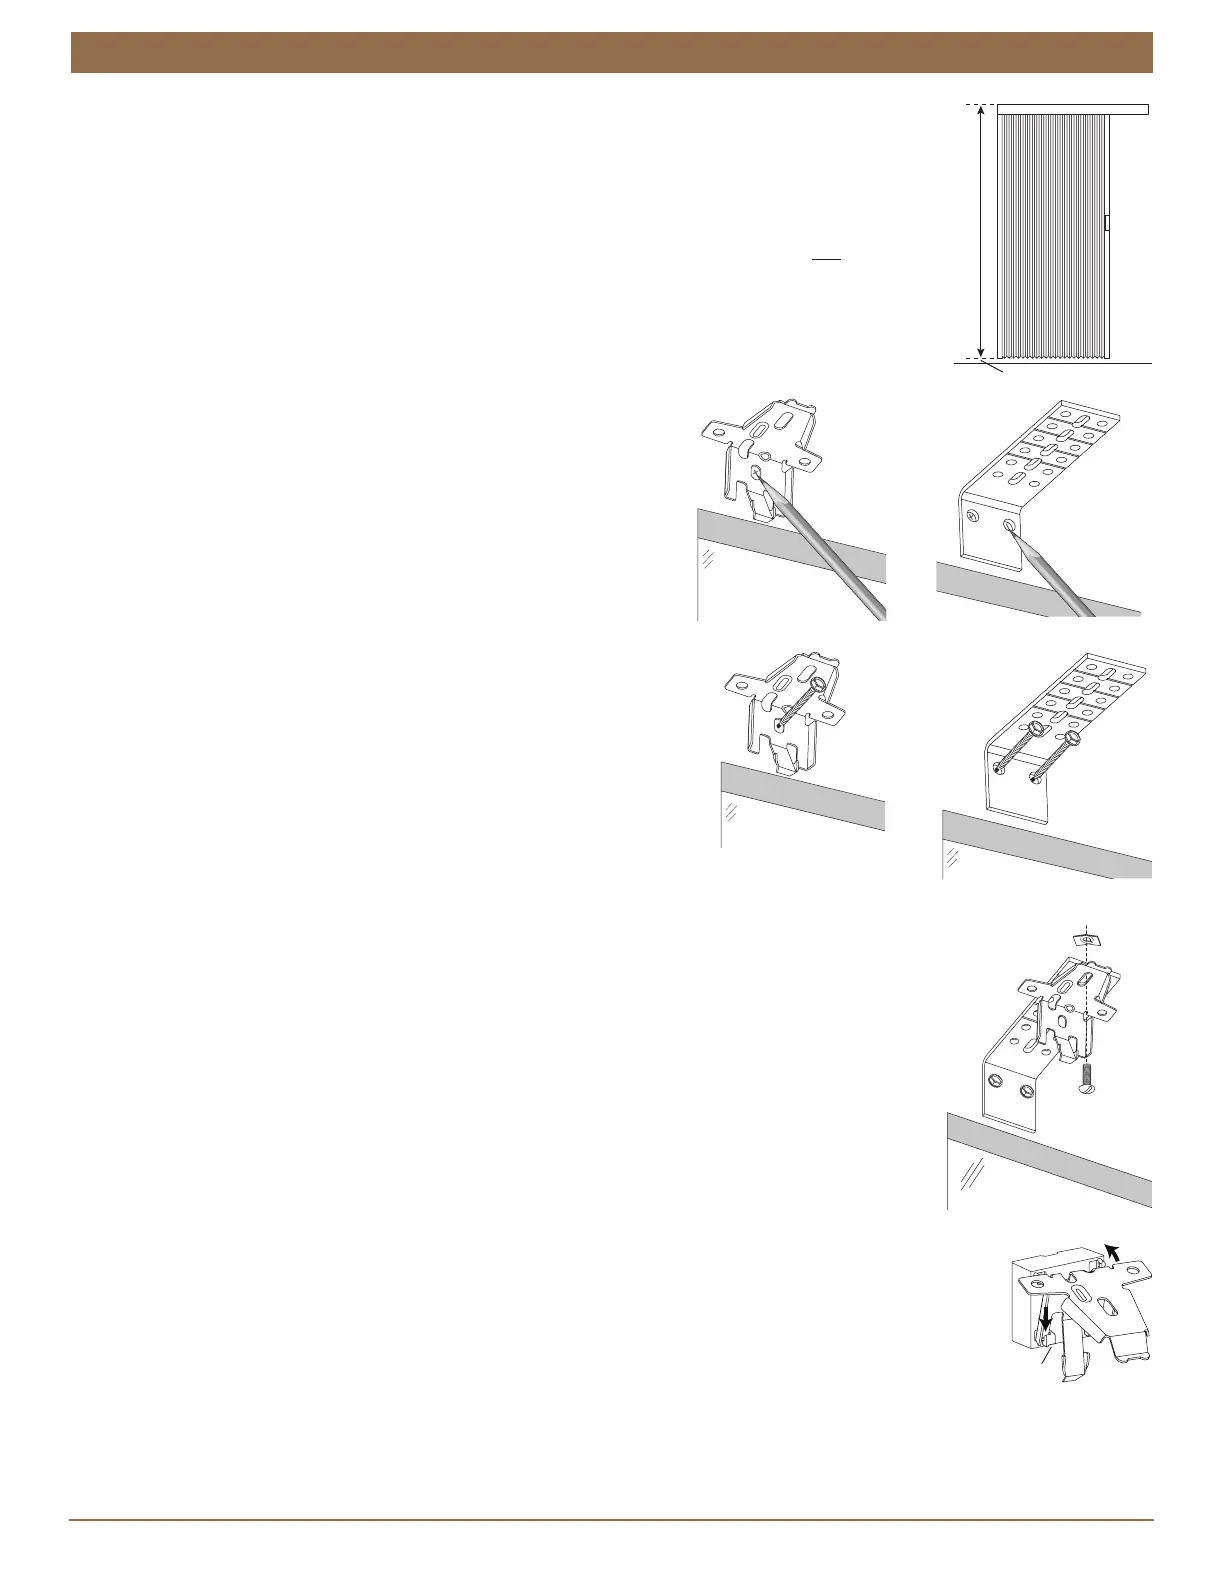
Determine where to place the top of the installation brackets.
Add the desired floor clearance to the ordered height of the shade. The ordered height can
be found on the packaging label. A minimum of
1
⁄
2
" floor clearance is recommended.
Measure the total distance up from the floor. This is where to place the top of the installation brackets.
A minimum flat vertical surface of 1
1
⁄
4
" is required to mount the brackets.
CAUTION: The rear of the brackets must be flush against a flat mounting surface. Do not
mount brackets on curved molding.
Center the brackets on your marks and mark the screw holes.
When using extension brackets, mark two screw holes
per bracket.
Drill the screw holes using a
3
⁄
32
" drill bit.
CAUTION: Use drywall anchors when mounting into drywall. Use
the drill bit size recommended by the manufacturer.
Attach the installation brackets using the screws provided.
IMPORTANT: The front edges of the brackets must be level and
aligned to each other.
If using extension brackets, attach an installation bracket to the underside of each extension
bracket using the provided screws and speed nuts.
If using spacer blocks, first attach the installation bracket to the
1
⁄
2
" spacer block before stacking additional
spacer blocks or shims together.
Insert the legs of the installation bracket into the tabs on the spacer block.
Then rotate the installation bracket back.
Use a maximum of three spacer blocks (1
1
⁄
2
") per installation bracket.
acket
dered
Shade
Height
Tab