6
INSTALLATION
INSTALLATION
Inside/Ceiling Mount
Mount the Installation Brackets
Mark 8" in from each jamb. This marks the
center points of the two end brackets.
Mark the locations of any additional
brackets, spaced evenly between the two
end brackets.
Center the brackets on your marks and mark the screw holes.
The minimum casement depth for mounting the installation brackets is
1
⁄
2
".
Mark both of the winged screw holes with shallow mounting depths.
The minimum casement depth for a fully recessed mount varies with valance
type and fabric pleat size, as shown in the table. Mark the center screw hole
when depth permits.
Drill the screw holes using a
3
⁄
32
" drill bit.
CAUTION: Use drywall anchors when mounting into drywall. Use
the drill bit size recommended by the manufacturer.
Attach the installation brackets using the screws provided.
IMPORTANT: Be sure the front edges of the installation brackets
are level and aligned to each other. Use shims if necessary to level
the brackets.
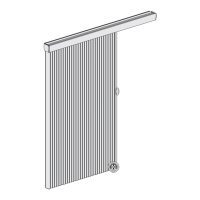
Mount the Headrail
Mount the headrail into the installation
brackets. Do not remove any components
from the headrail. Both end plates should
remain attached to the ends of the headrail.
Place the front groove on the headrail
onto the front lip of the installation
bracket.
Position the end of the headrail opposite
the fabric stack flush against the jamb.
This leaves a gap on the stationary rail
side. The stationary rail fills this gap when
anchored.
Rotate the rear of the headrail up and
push back until the headrail snaps in place.
8"
Space Evenly
Jamb
Space Evenly
8"
Gap Le Stack Shown Flush
Front of Bracket
Snap in
Place
Valance
Type
Fully Recessed Depth
3
⁄
4
" Cell 1
1
⁄
4
" Cell
Aluminum 3
7
⁄
8
" 4
5
⁄
8
"
Traditional 4
1
⁄
4
" 5"
Minimum
1
∕
2
"
Use Center Hole
When Depth Permits