8
INSTALLATION
INSTALLATION
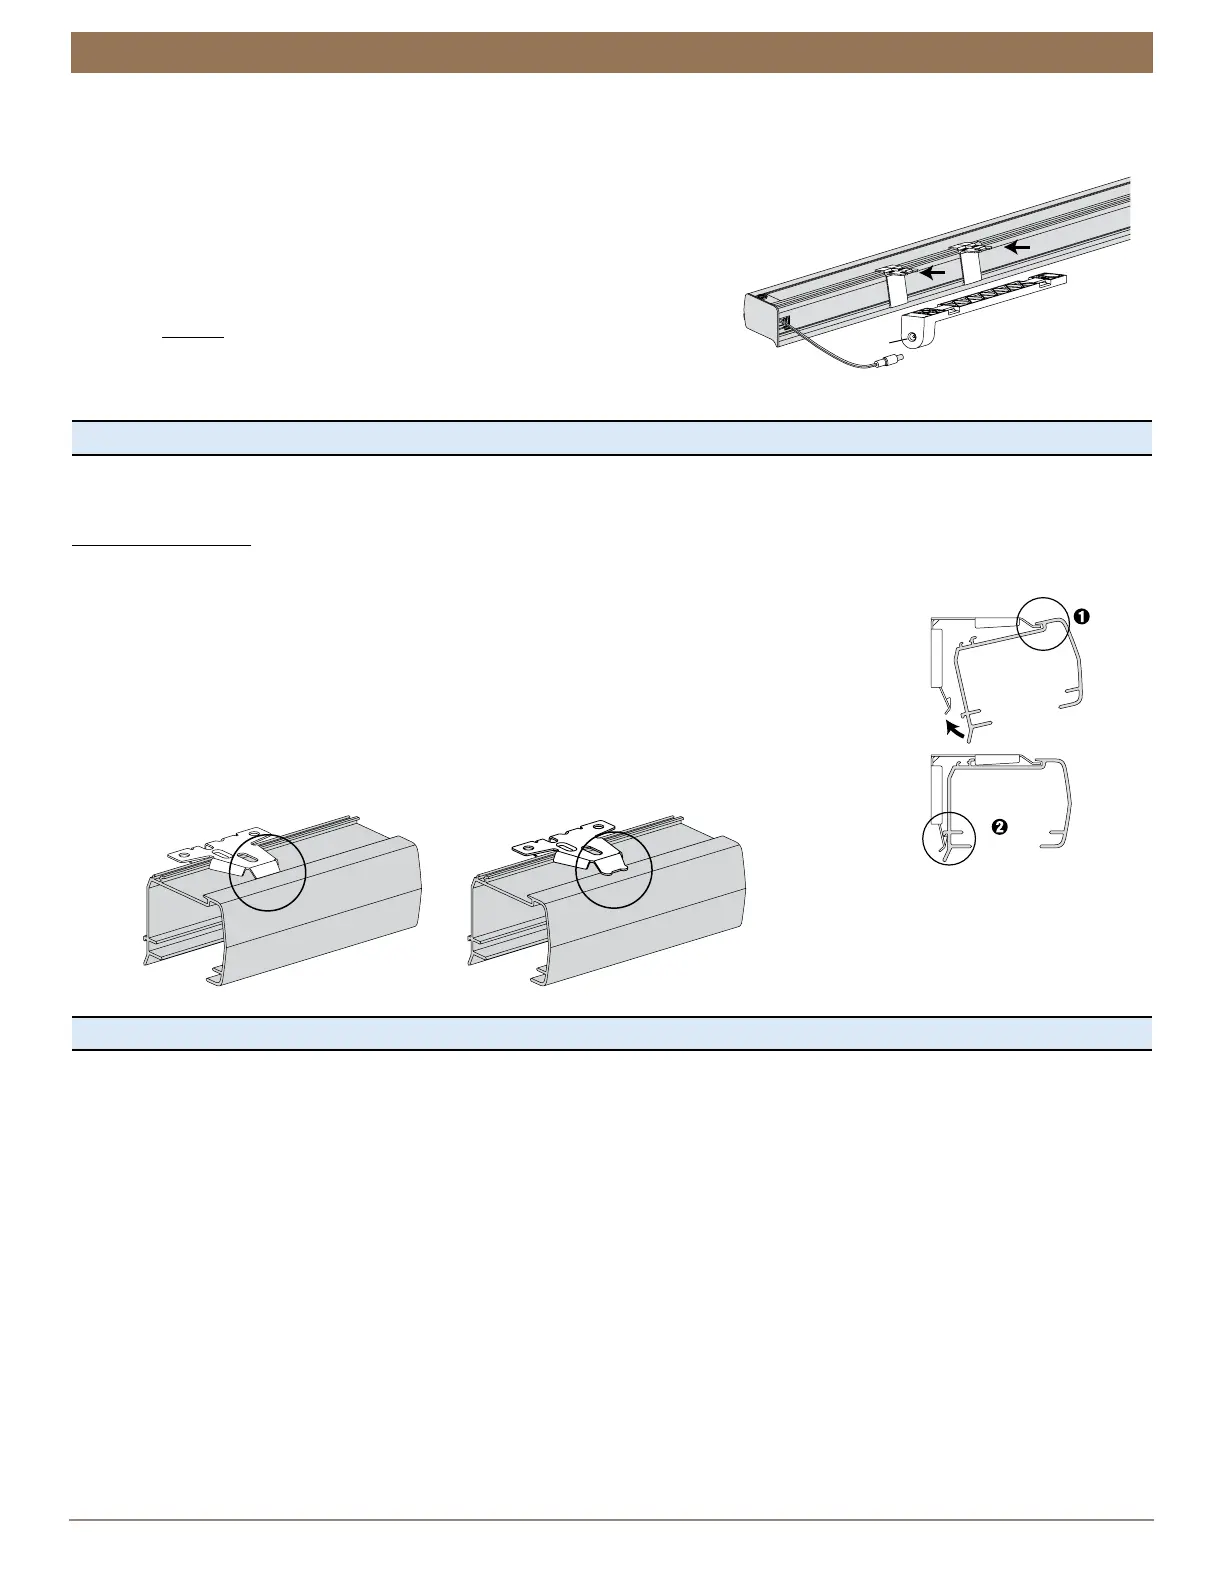
Mount the Rechargeable Battery Mount into the Rechargeable Clips
■
From the back of the shade headrail, connect the power cable from the motor side into the socket on the rechargeable battery
mount.
■
Align the slots in the battery mount with the battery wand clips.
■
Push the battery mount onto the battery wand clips until it snaps into place.
Check to make sure the battery mount is secure.
CAUTION: Be sure the cable does not become pinched by the battery wand
clips during installation. Damage or overheating of components could result.
NOTE: Do not install the rechargeable battery wand into the battery
mount before installing the shade. See "STEP 4: Connect the Power Source"
on page 13 for instructions on inserting the battery wand into the
battery mount.
Proceed to "STEP 3: Install the Shade" on page 8
STEP 3: Install the Shade
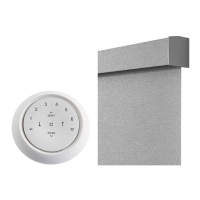
Mount the Headrail
CAUTION: Be sure no cables are pinched by the brackets or headrail during installation; damage or
overheating of components could result.
■
Fit the front channel on top of the headrail onto the front lip of the installation brackets.
■
Push the headrail up and back until it snaps into place.
➤
Check that the bottom of the headrail is snapped into the base of each bracket.
➤
Check that the front lip of each bracket is in the front channel of the headrail.
■
If any brackets are not installed correctly, release the shade and reinstall. See “"Removing the
Shade, If Necessary" on page 20.
Proceed to "STEP 4: Connect the Power Source" on page 9
Socket
The back of the headrail
snaps into the bracket.
The front of the bracket
fits under the groove.
Headrail
Bracket
Snap
in Place
Good Bad