4-19
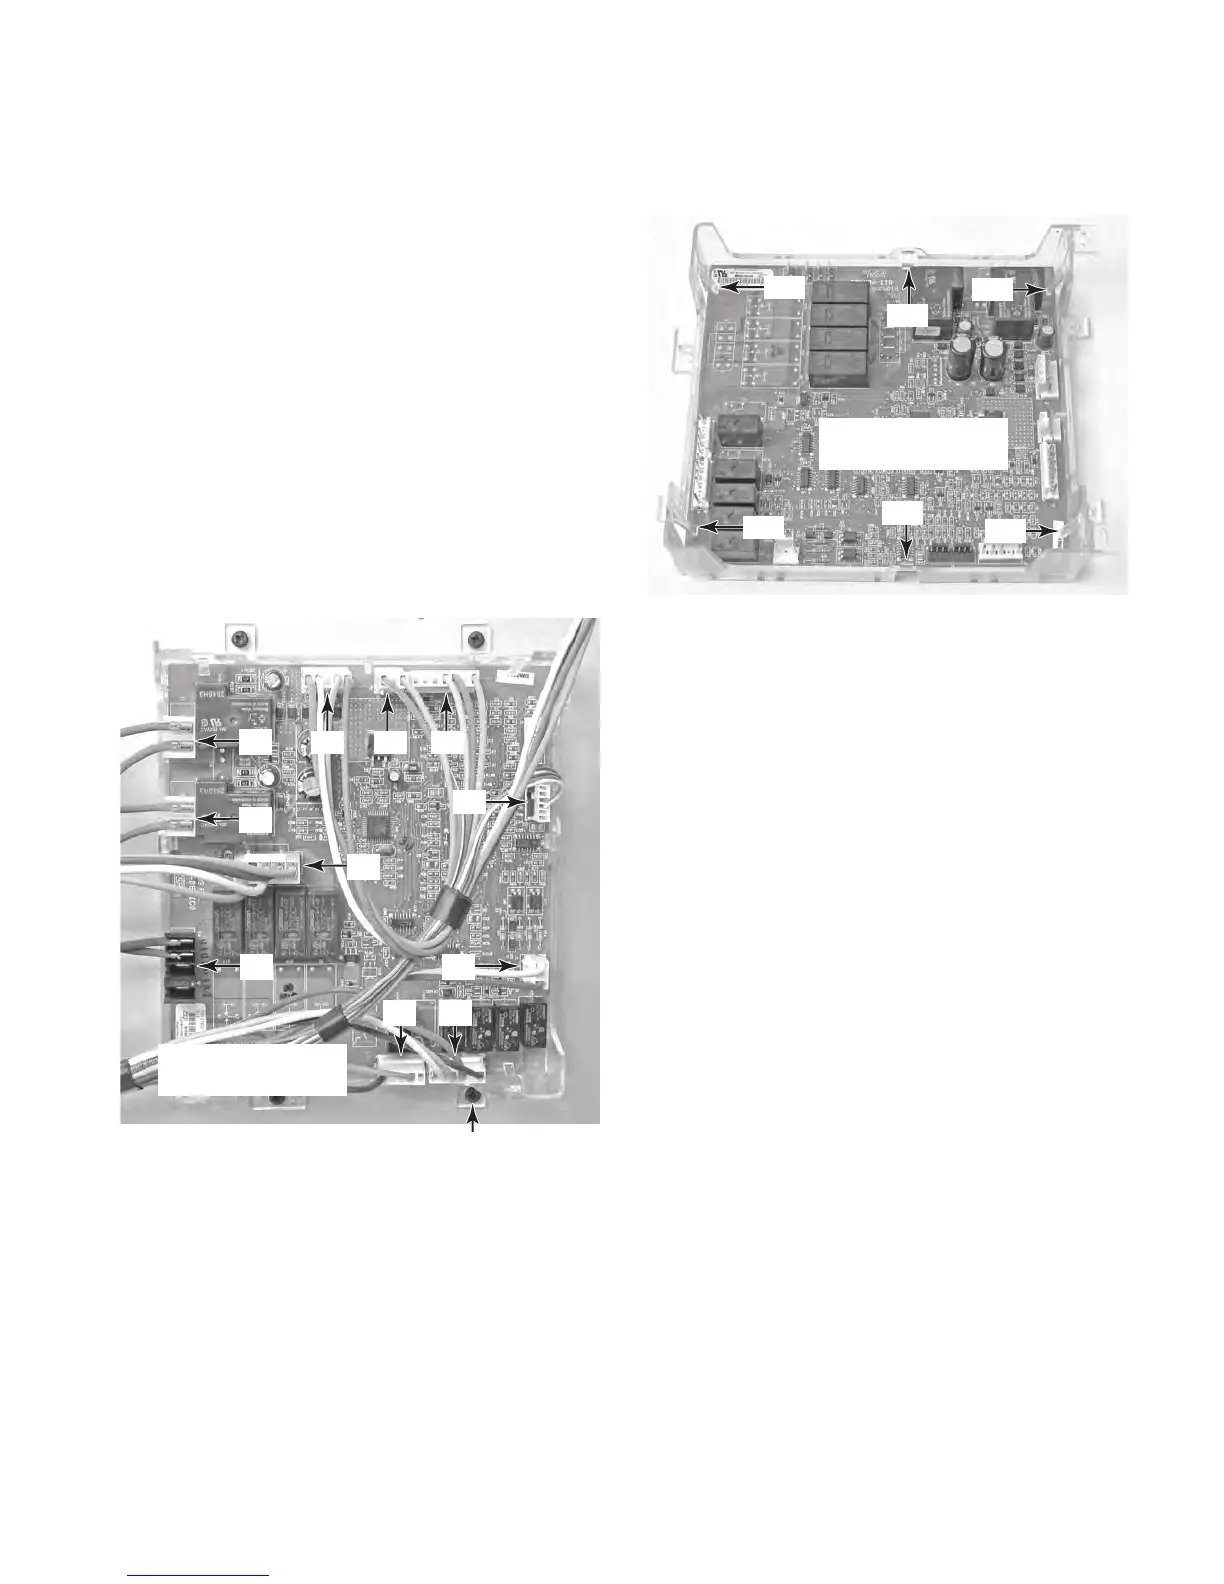
7. Disconnect the wire connectors from the
lower oven appliance manager board pins.
The wire connector colors are as follows:
T1 = PK/WH, PK
T2 = 2 PK
T3 = OR, RD, YL, BU
T4 = 2 BK
P9 = GY, BK
P8 = BK, OR, GY, YL, BK/WH
P7 = VI, WH
P2 = 2 VI, OR, WH
P1 = PK, BR, TN
P5 = GN, PK/WH
P6 = BR, OR, YL, BU
8. Remove the four lower oven appliance
manager housing screws and remove the
housing assembly.
9. Unclip the six tabs from the lower oven
appliance manager and remove it from the
housing.
Lower Oven
Appliance Manager
T1
T2
T3
T4
P8
P7
P2
P1 P5 P6
P9
Housing Screw (1 of 4)
Tab
Tab
Tab
Tab
Tab
Tab
Lower Oven
Appliance Manager