22 23
• AttachingthecameratotheBodyPieceviatheTiltingHeadAdaptor(fordetailsonhowtoattachtheTiltingHead
Adaptor to your camera, please refer to ‘Attaching the Tilting Head Adaptor to your camera’, page 21).
Note:Thecamerapositioncanbeadjustedhorizontally,plusthecameraanglecanberotatedupwardsordownwards
by loosening or tightening the nut on the Tilting Head Adaptor.
• AttachingthecameratotheBodyPieceviatheQuickReleaseAdaptorandQuickReleaseAdaptorsocket(fordetails
on how to attach the Quick Release Adaptor with socket to your camera, please refer to ‘Attaching the Quick Release
Adaptor with socket to your camera’, page 21).
Note:Thecamerapositioncanbeadjustedhorizontallywhenusingthismethod.
• AttachingthecameradirectlytotheBodyPiece.
Note:Thehorizontalandverticalpositionofthecamerawillbexedwhenusingthismethod.
[continued...]
Mounting your camera
Mounting onto your board
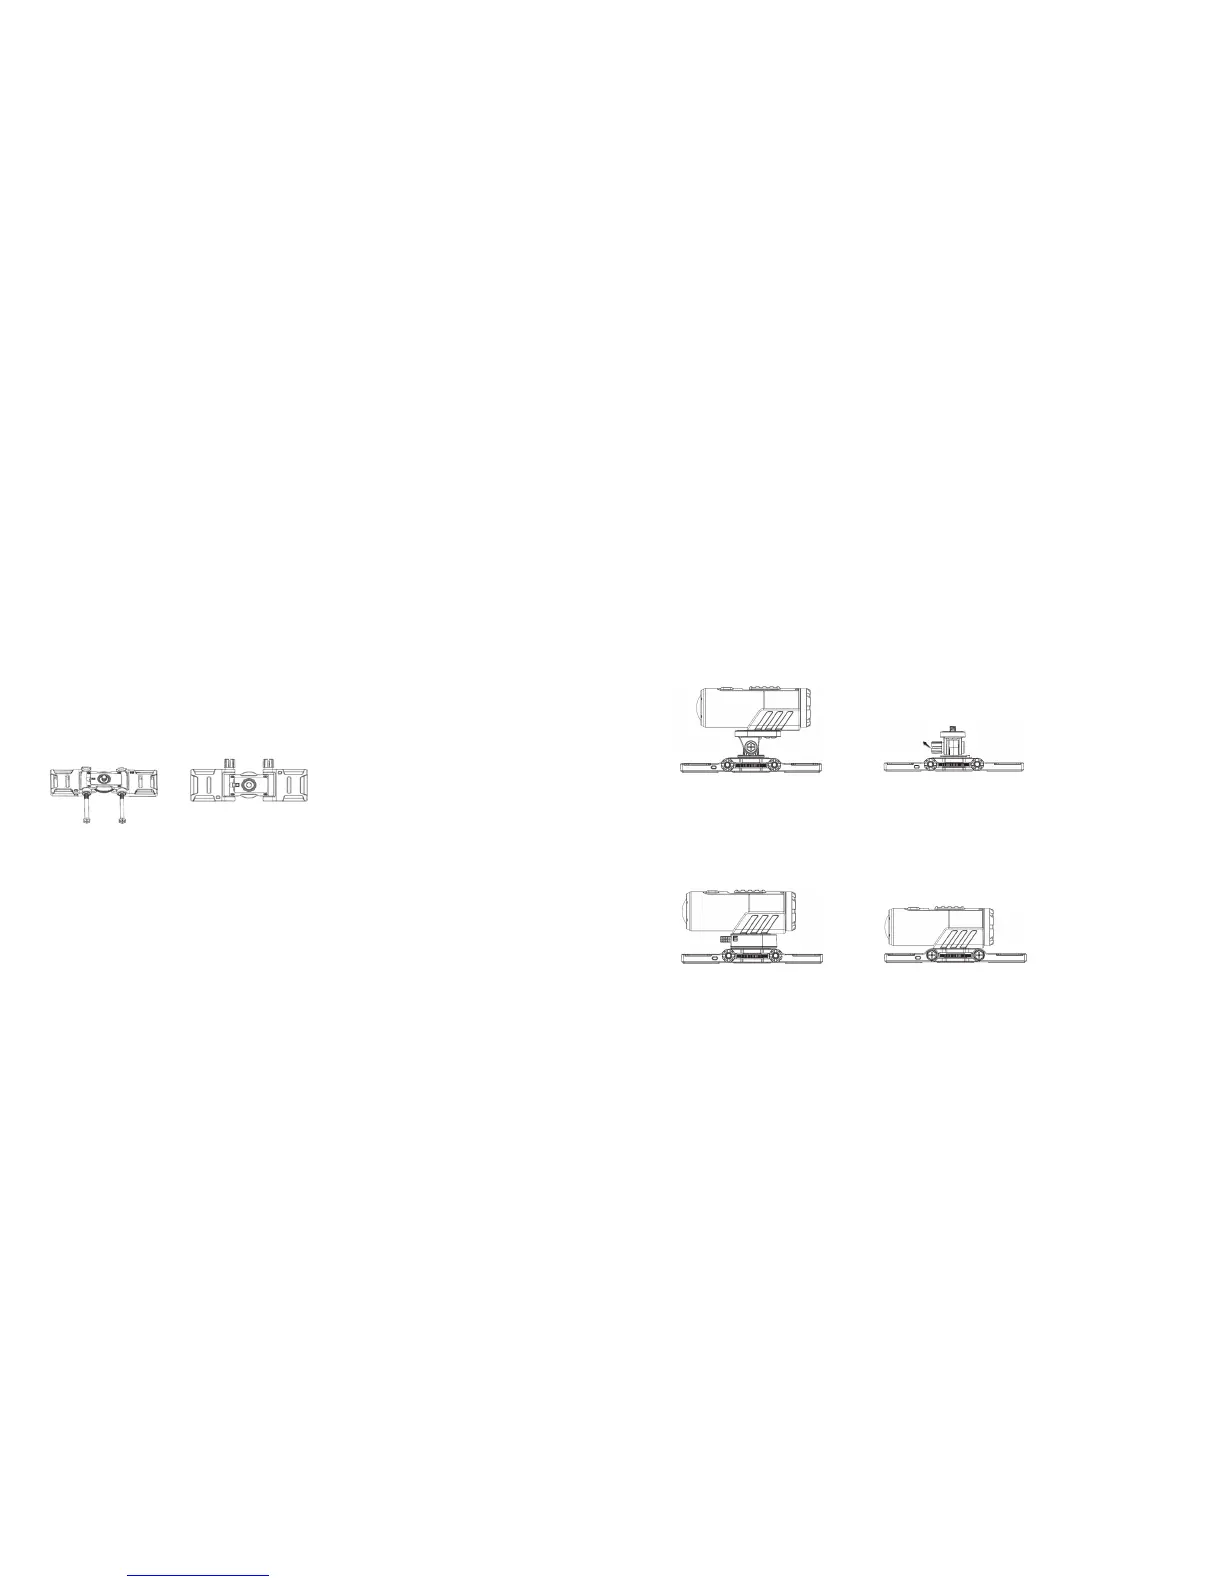
Assembling the Flat Mount
• AttachtheFlatWingstotheleftandrightsideoftheBodyPieceaccordingly
Note: Please make sure you install the Flat Wings with the 3M adhesive facing downward and fit the gears of the
Flat Wings and the Body Piece correctly on both sides.
• Inserttheboltsthroughtheholesandtightenthenut
Note: The angle of the Flat Wings can be adjusted: simply loosen the nut, adjust the Flat Wings and re-tighten the nut.
Mounting onto your board
1. Peel off the 3M adhesive’s protective film on the left and right Flat Wings and attach the Flat Mount onto the board.
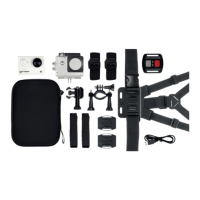
2. There are three ways to mount the camera onto the Body Piece:
Either use the Tilting Head Adaptor or Quick Release Adaptor socket to mount your camera onto the Body Piece or
attach your camera directly onto the Body Piece. Please note that the Tilting Head Adaptor provides a wider angle
to allow for greater adjustment
Rotate the nut