DocumentNo.:KE-4025-06 39/50
TypeBSW-0
A compressed heavy-duty spring is packed within the spring case of the
Type BSW actuators. The spring cover may be pushed out and cause
personalinjuryifthetierodusedforfixingthespringcaseisloosenedand
removed. When disassembling the spring case, make sure to follow the
instructionsgiveninthismanual.
■Preparation
Priortodisassemblyofactuators,preparethreadedrods,springpinsandnutsasshowninthetablebelow:
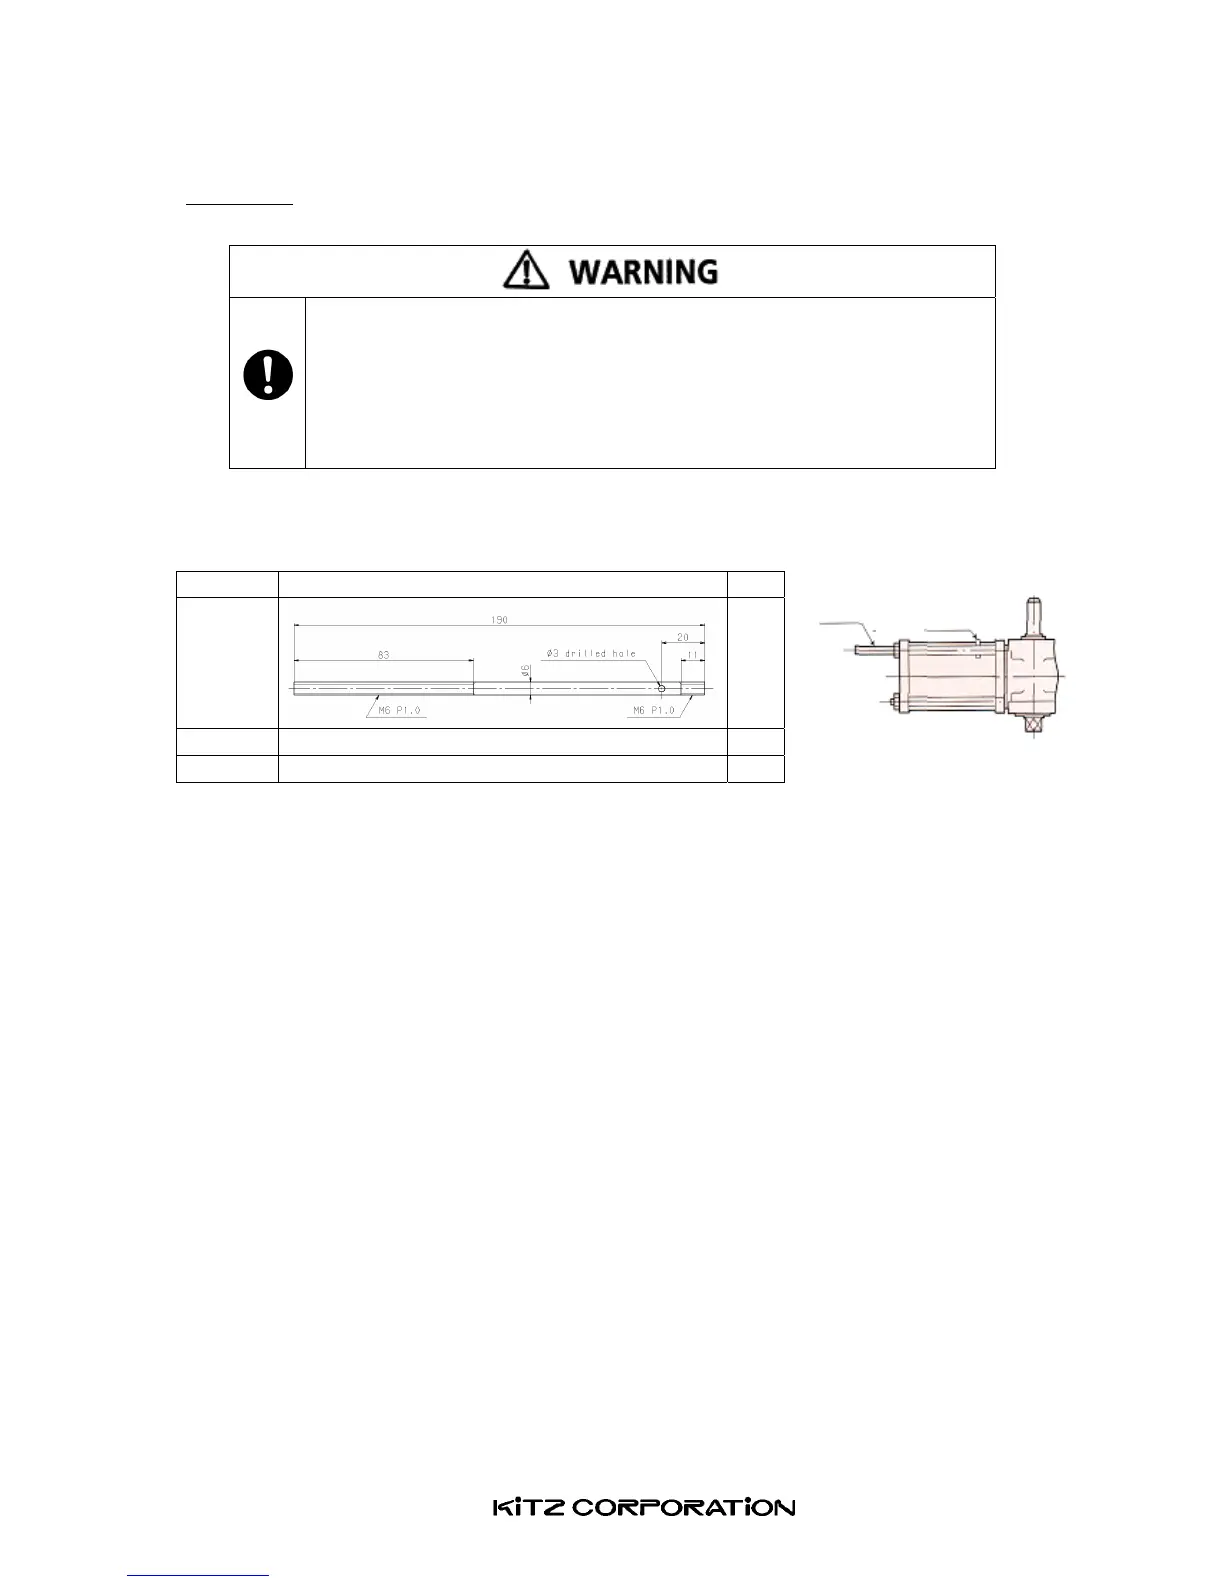
Parts Shapeanddimensions(mm) Qty
Threaded
rod
4
Springpin φ3×16long 4
Nut M6P1.0 4
■Disassembly
1.ReducetheInternalpressuretotheatmosphericlevelandremovetheairtubing.
2.Fullyrotatethemanualhandwheel〈9〉clockwise.
3.Removethehexagonalbolts〈94〉anddisassembletheactuatorfromthebracket〈93〉.
4.Removethehexagonalcapscrew〈10〉,springwasher〈145〉,wheelwasher〈43〉andthehandwheel〈9〉.
5.Removethespringcovernut〈133B〉andstopper〈49〉.
6.Removeoneofthetierod〈56〉andnut〈55〉fromtheactuator.
7.Mountoneofthefour threaded rodspreparedin advancewhere theremovedtierodwasmounted,and
secureitonthespringcover〈158〉withanut.Insertaspringpinintoaholedrilledonthethreadedrodfor
securedmounting(Fig.27).
8.Repeatthisworkwithallotherthreadedrods,springpinsandnuts,oneafteranother.
9.Gradually,alternatelyanddiagonallyloosenthenutsandremoveallwhenthespringhaslostitsrecoiling
force.Thenremovethespringcover〈158〉,springcase〈100〉andspring〈109〉.
10.Removeallthreadedrods.
11.Movethespring retainer〈150〉byhandapart from the rod guide〈136B〉tomove the piston〈177〉towards
anotherrodguide〈136A〉.
12.Removethehexagonalcapscrew〈35〉anddisassemblethecylinder〈2〉fromhousing〈1〉,takingcarenotto
scratchtheinternalsurfacecoating.
13.Removethepistonnut〈13a〉andthepiston〈177〉.
Threadedrod
Springpin
Fig.27