Document No.:KE-4011-03 Page: 22/27
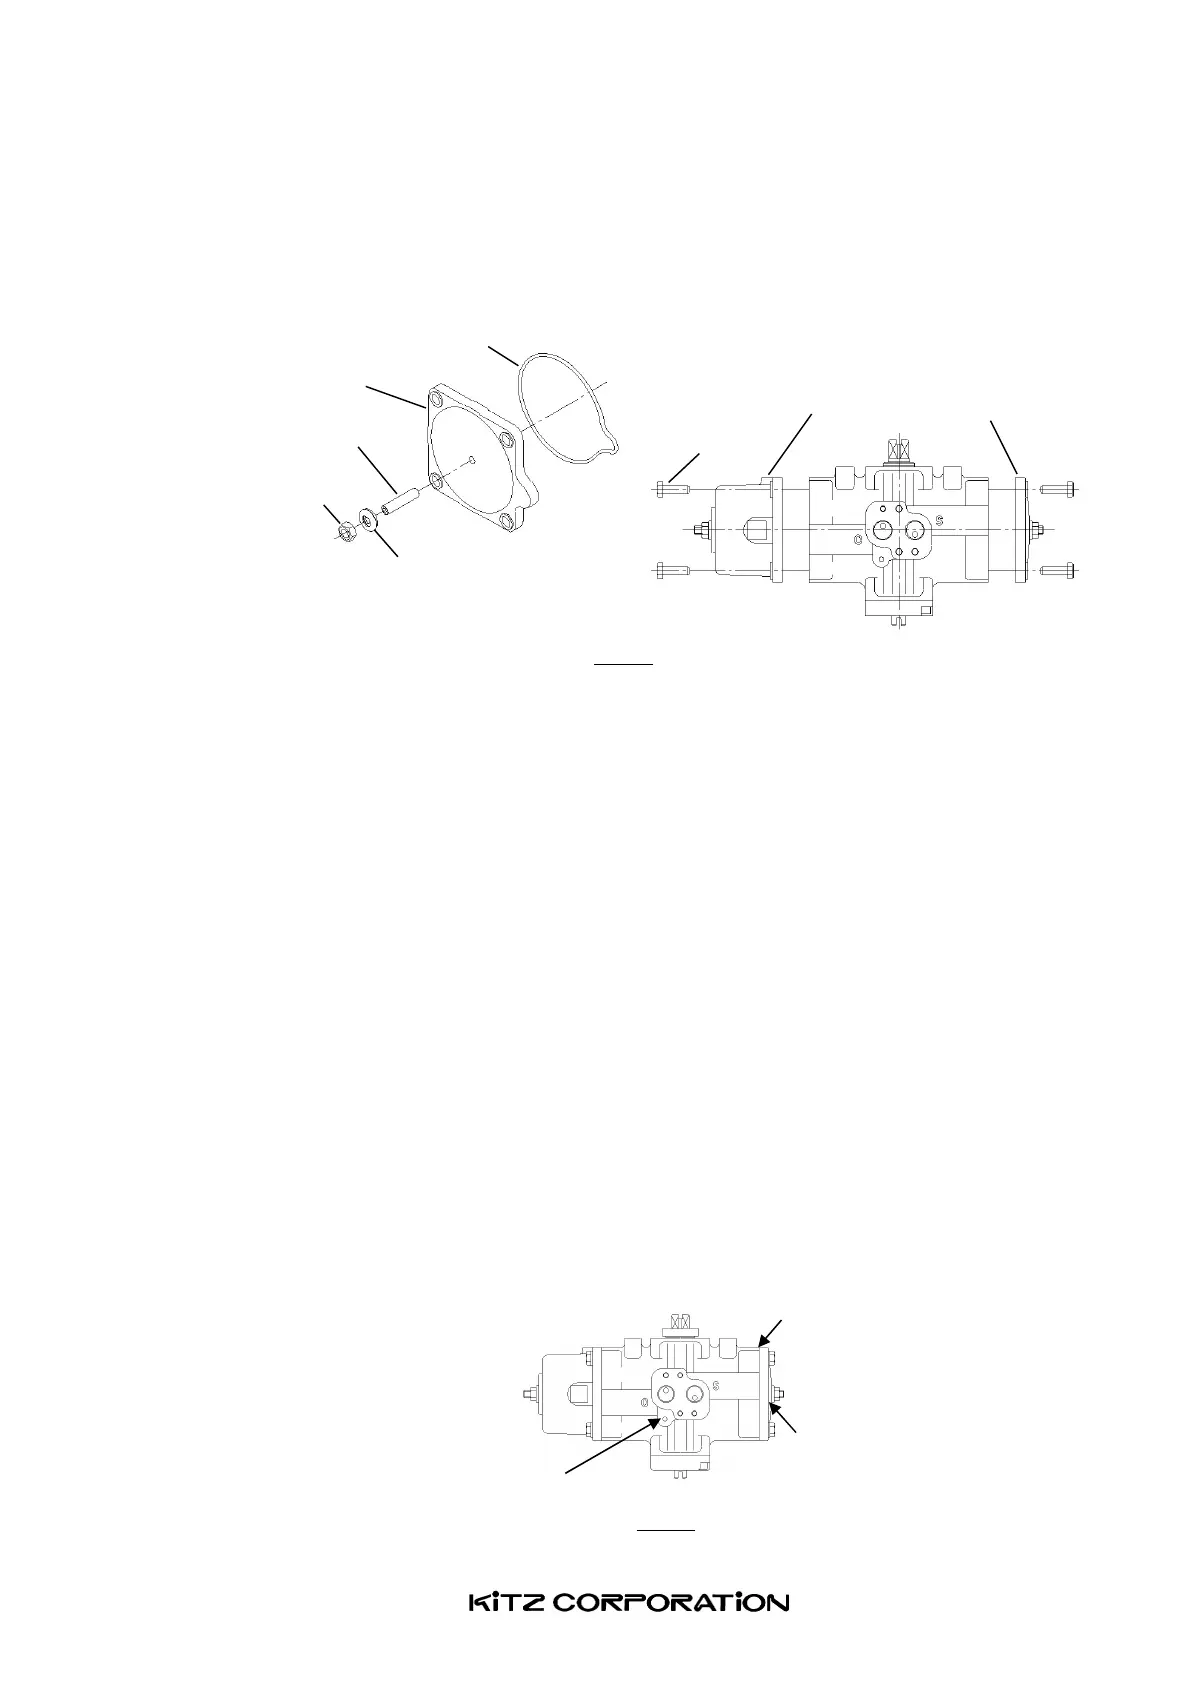
(9) Mount the O-ring, stopper bolts, seal washers and nuts into the end cover and spring unit.
Assemble the end cover and spring unit assembly into the housing (Fig.21). The threading
torque values are provided in Table 3.
Fig.21
(10) Adjust the shaft rotating angle (valve opening range), according to Section 14 of this
manual.
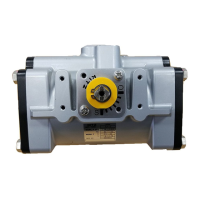
(11) Check the leakage of air from an actuator with soap solution, according to the following
procedures:
① Apply the operating pressure to Port [O] and check if any external air leakage is
detected through the contact of the housing with the end cover, the stopper bolt and
the seal washer in the right-hand side ( Fig.22 ).
② Cover the leak detecting hole below the solenoid valve mounting pad with a soap film,
and check if any air leakage is detected there during a travel of the piston. Don’t
apply the soap film directly to the opening, since the soap may penetrate inside the
housing and cause malfunction of an actuator.
③ Leak test should be done after 15minuits to 30minuts past since pressurizing actuators.
If not, internal air residue remains and the leak test cannot be done with accuracy.
④ Wipe off all soap solution afterwards.
If any leakage has been detected, disassemble the actuator again to check if any part or
component is scratched, deformed or worn, and replace them, if necessary, with KITZ genuine
parts.
Fig.22
Spring unit assembly
End cover <2A>
End cover / housing contact
Stopper bolt / seal washer
Leak detecting hole