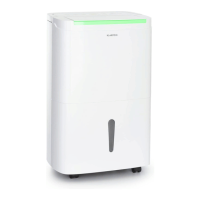
Installing a Continuous Drainage
If you are not intended to pour water in tank o frequently, a drainage pipe (with inner diameter of
9mm) can be connected on the back of this dehumidier for drainage.
1. Find the position to block
the outlet on side. Shear
o the rib connecting the
plastic plate blocking the
outlet and dehumidier
body and take it out.
2. Connect one drainage
pipe in proper length to
the outlet rmly.
3. Before use please check
the drainage pipe for so-
lid connection carefully in
order to avoid leakage of
water.
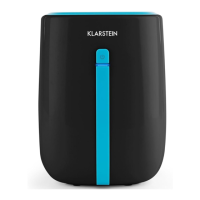
Cleaning and Care
Cleaning of PP Strainer
1. Pull out power plug before maintenance or re-
pair in case of electric shock.
2. Only PP strainer in this dehumidier can be
cleaned.
3. If the strainer isn‘t very dirty, it‘s only required
sucking the surface with dust collector.
4. If the PP strainer is very dirty, please clean the
strainer with fresh or warm water, and the tem-
perature of warm water is approximate 40°C.
NOTE: To avoid deformation, the cleaned strainer should be put in dry air for natural drying and be far
away from any heat source. Please do not clean with chemical solvents such as alcohol or gasoline.
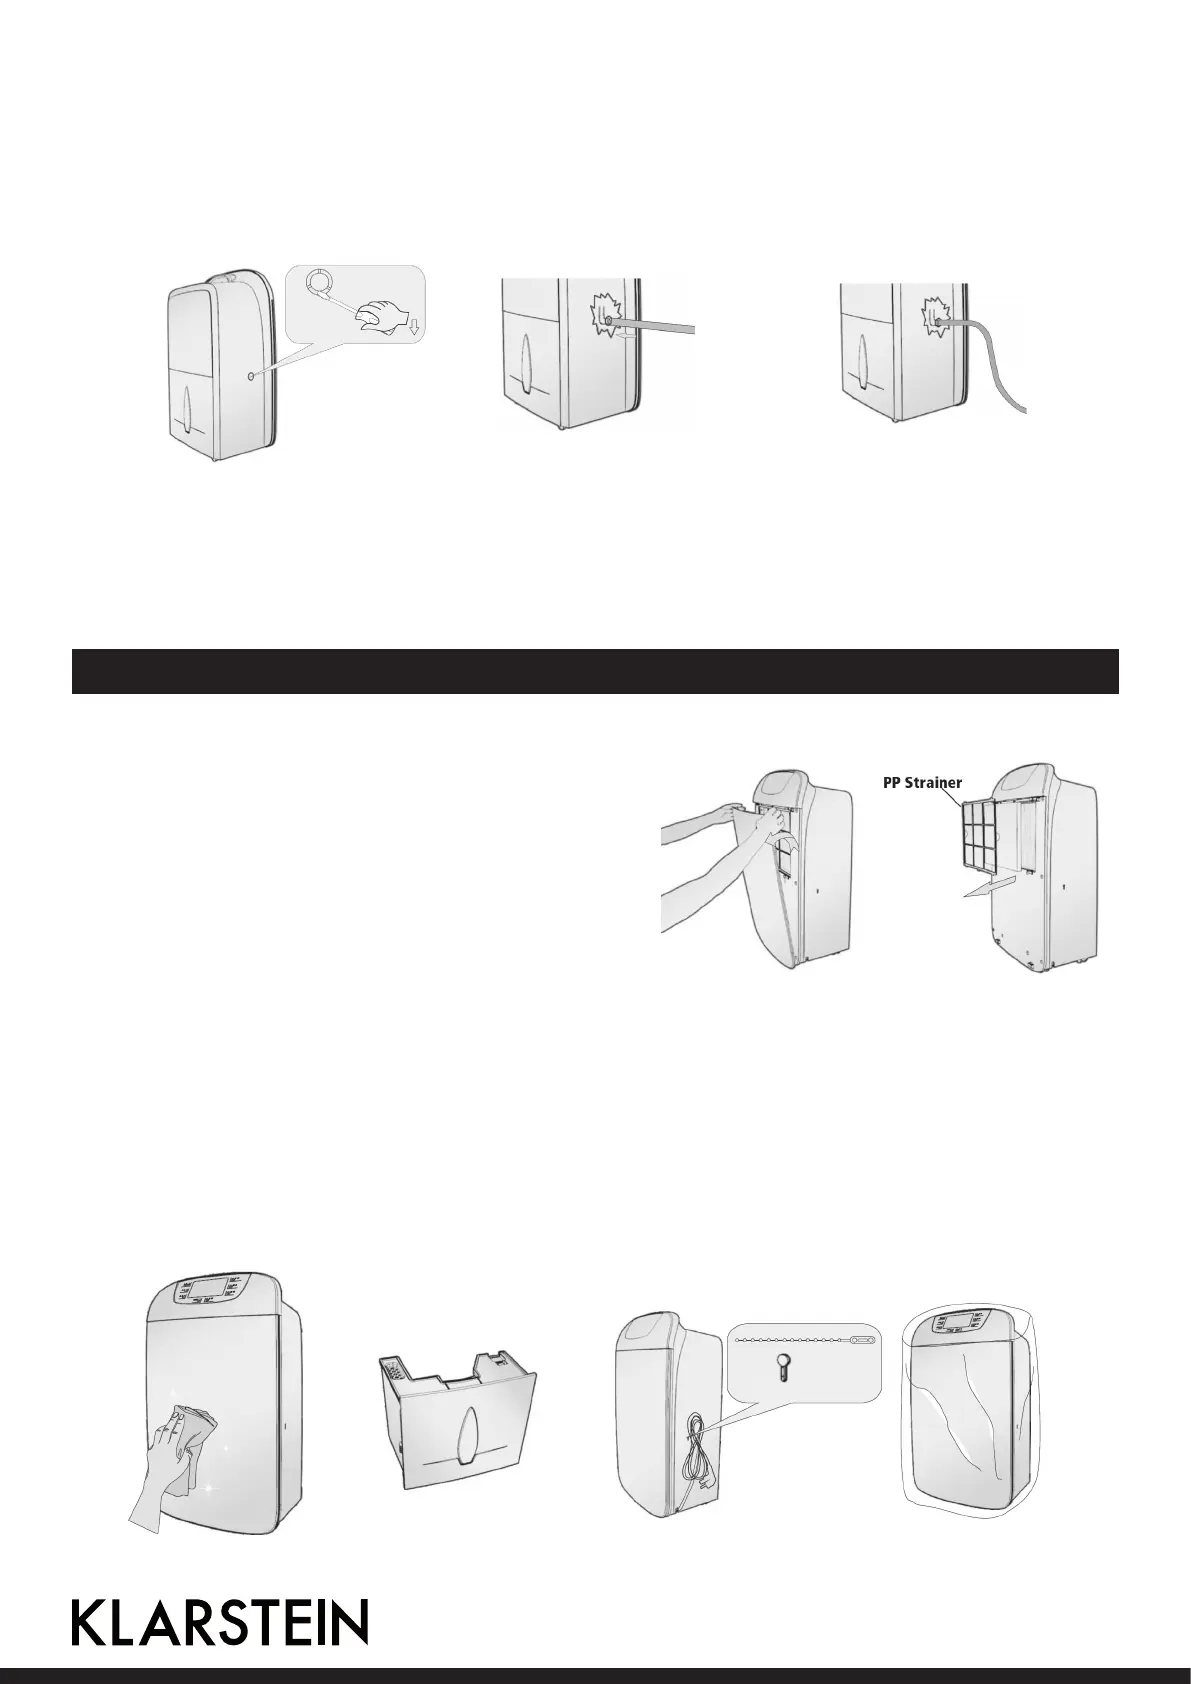
Cleaning and storing the dehumidier
1. Please clean water tank or its cover with soft cloth dipped in cold water or warm water so as to
avoid mildew inside. If the dehumidier is indeed very dirty, neutral cleaning agents can be used
to wipe.
2. After wiping, x power line and entangle the whole dehumidier with plastic bag of dehumidier
body or other bags to avoid pollution by ying dust, etc. for use next time.
20