21 of 30 DI-129/11/07.07.15
7 MAINTENANCE
o KOBRA CYCLONE is a simple and easy machine
to operate.
o The Cyclone does not need oiling or lubrication of
the cutting blades
o The Cyclone does not need any service or
maintenance except that:
o Filter bag should be checked regularly and
replaced when full.
o The plastic waste bag level should be checked
regularly even If the bag full light is not activated.
o Sharpness of the cutting blades should be checked
regularly.
Mantaining the blades and replacement in case of
dull blades or damaged blades allows a more
efficient shredding operation and reduces the time
required to complete the shredding of the material.
To change cutting blades see paragraph 8.1
8 REPLACEMENT OF PARTS AND MAIN
SERVICE OPERATIONS
8.1 How to change the cutting blades
° DISCONNECT the Cyclone from the supply power by
turning the main switch (U) [Sec. E-
Fig.2] to “0” position and disconnect the
plug of the power cord from main power supply
° Open lock with the standard key and remove
plastic side cover (M) [Sec. D-Fig.8]
° Open door the shredding chamber door and make
sure the inside of the chamber is well
illuminated (a battery operated lamp can be
inserted into the shredding chamber)
° Loosen and remove the nut on top of the blades
and start removing each blade and spacer from the
shaft.
° Replace blades by following the correct
mounting sequence and the position of the
sharpened edges as shown in the following
picture.
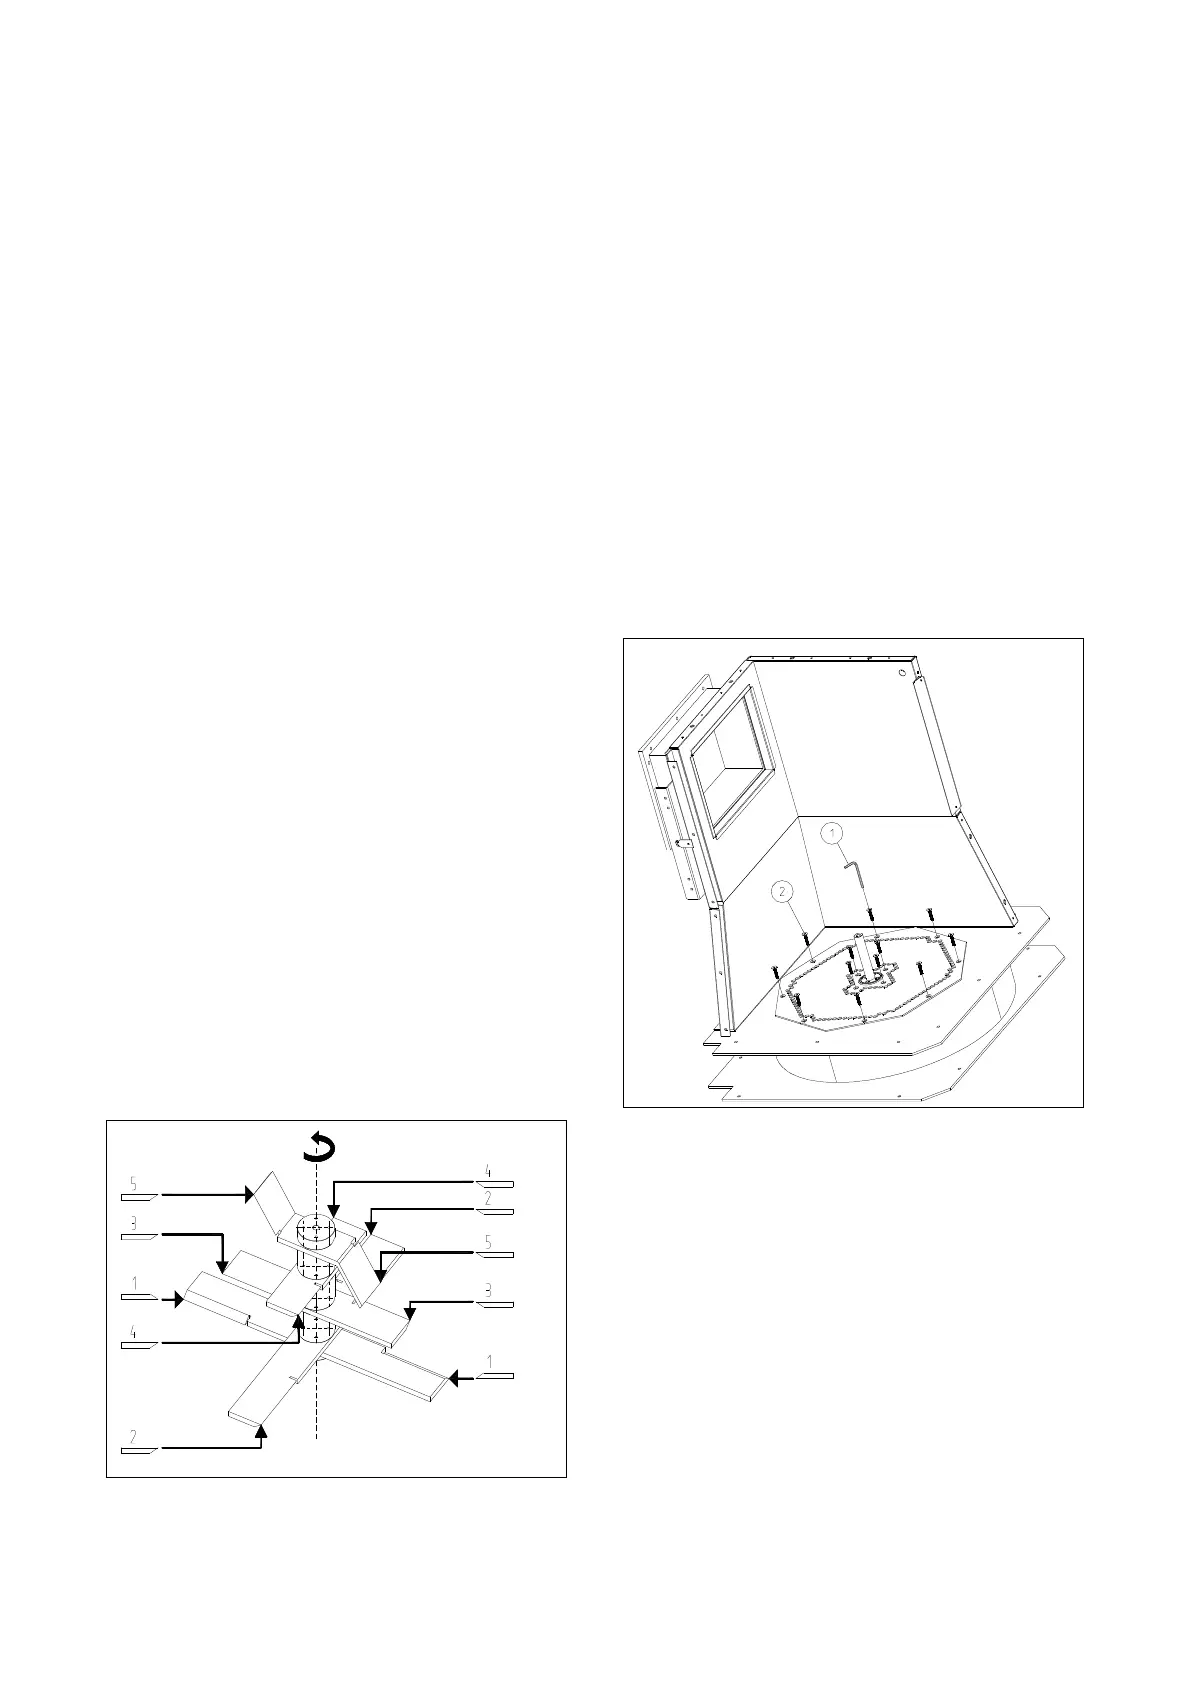
CORRECT BLADES POSITIONS AND DIRECTION
8.2 HOW TO CHANGE THE SECURITY LEVEL
(How to change the screen)
° DISCONNECT the Cyclone from main power
supply and follow the steps of paragraph 8.2.
After blades have been removed loosen and
remove 12 screws securing the metal screen to the
floor of the shredding chamber.
° Remove the screen from its position and install
the new desired screen by aligning the screw holes
of the screen with the corresponding mounting holes
and installing the 12 screen screws with washers in the
correct direction.
° Install the blades and spacers in their correct position
by following the above mounting sequence.