TP-6196 10/09 105Section 7 Disassembly/Reassembly
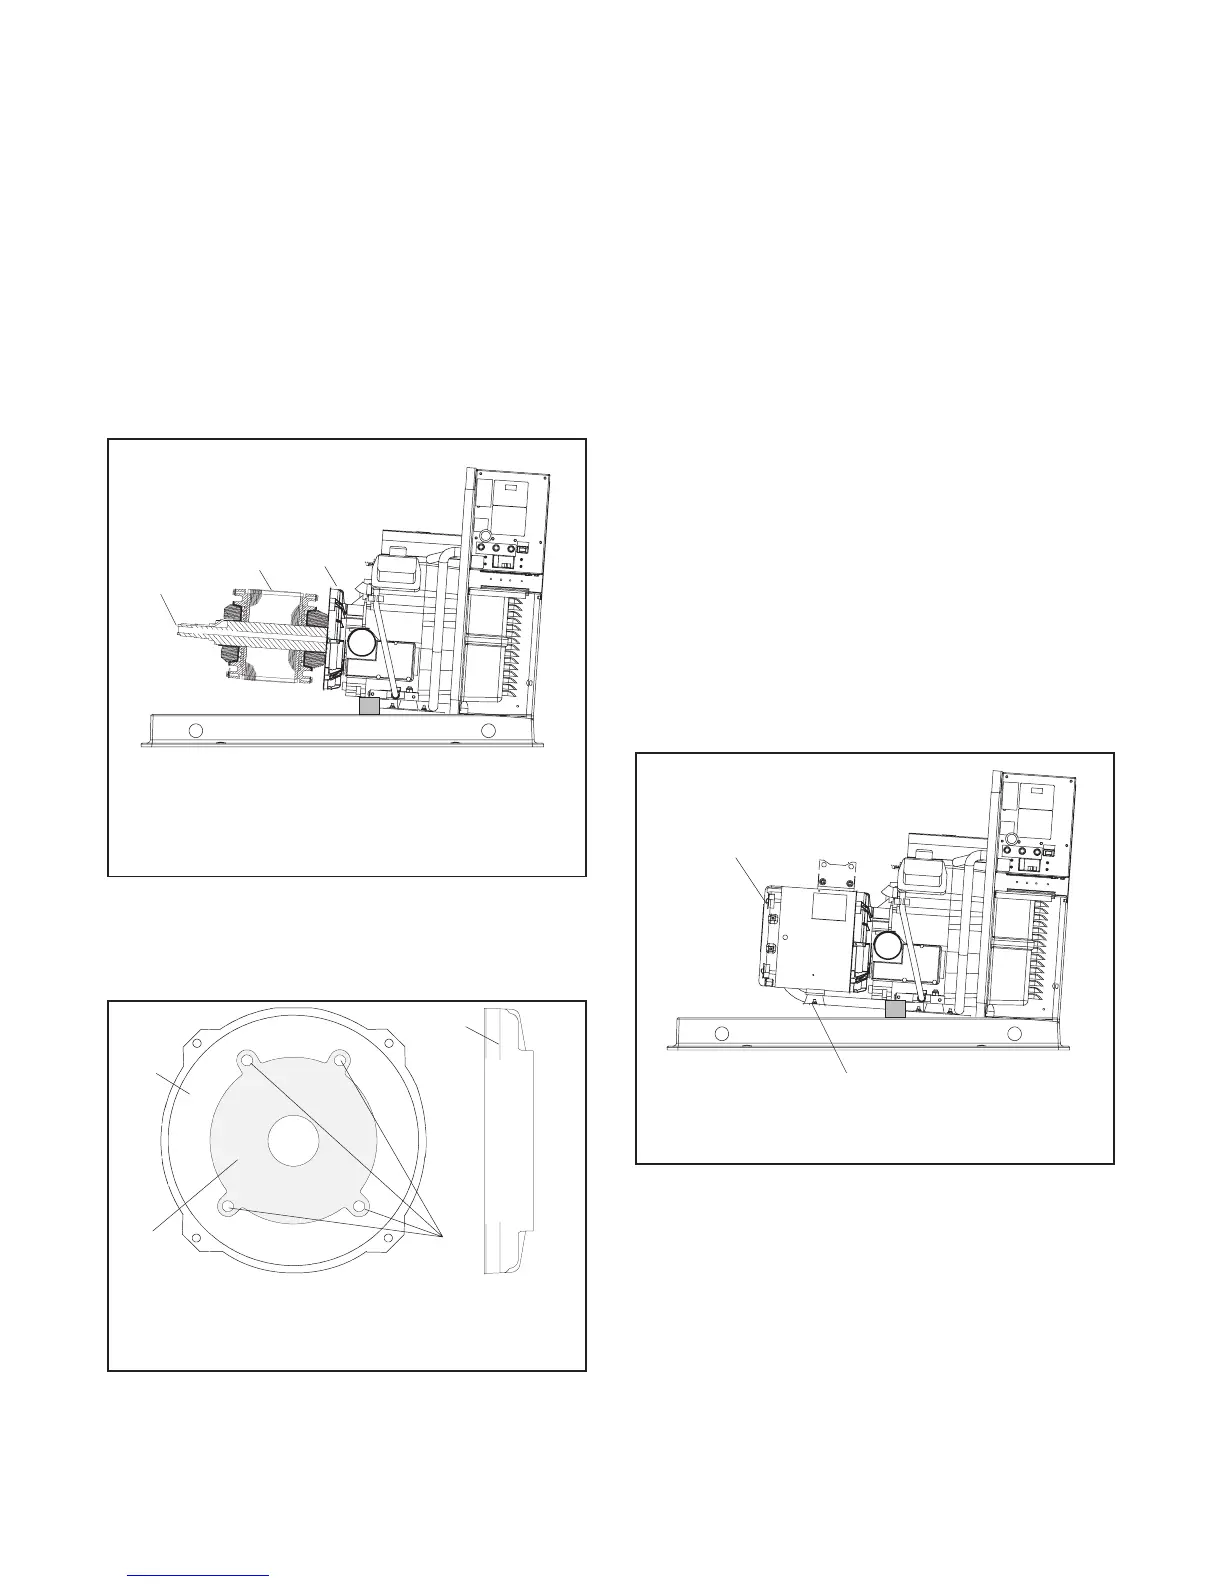
7. Remove the stator and rotor.
a. Remove the stator from the rotor.
b. Loosen and remove the thrubolt. Use a strap
wrench on the rotor to keep the rotor from
turning during loosening, if necessary. See
Figure 7-12.
c. Remove the rotor assembly by striking the side
of the rotor repeatedly with a soft-faced
hammer to loosen it from the tapered
crankshaft fitting. See Figure 7-12. Rotate the
rotor and strike it on alternate sides. Set the
rotor assembly aside.
GM29253A
2
1. Thrubolt and magnetic actuator
2. Rotor strike surface
3. Generator adaptor
1
3
Figure 7-12 Rotor and Thrubolt
8. Remove the four engine adapter mounting bolts.
See Figure 7-13. Remove the generator adapter.
A-358000A-B
1
3
4
2
1. Generator adapter
2. Generator fan guard
3. Engine adapter mounting holes
4. Alternator adapter guard
Figure 7-13 Generator Adapter
7.2 Re asse mbly
1. Reinstall the generator adapter onto the engine.
a. Attach the generator adapter and alternator
adapter guard to the engine using four
7/16-14 x 1.0 hex cap bolts and washers. See
Figure 7-13.
b. Torque the bolts to 40 Nm (28 ft. lb.).
2. Install the rotor. See Figure 7-12.
a. Clean the crankshaft stub and mating surface
on the fan hub. Do not use antisieze compound
when reassembling the rotor.
b. Install the rotor onto the engine crankshaft.
c. Thread the thrubolt through the actuator and
rotor into the crankshaft. Do not tighten the
thrubolt.
3. Install the stator and end bracket.
a. Align the stator so that the alternator frame
vibromount points down toward the generator
base. See Figure 7-14. Install the stator
assembly around the rotor.
GM29253A
1. End bracket
2. Alternator frame vibromount
1
2
Figure 7-14 Generator Set, Right Side (typical)
b. Align the alignment mark on the top of the stator
with the slot in the generator adaptor.
c. Route the leads connected to the alternator end
bracket through the opening in the base of the
alternator frame.
d. Place the end bracket onto the stator assembly,
lining up the alignment marks on the top of the
stator and end bracket.

 Loading...