Section 11
Reassembly
11
11.13
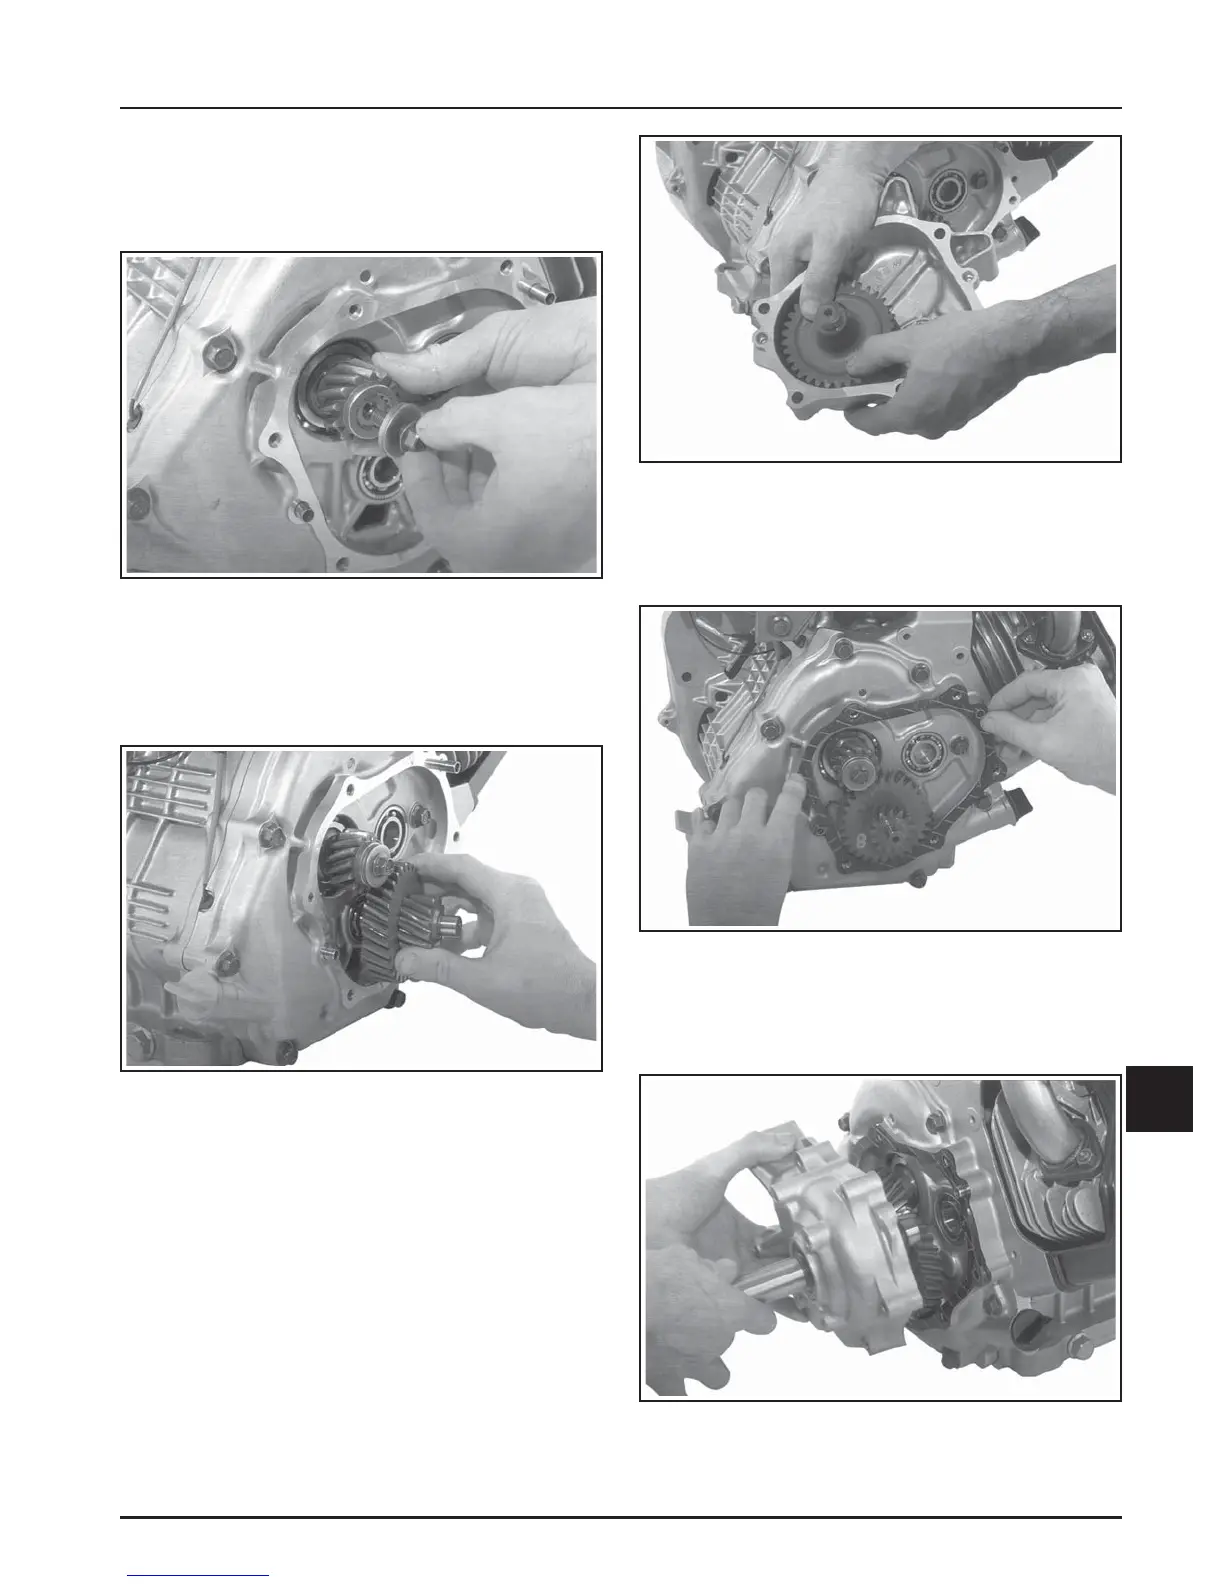
3. Slide the crankshaft gear onto the splines of the
crankshaft. Secure with the flat washer and hex
flange screw. Torque the screw to 20-24 N·m
(177-212 in. lb.).
Figure 11-48. Installing Crankshaft Gear, Mounting
Screw, and Washer.
4. Lubricate the bearing surfaces with oil, and
install the counter gear into the closure plate
bore, engaging teeth with gear on crankshaft.
Figure 11-49. Installing Counter Gear Assembly.
5. Lubricate the bearing surfaces with oil, and
install the output shaft/gear assembly into the
cover. See Figure 11-50.
Figure 11-50. Installing Output Shaft Assembly.
6. Reinstall the two dowel pins into their respective
locations in the closure plate. Install a new
housing/cover gasket (dry) onto the dowel pins.
Figure 11-51. Installing Dowel Pins and Gasket.
7. Install the reduction housing cover, and secure
with the six mounting screws. Torque the screws
to 28-32 N·m (247-283 in. lb.).
Figure 11-52. Installing Cover.