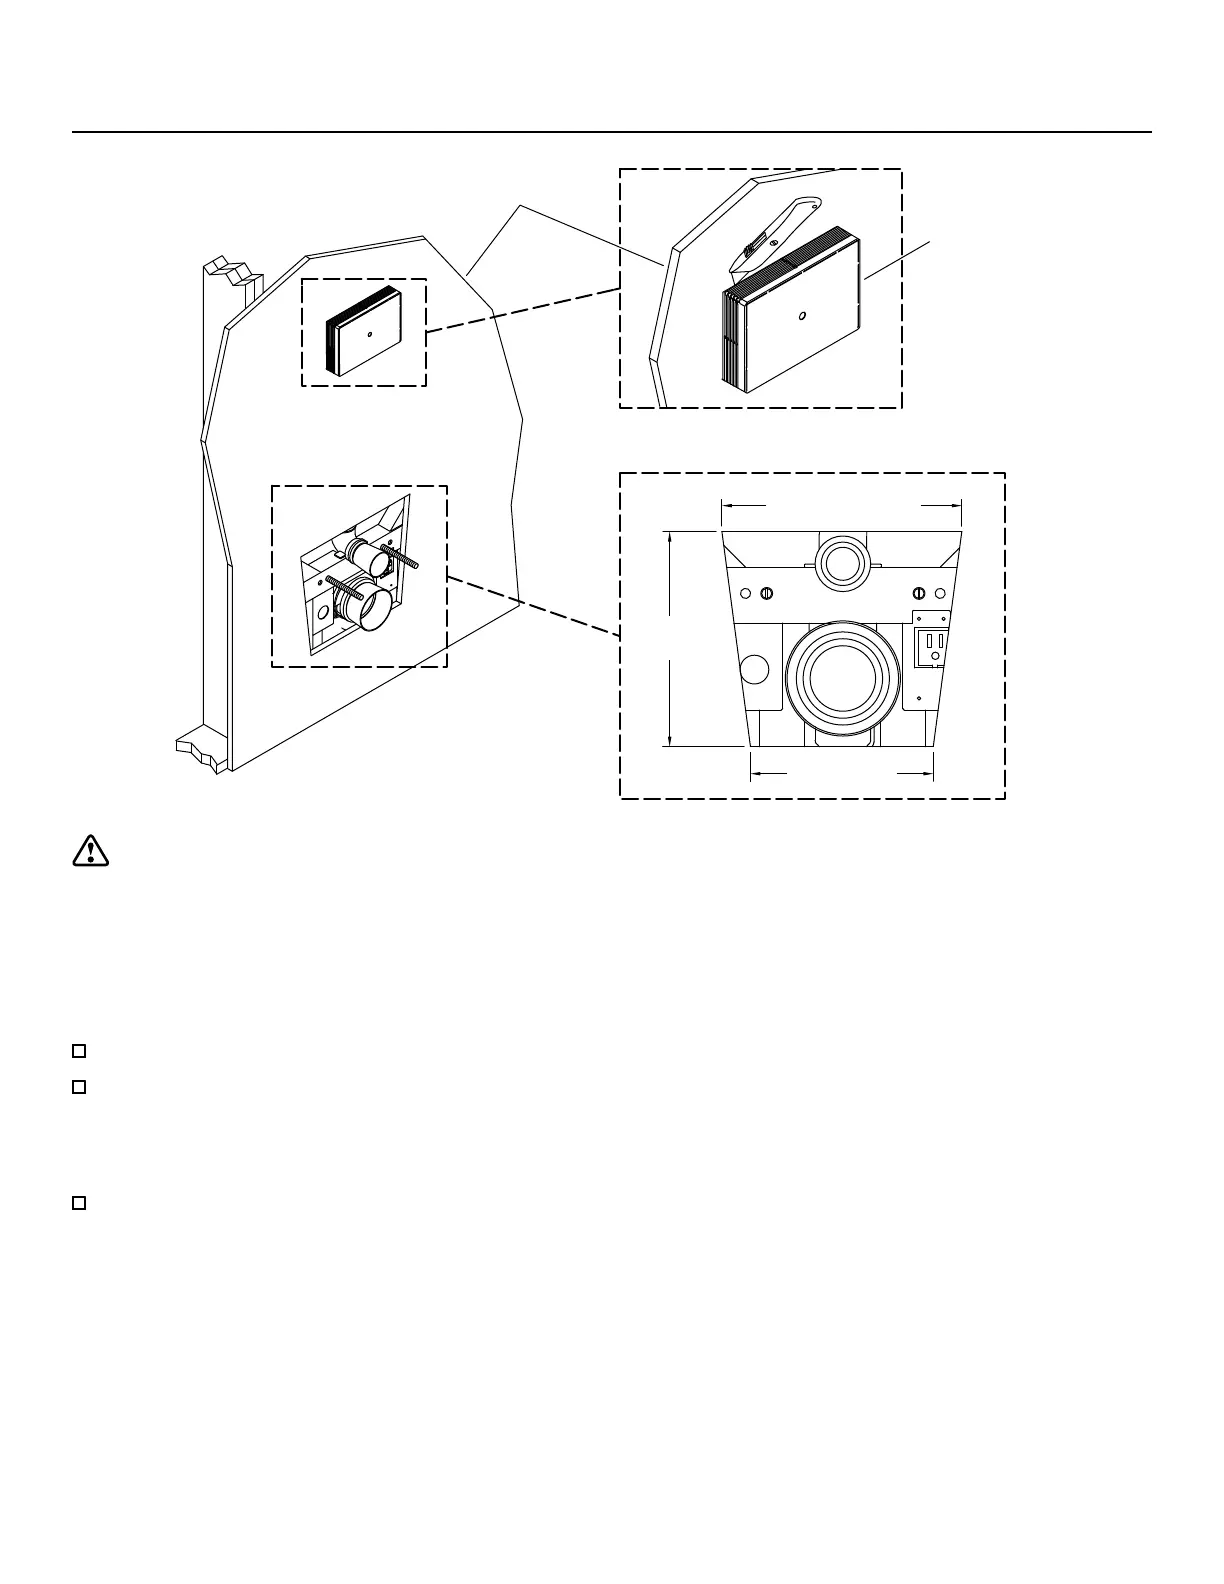
7. Install the Finished Wall
Finished Wall
9-1/4"
(235 mm)
Front View
10-1/2" (267 mm)
8" (203 mm)
Flush Shield
CAUTION: Risk of product damage. Do not puncture the water tank with fasteners. A template to assist in
securing the nished wall is located on the inside of the box lid. Hang this template on the ush shield to identify
the tank location.
IMPORTANT! Gypsum board may compromise the load strength of the toilet installation. Kohler Co. recommends the
use of cement board or tile backer board for the wallboard backing.
NOTE: The wall thickness should not exceed 2-3/4" (70 mm).
Install the nished wall.
Use a sharp utility knife to carefully trim the ush shield even with the nished wall.
NOTICE: Retrieve and retain the actuator frame locking pins and bowl nut, washer, and cap set from inside the ush
shield.
Discard the trimmed o portion of the shield.
Kohler Co. 11
1430967-2-B
 Loading...