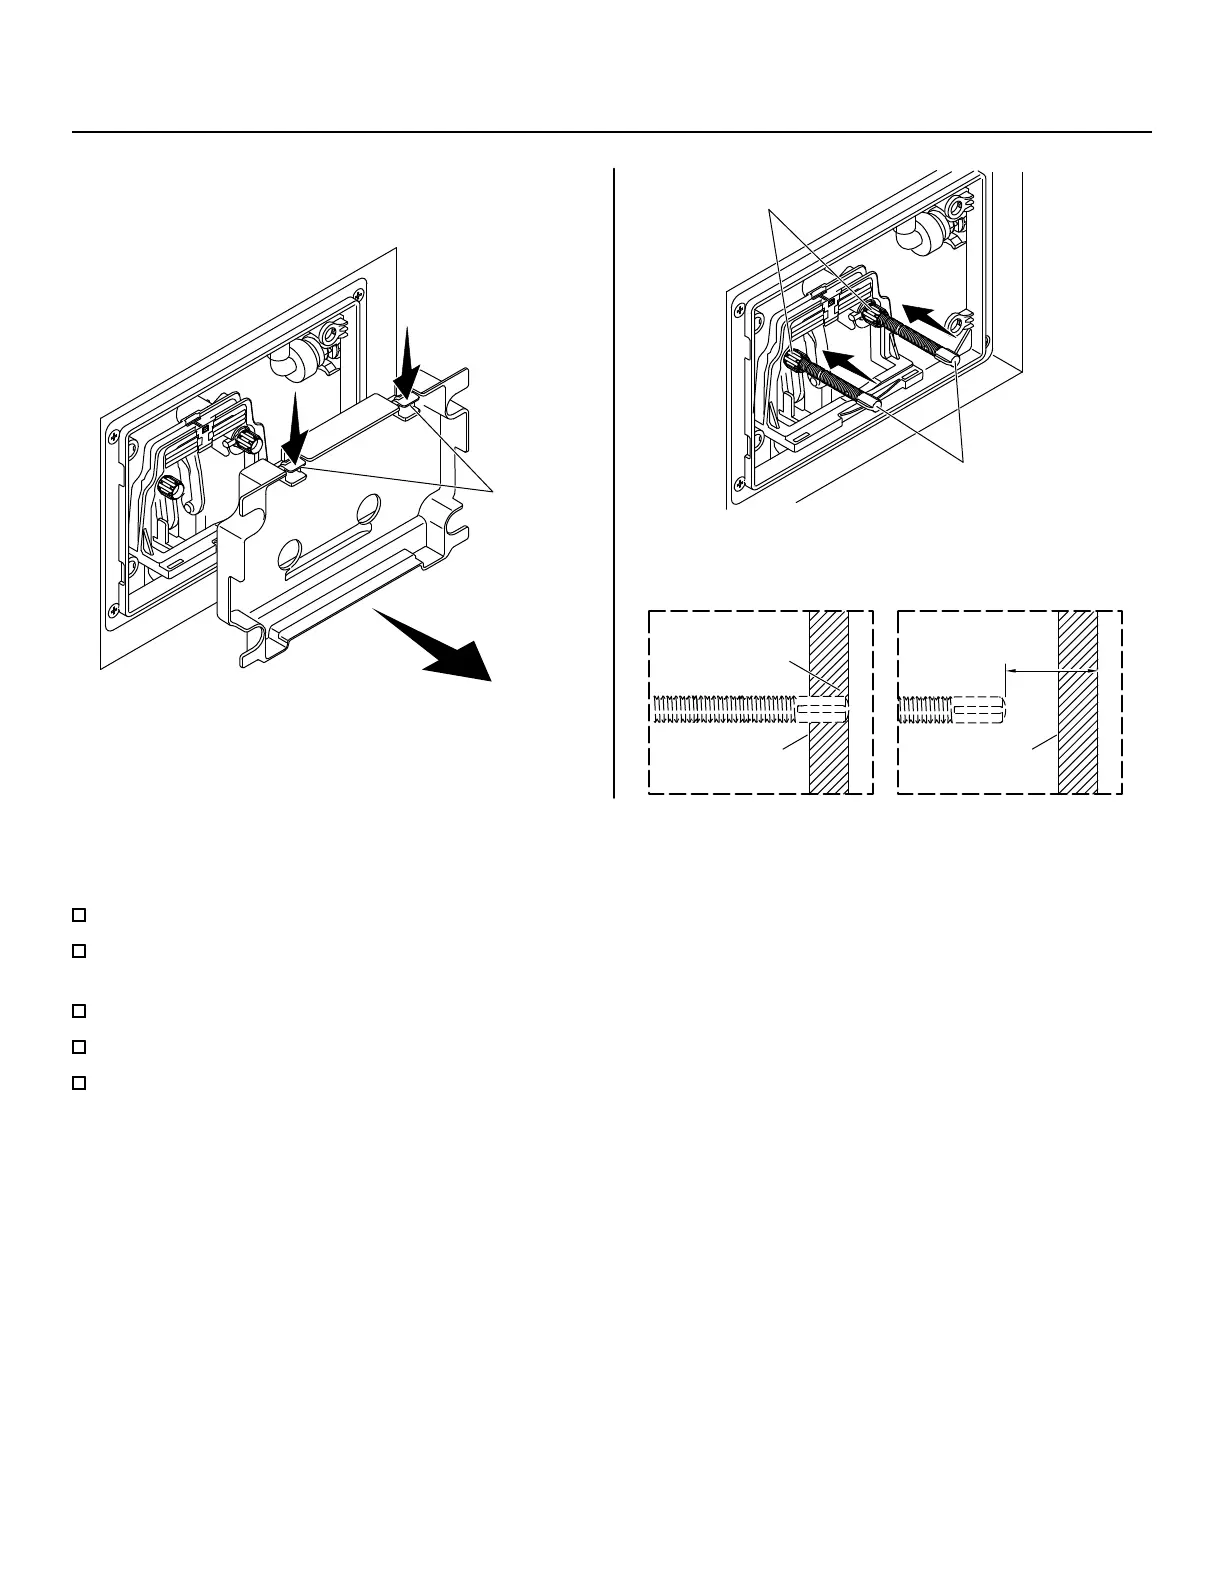
8. Install the Push Rods
Flush
Nuts
Push Rods
Finished Wall
1/2"
(13 mm)
Finished Wall
Other ModelsK-4177, K-5413, K-8857
Models
Tabs
NOTICE: The service cover contains information on removal and adjustment of the ush valve, ll valve, and debris
screen. Retain the service cover for future reference.
Remove and retain the service cover by pressing down on the tabs and pulling forward.
Faceplates K-4177, K-5413, and K-8857: Thread the push rods into the actuator assembly so they are ush with the
nished wall.
All Other Faceplates: Thread the push rods into the actuator assembly 1/2" (13 mm) behind the nished wall.
All Models: If needed, trim the threaded end of the push rods.
Secure the push rods in place with the push rod nuts.
1430967-2-B
12 Kohler Co.
 Loading...