3-37
PC210/240-ENG
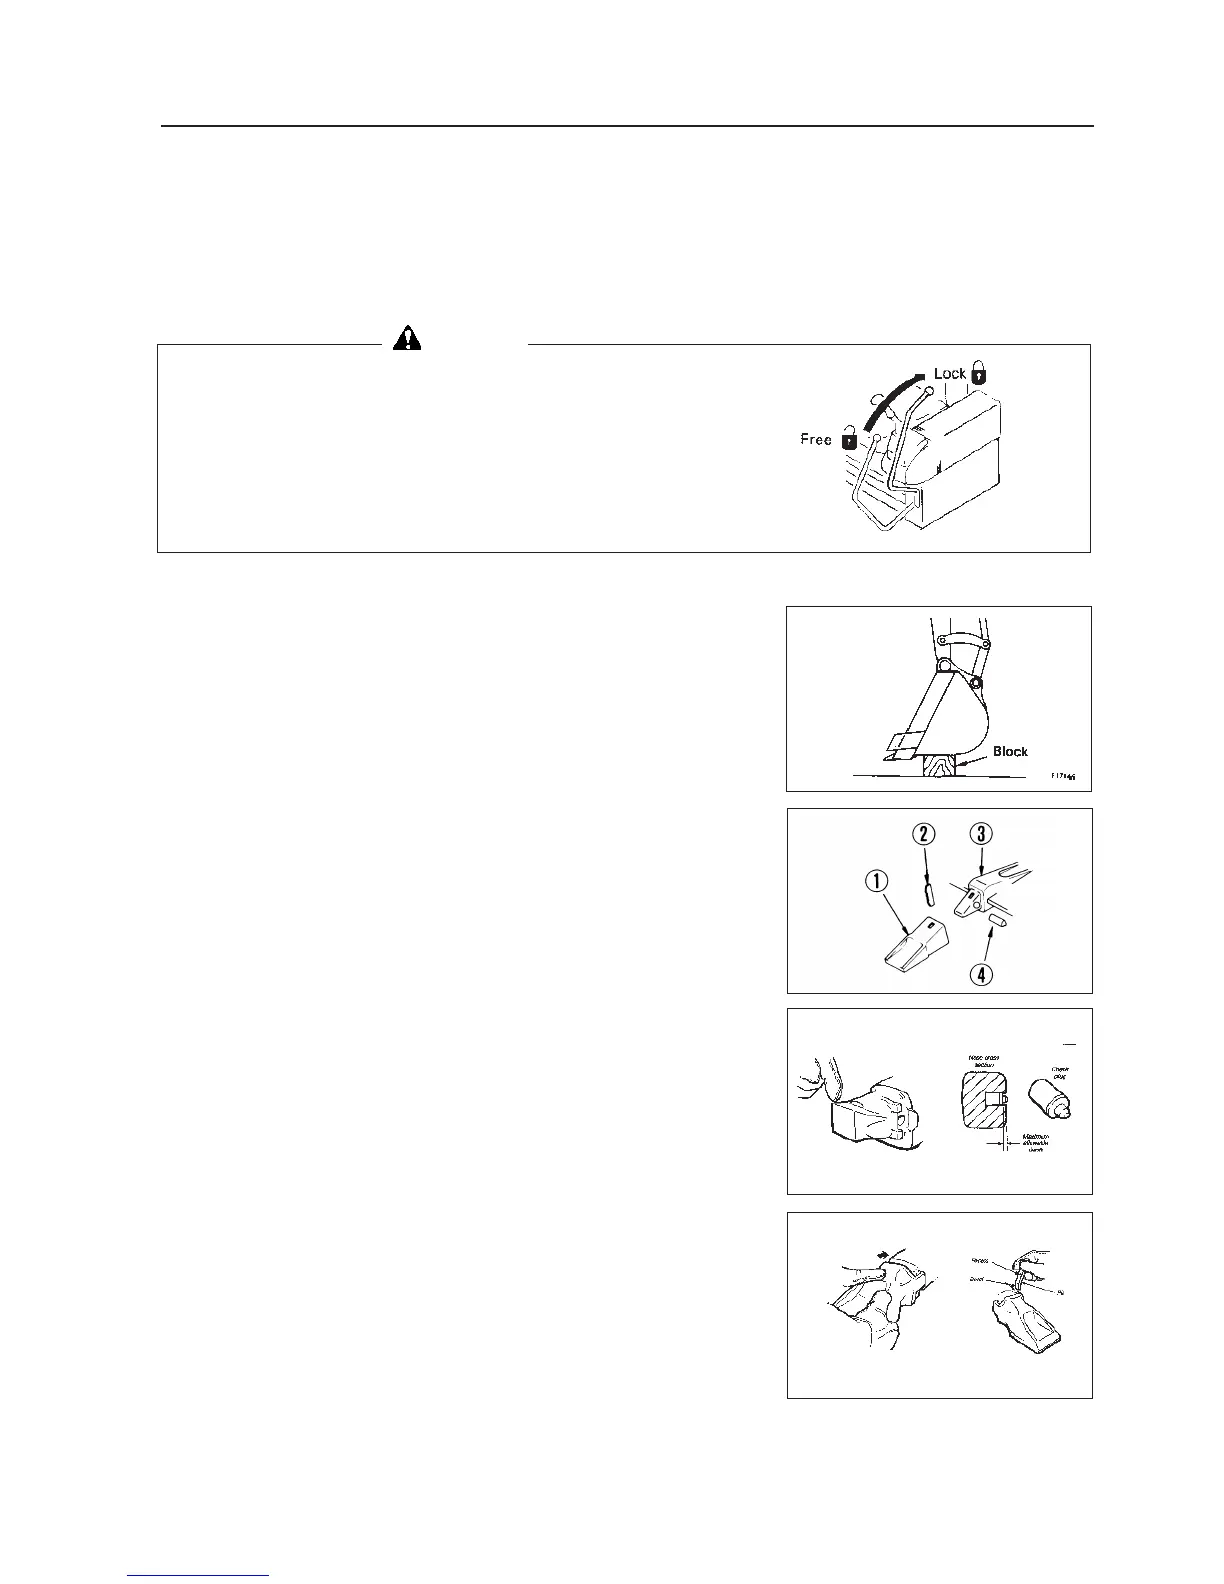
WARNING
24.2.7 REPLACE BUCKET TEETH
(PC210, PC240)
Replace the point before the adapter starts to wear.
It is dangerous if the work equipment moves by mistake when
the teeth are being replaced. Set the work equipment in a stable
condition, then stop the engine and apply the locks securely to
the levers.
1. Set a block at the bottom face of the bucket so that is is possible to
knock out the pin of tooth a, then check that the work equipment is
in a stable condition, and lock the safety lock lever.
Set so that the bottom face of the bucket is hoizontal.
2. Use a hammer and drift to knock out lock pin b.
3. After removing lock pin b, check for any damage and replace if nec-
essary.
4. Clean the surface of adapter c and remove the soil from it with a
knife.
5. Check the plug d for damaged rubber and replace if necessary. In-
stall plug as shown, ensuring it seats correctly.
TOOTH SIZE MAX ALLOWABLE DEPTH
27-37 3.2 mm
6. Clean the inside of point a, then install it to adapter c. If there is
mud stuck to it or if there are protrusions, the point will not enter the
adapter properly, and there will not be proper contact at the mating
portion.
7. Fit tooth with a 1/4 turn. Ensure plug remains fully seated.
8. Inspect the pin for damage and replace if necessary. Insert the pin as
shown with the bevel down and the recess facing inside. Drive the
pin until the plug engages the pin recess.
24. SERVICE PROCEDURE
 Loading...