2
GB
Contents
Safety ..................................................2
First start-up Instructions ..................... 2
Starting and Stopping .......................... 3
Adjustment for max. Capacity..............3
Piping Instructions ...............................4
Selection of Intake Nozzle ................... 5
Clearing a blocked Pipe System..........5
Bin clean-out........................................5
Maintenance ........................................ 6
Trouble shooting .................................. 7
Conveying Capacity.............................8
Principle of Operation ........................ 10
Function and use of Air Regulator ..... 11
Technical Data ................................... 12
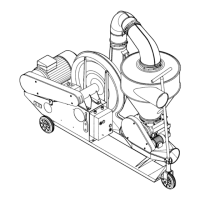
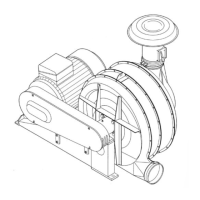
Safety
1. Take care that all the guards
areincorrectpositionandxed
during operation.
2. Always stop the machine prior to
greasing, adjusting or repair.
3. Blower noise can be irritating.
Ear protection should be used
under long-term continuous
exposure.
4. Use eye protection when work-
ing in the vicinity of the intake
nozzle.Kernelscanyoutofthe
secondary air opening, causing
eye damage if proper protection
is not worn.
5. Avoid open suction pipes.
Clothing or objects can be
drawn into the machine and
cause injury to a person or
damage to the machine.
6. After conveying treated grain the
machine and the pipe system
should be carefully cleaned out.
7. Always use a discharge cyclone
to decelerate the grain and to
separate it from the air stream.
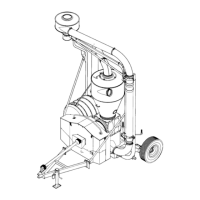
First Start-up
Instructions
1. All wiring must be made by a
certiedelectrician.
Min. fuse at 3 x 380 V
(recommended):
SUC 100E: 25 Amp.
SUC 150E: 35 Amp.
SUC 200E: 35 Amp.
SUC 300E: 63 Amp.
SUC 500E: 100 Amp.
2. Make sure that the direction of
rotation of blower and rotary
valve is correct (see arrows on
blower and rotary valve).
3. Check that the belt tension is
correct.
4. Make sure that all bolts are
tightened. Retighten the bolts
aftertherstdayofoperation.