EasyManua.ls Logo

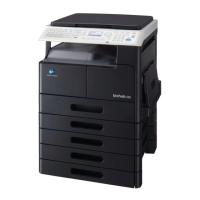
Konica Minolta bizhub 200 User Manual

Konica Minolta bizhub 200
424 pages
To Next Page IconTo Next Page
Page #1 background imageLoading...
Page #1 background image
U
ser
s
G
uide
[C
o
py
Op
erations
]

Table of Contents

Other manuals for Konica Minolta bizhub 200

Questions and Answers:

Konica Minolta bizhub 200 Specifications

General IconGeneral
BrandKonica Minolta
Modelbizhub 200
CategoryAll in One Printer
LanguageEnglish

Summary

Introduction

Energy Star®

Explains the machine's compliance with ENERGY STAR® guidelines for energy efficiency.

What is an ENERGY STAR® Product?

Defines ENERGY STAR® products and their benefits for energy efficiency and the environment.

Trademarks and registered trademarks

1 Installation and operation precautions

1.1 Safety information

Covers critical safety instructions, warnings, and precautions for operators.

1.2 USER INSTRUCTIONS

Provides regulatory compliance information for FCC and Canadian standards.

1.3 Laser safety

Explains laser safety, class certification, and internal radiation details.

1.4 Caution notations and labels

Identifies and explains the meaning of safety precaution notations and labels on the machine.

1.5 Space requirements

Specifies the recommended clearances for proper machine operation and maintenance.

1.6 Operation precautions

Outlines important precautions for power source, operating environment, and copy storage.

2 Before making copies

2.1 Part names and their functions

Identifies major parts of the machine and their basic functions for user understanding.

2.2 Adjusting the angle of the control panel

Provides instructions for adjusting the control panel angle for better ergonomics.

2.3 Turning on the main power and the auxiliary power

Explains the procedure for powering on the machine using its two power controls.

2.4 Loading paper into the 1st or 2nd tray

Step-by-step instructions for loading paper into the main paper trays.

2.5 Loading paper into the LCT

Guide for loading paper into the Large Capacity Tray (LCT) for higher volume needs.

2.6 Loading paper into the bypass tray

Instructions for loading paper into the bypass tray for special paper types or sizes.

3 Basic copy operation

3.1 General copy operation

Details the basic steps involved in making a standard copy of a document.

3.2 Operations that cannot be combined

Explains conflicts between certain copy settings and their resolution priority.

3.3 Feeding the document

Describes methods for placing originals for scanning, via ADF or original glass.

3.4 Specifying document settings

How to configure settings like size, orientation, and margins for document input.

3.5 Selecting a Paper setting

Guides users on choosing paper source and size for output.

3.6 Specifying a Zoom setting

Details how to adjust the size of the copied image using zoom ratios.

3.7 Selecting single-/double-sided settings for originals and copies

Configuration options for simplex and duplex scanning and printing.

3.8 Specifying document quality/density settings

Adjusting copy quality and density based on document type and appearance.

Additional copy operations

4.1 Checking the copy settings (Mode Check)

Allows users to view and modify current copy job settings through detail screens.

4.2 Printing a sample to check the settings (Proof Copy)

Prints a single sample copy to verify settings before producing a large batch.

4.3 Interrupting a copy job (Interrupt mode)

Temporarily halts a current job to perform a different one, then resumes the original.

4.4 Registering copy programs (Mode Memory)

Saves and recalls custom copy settings for frequent use.

4.5 Specifying control panel settings (Accessibility mode)

Customizes touch panel behavior for easier operation and accessibility.

4.6 Job List screens

Displays information about active, queued, and completed jobs for monitoring.

4.7 Performing operations on jobs

Covers checking job status, print order, and the process of deleting jobs.

5 Troubleshooting

5.1 When the message “Malfunction detected.” appears (Call technical representative)

Guides users on what to do when a critical malfunction requires technical support.

5.2 When the message “Misfeed detected.” appears

Detailed steps for clearing paper misfeeds based on their location.

5.3 When the message “Replenish paper.” appears

Instructions for adding paper to the indicated tray when it is empty.

5.4 When the message “... Not enough remaining memory.” appears

Addresses memory limitations that may cause job deletion during scanning.

5.5 When the message “Please exchange toner.” appears

Information on toner levels and when to replace the toner bottle.

5.6 When the message “Stapler empty.” appears

Guidance on replacing the staple cartridge when the finisher is empty.

5.7 Basic troubleshooting

A table listing common symptoms, their causes, and remedies for quick problem resolution.

5.8 Main messages and their remedies

Comprehensive list of system messages and corresponding troubleshooting actions.

6 Specifications

6.1 Specifications

Technical data for the copier, including physical dimensions, power, and performance metrics.

Available features

Automatically selecting the paper

Explains the automatic paper size selection based on document and zoom settings.

Adjusting copies to the size of the paper

Describes automatic zoom ratio selection to match paper size.

Specifying separate horizontal and vertical zoom ratios

Allows custom resizing using independent horizontal and vertical zoom controls.

Scanning the document in separate batches

How to scan large documents in segments as a single job.

Sorting copies

Details the available methods for sorting output copies.

Basic copy operation

3.1 General copy operation

Details the basic steps involved in making a standard copy of a document.

3.2 Operations that cannot be combined

Explains conflicts between certain copy settings and their resolution priority.

3.3 Feeding the document

Describes methods for placing originals for scanning, via ADF or original glass.

3.4 Specifying document settings

How to configure settings like size, orientation, and margins for document input.

3.5 Selecting a Paper setting

Guides users on choosing paper source and size for output.

3.6 Specifying a Zoom setting

Details how to adjust the size of the copied image using zoom ratios.

3.7 Selecting single-/double-sided settings for originals and copies

Configuration options for simplex and duplex scanning and printing.

3.8 Specifying document quality/density settings

Adjusting copy quality and density based on document type and appearance.

3.9 Selecting a Combine Originals setting

Allows combining multiple pages onto a single sheet for paper savings.

3.10 Selecting finishing for copies

Options for sorting, stapling, and hole-punching the final copies.

3.11 Scanning the next document during printing (reserving a copy job)

Enables queuing new jobs while the current one is in progress.

3.12 Stopping/deleting a job

Procedures for managing active or queued copy jobs by stopping or deleting them.

User’s Guides

User’s Guide [Copy Operations] (this manual)

This manual detailing basic copy functions, precautions, and troubleshooting.

User’s Guide [Network Scanner Operations]

Covers network scanning capabilities, including Scan to E-Mail and FTP.

User’s Guide [Box Operations]

Details operations for saving, routing, and retrieving documents in user boxes.

User’s Guide [Print Operations]

Information on using the standard built-in printer controller functions.

Quick Guide [Print Operations]

Basic instructions for using the printer controller functions.

User’s Guide [Advanced Scan Operations]

Covers advanced scanning functions with the optional scanner unit.

User’s Guide [Facsimile Operations]

Details fax functions and operations when the fax kit is installed.

Descriptions and symbols for documents and paper

“Width” and “Length”

Clarifies the convention for specifying paper dimensions as width and length.

Paper orientation

Defines lengthwise and crosswise paper orientations and their corresponding symbols.

Legal restrictions on copying

1 Installation and operation precautions

1.1 Safety information

Covers critical safety instructions, warnings, and precautions for operators.

Warning and precaution symbols

Explains the meaning and severity levels of WARNING and CAUTION indicators.

Meaning of symbols

Interprets various symbols used for safety warnings and prohibitions.

1 Installation and operation precautions

Disassemble and modification

Warns against tampering with internal components or modifying the machine.

Power cord

Provides crucial safety instructions for using and handling the power cord correctly.

1 Installation and operation precautions

Power source

Details requirements for power supply voltage, plug configuration, and avoiding overloads.

Power plug

Safety guidelines for handling the power plug and cleaning its terminals.

Grounding

Emphasizes the necessity of connecting to a grounded electrical outlet.

1 Installation and operation precautions

Installation

Safety precautions related to placing the machine and its immediate environment.

Ventilation

Stresses the importance of adequate ventilation for safe and healthy operation.

Actions in response to troubles

Outlines immediate safety actions for critical machine issues like overheating or damage.

1 Installation and operation precautions

Consumables

Safety warnings concerning toner and toner bottles, and handling toner spills.

When moving the machine

Provides essential precautions for safely moving the machine to prevent damage or injury.

Before successive holidays

Recommends unplugging the machine when it will be unused for extended periods.

1.2 USER INSTRUCTIONS

FCC PART 15 - RADIO FREQUENCY DEVICES (For U.S.A. Users)

Details FCC compliance for Class A digital devices and radio frequency energy.

INTERFERENCE-CAUSING EQUIPMENT STANDARD (ICES-003 ISSUE 3) (For Canada Users)

Outlines Canadian compliance for Class A digital apparatus.

For users in countries subject to Class B regulations

Specific usage guidance for users in regions adhering to Class B regulations.

For users in countries not subject to Class B regulations

Usage guidance for users in regions not adhering to Class B regulations.

1.3 Laser safety

Internal laser radiation

Technical details on the laser diode, its power, and the print head unit's serviceability.

CDRH regulation

States the machine's certification as a Class 1 Laser product under US standards.

1.3 Laser safety

For European users

Laser safety information tailored for users in European countries.

For Denmark users

Laser safety information specific to users in Denmark.

For Finland, Sweden users

Laser safety information for users in Finland and Sweden.

For Norway users

Laser safety information for users in Norway.

1.3 Laser safety

Laser safety label

Shows the location and appearance of the laser safety label affixed to the machine.

Ozone release

Advises on ozone generation and the necessity of proper ventilation during operation.

1.3 Laser safety

Acoustic noise (For European users only)

Specifies noise level information according to European regulations.

For EU member states only

Explains the symbol for WEEE compliance and proper disposal methods.

1.4 Caution notations and labels

1.5 Space requirements

1.6 Operation precautions

Power source

Outlines requirements for voltage stability and frequency for the power source.

Operating environment

Specifies the recommended temperature and humidity ranges for correct machine operation.

Storage of copies

Offers advice on how to store copies to maintain their quality and prevent fading.

2 Before making copies

2.1 Part names and their functions

Identifies major parts of the machine and their basic functions for user understanding.

2.2 Adjusting the angle of the control panel

Provides instructions for adjusting the control panel angle for better ergonomics.

2.3 Turning on the main power and the auxiliary power

Explains the procedure for powering on the machine using its two power controls.

2 Before making copies

2.4 Loading paper into the 1st or 2nd tray

Step-by-step instructions for loading paper into the main paper trays.

2.5 Loading paper into the LCT

Guide for loading paper into the Large Capacity Tray (LCT) for higher volume needs.

2.6 Loading paper into the bypass tray

Instructions for loading paper into the bypass tray for special paper types or sizes.

3 Basic copy operation

3.1 General copy operation

Details the basic steps involved in making a standard copy of a document.

3.2 Operations that cannot be combined

Explains conflicts between certain copy settings and their resolution priority.

3.3 Feeding the document

Describes methods for placing originals for scanning, via ADF or original glass.

3 Basic copy operation

3.4 Specifying document settings

How to configure settings like size, orientation, and margins for document input.

3.5 Selecting a Paper setting

Guides users on choosing paper source and size for output.

3.6 Specifying a Zoom setting

Details how to adjust the size of the copied image using zoom ratios.

3.7 Selecting single-/double-sided settings for originals and copies

Configuration options for simplex and duplex scanning and printing.

3.8 Specifying document quality/density settings

Adjusting copy quality and density based on document type and appearance.

3 Basic copy operation

3.9 Selecting a Combine Originals setting

Allows combining multiple pages onto a single sheet for paper savings.

3.10 Selecting finishing for copies

Options for sorting, stapling, and hole-punching the final copies.

3.11 Scanning the next document during printing (reserving a copy job)

Enables queuing new jobs while the current one is in progress.

3.12 Stopping/deleting a job

Procedures for managing active or queued copy jobs by stopping or deleting them.

4 Additional copy operations

4.1 Checking the copy settings (Mode Check)

Allows users to view and modify current copy job settings through detail screens.

4.2 Printing a sample to check the settings (Proof Copy)

Prints a single sample copy to verify settings before producing a large batch.

4.3 Interrupting a copy job (Interrupt mode)

Temporarily halts a current job to perform a different one, then resumes the original.

4.4 Registering copy programs (Mode Memory)

Saves and recalls custom copy settings for frequent use.

4.5 Specifying control panel settings (Accessibility mode)

Customizes touch panel behavior for easier operation and accessibility.

Additional copy operations

4.6 Job List screens

Displays information about active, queued, and completed jobs for monitoring.

4.7 Performing operations on jobs

Covers checking job status, print order, and the process of deleting jobs.

5 Troubleshooting

5.1 When the message “Malfunction detected.” appears (Call technical representative)

Guides users on what to do when a critical malfunction requires technical support.

5.2 When the message “Misfeed detected.” appears

Detailed steps for clearing paper misfeeds based on their location.

5.3 When the message “Replenish paper.” appears

Instructions for adding paper to the indicated tray when it is empty.

5.4 When the message “... Not enough remaining memory.” appears

Addresses memory limitations that may cause job deletion during scanning.

5.5 When the message “Please exchange toner.” appears

Information on toner levels and when to replace the toner bottle.

5.6 When the message “Stapler empty.” appears

Guidance on replacing the staple cartridge when the finisher is empty.

5.7 Basic troubleshooting

A table listing common symptoms, their causes, and remedies for quick problem resolution.

5.8 Main messages and their remedies

Comprehensive list of system messages and corresponding troubleshooting actions.

6 Specifications

6.1 Specifications

Technical data for the copier, including physical dimensions, power, and performance metrics.

7 Copy paper/original documents

7.1 Copy paper

Specifications for paper types, sizes, and capacities for various paper sources.

7.2 Specifying paper settings for the bypass tray

How to specify paper size and type for the bypass tray, including custom sizes.

7.3 Original documents

Guidelines for documents that can be loaded into the ADF and placed on the original glass.

Copy paper/original documents

Precautions for loading documents Into the ADF

Warnings against loading certain types of documents into the ADF to prevent misfeeds or damage.

Paper storage

Precautions for storing paper to prevent misfeeds and maintain quality.

Copy paper/original documents

Automatic paper-tray-switching feature

How the machine automatically selects the next available paper tray when one runs out.

Order for selecting the paper trays

The default sequence in which paper trays are automatically selected.

8 Application functions

8.1 Adding cover pages (“Cover Mode” function)

Functionality to add front and back cover pages to copies, using blank or original pages.

8.2 Inserting cover pages (“Insert Sheet” function)

Inserting different paper, like colored sheets, as insertion sheets into copies.

8.4 Adding filing margins to copies (“Page Margin” function)

Printing copies with a margin for easier storage in binders.

Application functions

8.5 Erasing unwanted areas of copies (“Edge/Frame Erase” function)

Removes unwanted areas from copies, such as shadows or fax transmission info.

8.6 Tiling copy images (“Image Repeat” function)

Prints multiple copies of a scanned area onto a single output sheet.

8.7 Producing separate copies of each page in a page spread (“Book Copy” function)

Copies left and right pages of a spread onto separate pages or the same page.

8.8 Creating booklet copies (“Booklet” function)

Arranges double-sided copies for booklet binding, with optional stapling.

8.9 Printing additional information on copies (Image Settings functions)

Adds distribution numbers or preset text stamps to copies.

8.10 Printing copies overlapping a different image (“Image Overlay” function)

Overlays stored images onto copies, available with optional hard disk.

8.11 Copying with light and dark coloring inversed (“B/W Reverse” setting)

Inverts image colors, making light areas dark and vice versa.

8.12 Separate scan

Setting the machine to continuously scan documents.

9 Replacing toner bottles and staples and emptying punch waste containers

9.1 Replacing the toner bottle

Step-by-step instructions for replacing the toner bottle when it is depleted.

9.2 Replacing the staple cartridge

Procedures for replacing staple cartridges in the finisher and saddle stitcher units.

9.3 Clearing a staple jam

Instructions for resolving staple jams within the finisher and saddle stitcher.

9.4 Emptying the waste containers

Guidance on how to empty the hole-punch waste container to maintain functionality.

10 Care of the machine

10.1 Cleaning

Details how to clean various parts of the machine, including housing and glass.

10.2 Viewing counters (Total Counter)

How to access and view the total count of prints made by the machine.

10.3 When the message “Preventative Maintenance is required.” appears

Advises users to contact service for required periodic maintenance.

11 Utility mode

11.1 Overview of Utility mode parameters

Introduces the structure and available functions within the Utility mode menu.

11.2 Specifying User’s Choice settings

Allows customization of default machine settings for user preferences.

11.3 Specifying User Management settings

Covers settings related to user management, such as tone volume and panel cleaning.

11.4 Displaying the Administrator Management screen

Guides users on how to access the administrative settings screens.

11.5 Specifying Initial Settings

Procedures for setting initial parameters like date, time, and language.

11.6 Specifying Administrator settings

Configuration options for administrator access codes and copy limits.

11.7 Specifying the account/authentication settings (User Authentication ON/OFF parameters)

Manages user authentication and account track settings for access control.

11.8 Specifying account data settings

Details on setting up accounts, passwords, and print limits.

11.9 Specifying user authentication settings

Configuration for external server or machine-based user authentication.

11.10 Specifying software switch settings (machine functions)

Allows modification of machine behavior by adjusting software switch settings.

Utility mode

11.11 Specifying security settings (Security Setting parameters)

Configuration of enhanced security features like password rules and access locks.

Canceling an access lock (“Unlock” parameter)

Procedure to unlock operations after excessive incorrect password attempts.

11.12 Managing the memory (Memory Management parameters)

Operations for managing internal memory, including data erasure and resetting settings.

11.13 Password rules

Defines the rules and limitations for creating secure passwords.

12 Appendix

12.1 Entering text

Instructions on using the on-screen keyboard for typing passwords and text.

12.2 Glossary

Definitions of technical terms and acronyms used in the manual.

12.3 Index

An alphabetical index to help users quickly find specific topics within the manual.

Related product manuals