bizhub C4000i/C3300i I SERVICE MODE > 6. Machine
I-8
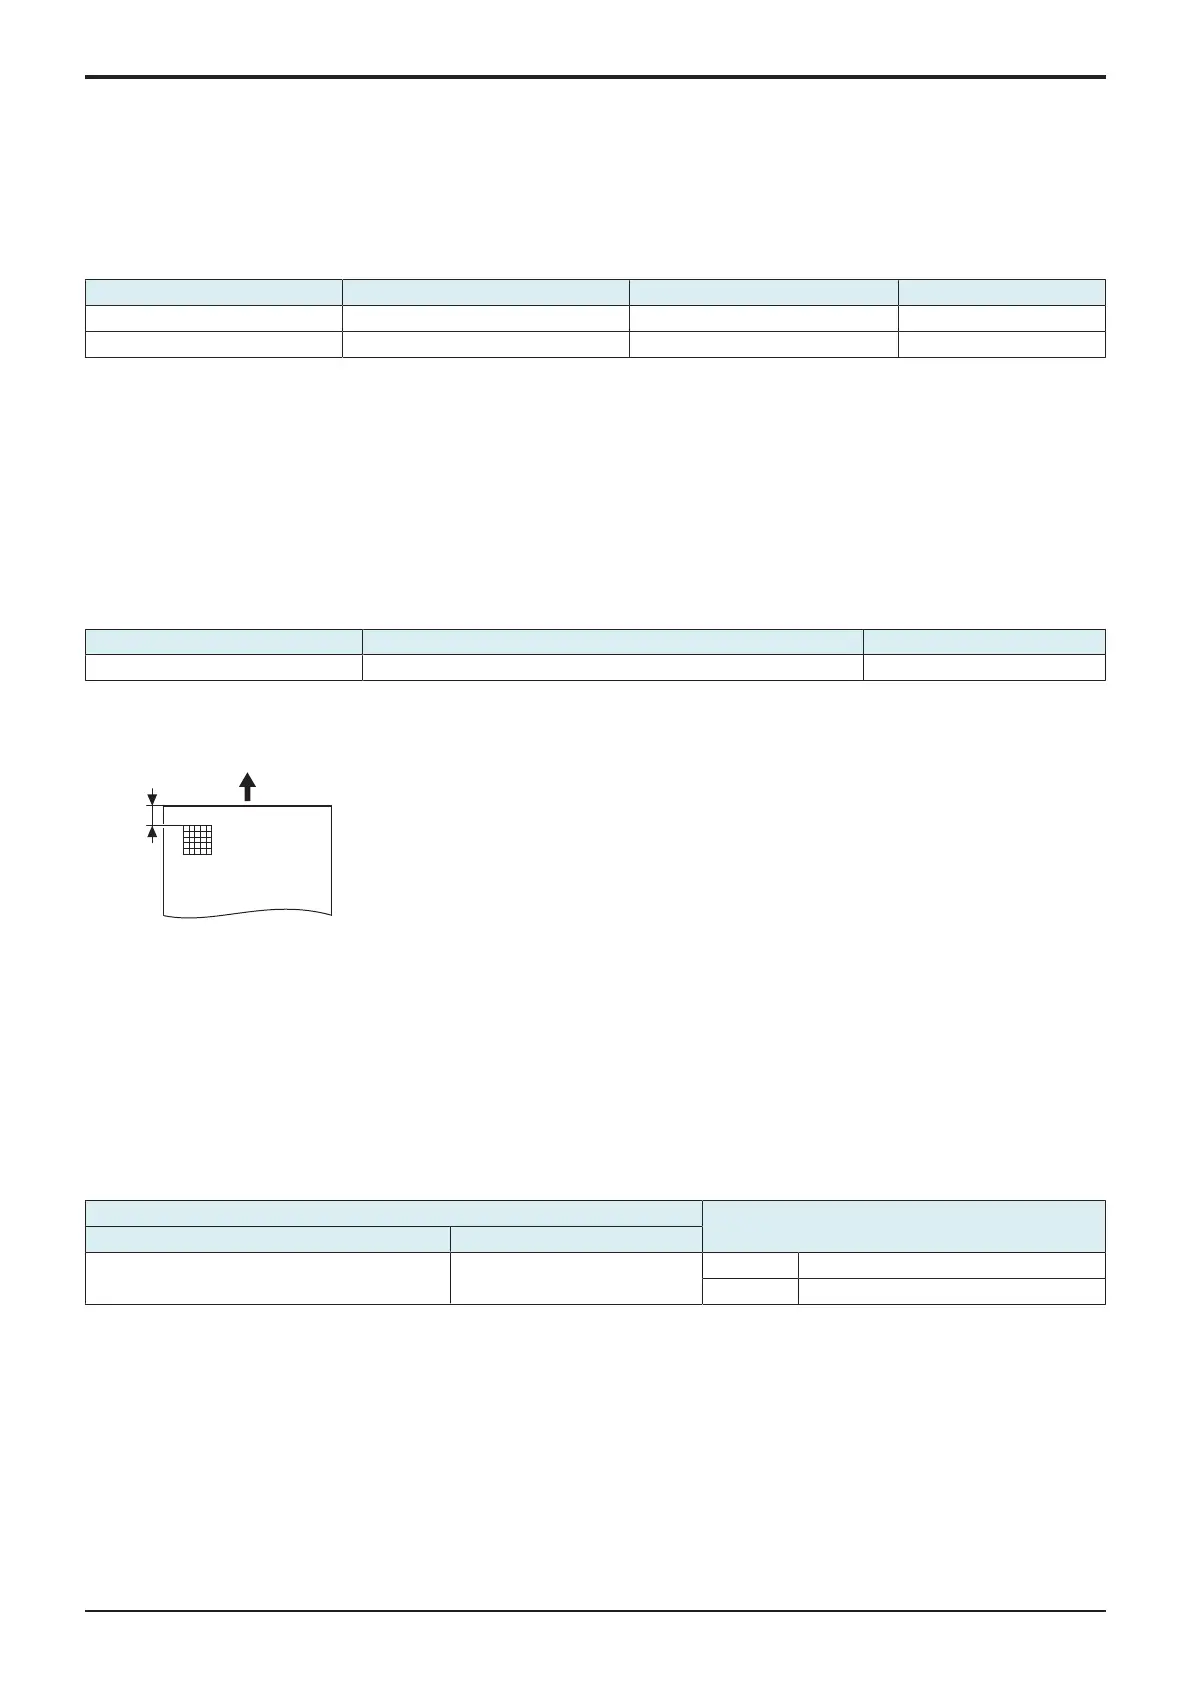
9. If width A is outside the target, change the setting again and make a check again.
10. If width A falls within the target, touch [END].
6.3.5Paper Feed Direction Adj.
• To synchronize the paper transport speed with the image writing speed.
• [Sub Scan Zoom Adj.] becomes necessary.
• The print image on the copy distorts (stretched, shrunk).
• When the print image on the copy is stretched in the sub scan direction.
• This setting can be made independently for each paper type.
Check Item Target Setting range Default setting
Width A: equivalent to one grid 5.4 ± 0.2 mm -7 to +7 0
Width B: equivalent to 48 grids 270.9 ± 2.0 mm -7 to +7 0
<Procedure>
6.3.6Tray Printing Position: Tip
• To change and adjust image printing position at vertical scanning direction by each feed. (to adjust the timing starting from the roller
connection up to start of transfer output). It is not applicable in case the job is fed at re-feed.
• To be used when [Printer Area-Leading Edge Adjustment] is not enough for full adjustment (as such case that image printing position gets
deviated due to pattern of each feed.)
• Adjustment is made for plain paper.
NOTE
▪ [Printer Area-Leading Edge Adjustment] should be made within target.
▪ Image printing position at vertical scanning direction is adjusted based on the combination value of this setting figure and
[Printer Area-Leading Edge Adjustment] figure. In case the value does not fall in the setting range, the figure should be rounded
to the minimum or maximum value.
Target Setting range Default setting
4.2 ± 2.0 mm -3.0 mm to +3.0 mm (in 0.2 mm increments) 0.0 mm
<Procedure>
1. Set the targeted tray with plain paper, and select the feed tray.
2. Press the Start key to let the machine produce a test pattern.
3. Check the dimension of width A on the test pattern.
4. If width A falls outside the target, change the setting using the [+] / [-] key.
• If width A is longer than the target, make the setting value smaller than the current one.
• If width A is shorter than the target, make the setting value greater than the current one.
5. Press the Start key to let the machine produce a test pattern.
6. Check the dimension of width A on the test pattern.
7. If width A is outside the target, change the setting again and make a check again.
8. If width A falls within the target, touch [END].
6.4Color Registration Adjustment
• To adjust color shift if there is any when comparing the original with copy of the plain or thick paper.
• To correct any color shift.
• This setting can be made independently for each paper type.
Setting item Setting range
Paper type Color selection
Plain Paper/Plain Paper+, Thick Paper Cyan, Magenta, Yellow X -6 to +6 dot (step: 1 dot)
Y -6 to +6 dot (step: 1 dot)
<Procedure>
1. Load manual bypass tray with A4.
2. Press the Start key.
3. On the test pattern produced, check for deviation between the black line and the line of each color at positions X and Y.
4. Select the paper type and color to be adjusted.
5. Using the [+] / [-] key, change the setting value as necessary. (At this time, only the line of the selected color moves.)
• If the cross deviates in the direction of A, decrease the setting.
• If the cross deviates in the direction of B, increase the setting.
6. Produce another test pattern and make sure that there is no deviation.
 Loading...