E-9
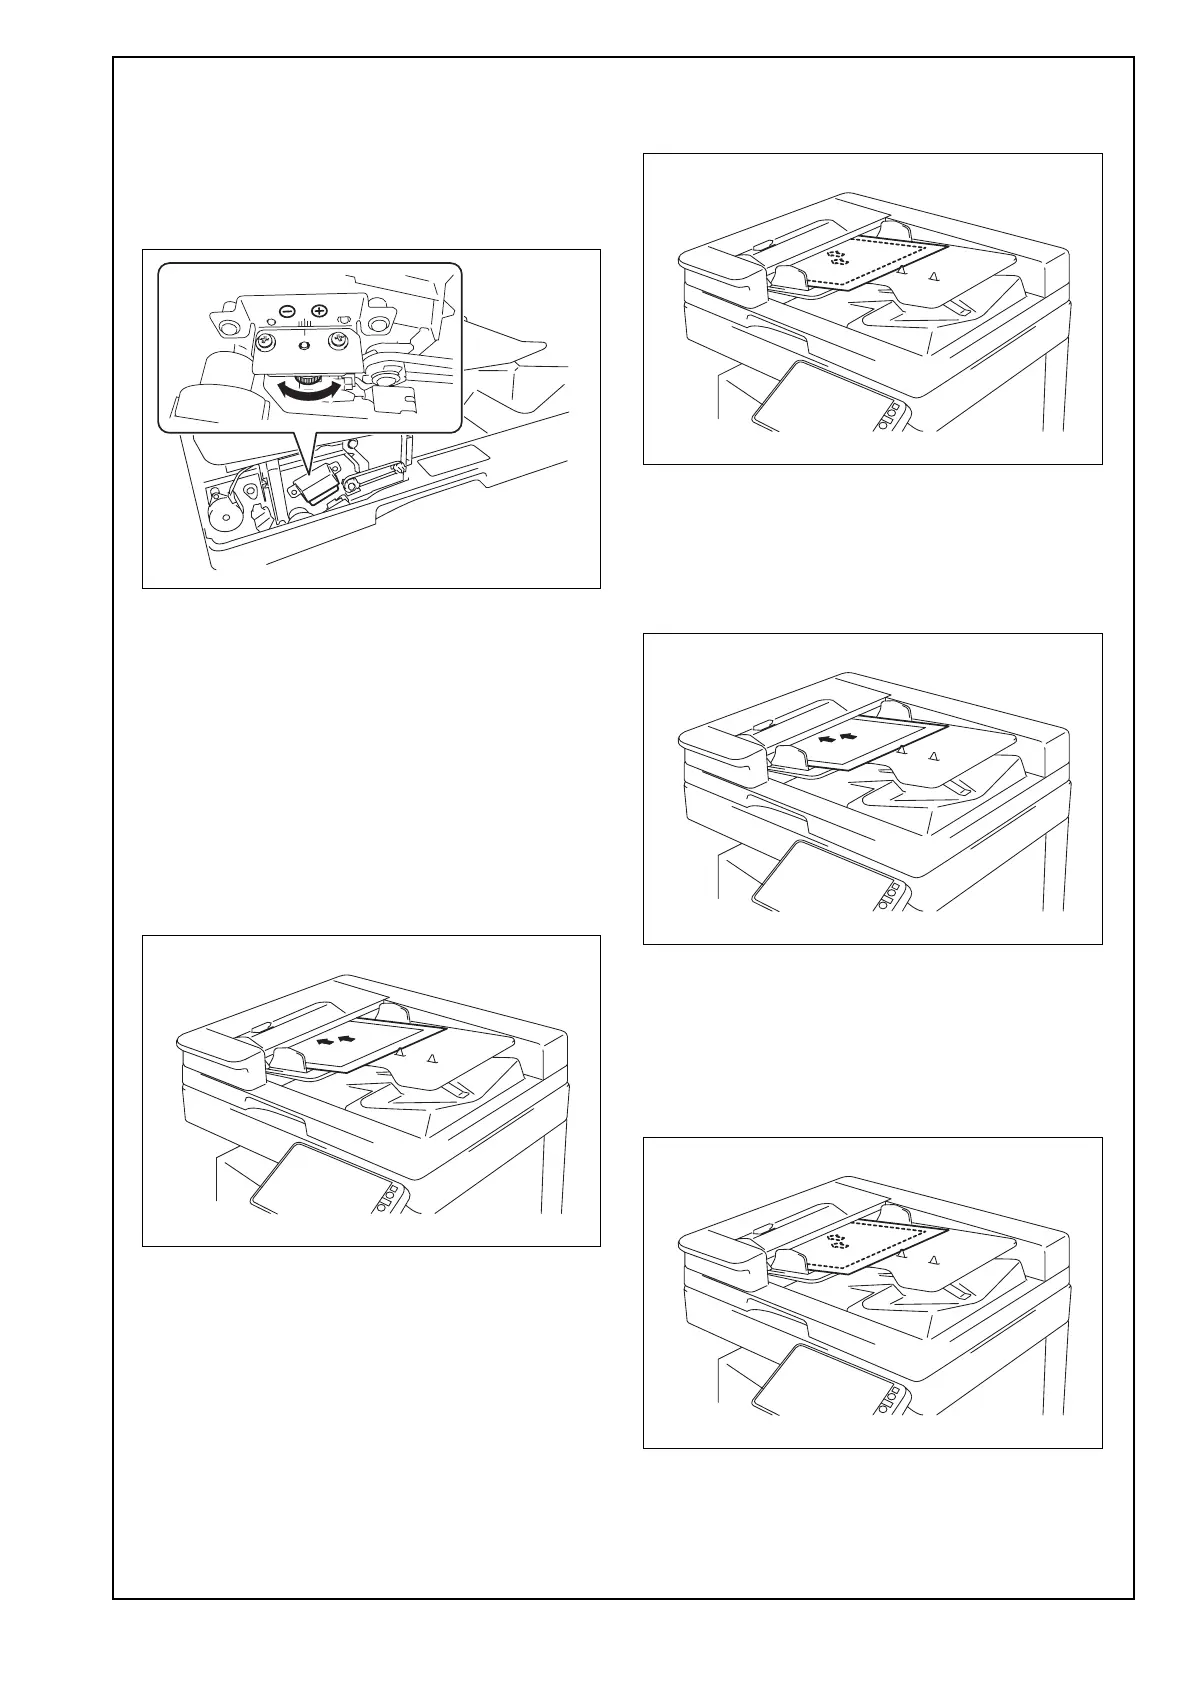
(11) Check “Scale” on the screen, and adjust the
value by turning the adjusting dials as neces-
sary.
In case of the + (plus) value, turn the dial clock-
wise
In case of the - (minus) value, turn the dial
counterclockwise
(12) Touch “END.”
(13) Repeat the steps (1) to (6) to check if the value
of “Avg. Value” falls within the specified range.
(14) After completing the adjustment, tighten the
screws loosened in step (10).
(15) Install the front cover removed in step (9). (Two
screws)
<Auto Stop Position Adjustment>
(1) Touch “Auto Stop Position Adjustment.”
(2) Touch “Sub Scanning Direction 1-Side.”
(3) Place the chart in the document feeding tray
(with the side having an arrow facing up).
(4) Press the Start key.
(5) Check that “Adjustment Result” is “OK” and then
touch “SET.”
(6) Touch “Sub Scanning Direction 2-Side.”
(7) Place the chart in the document feeding tray
(Make sure that the blank surface of the chart
faces up).
(8) Press the Start key.
(9) Check that “Adjustment Result” is “OK” and then
touch “SET.”
(10) Touch “Main Scanning (Front).”
(11) Place the chart in the document feeding tray
(with the side having an arrow facing up).
(12) Press the Start key.
(13) Check that “Adjustment Result” is “OK” and
then touch “SET.”
(14) Touch “Main Scanning (Back).”
(15) Place the chart in the document feeding tray
(Make sure that the blank surface of the chart
faces up).
(16) Press the Start key.
(17) Check that “Adjustment Result” is “OK” and
then touch “SET.”
(18) Touch “END.”