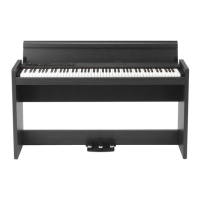
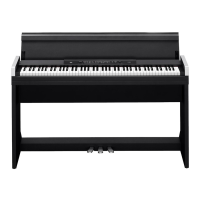
8
Assembling the Stand
Warning
At least one other person must help you
assemble the stand.
Caution during assembly
In order to assemble the stand safely, please observe the fol-
lowing points.
• Make sure that you have the correct part in the correct
orientation, and perform the assembly in the order given.
• The LP-180 may fall when applying force too much to the
front side of it before xing the LP-180 to the stand. You
should be careful in handling it.
Other cautions
Please check the following points aer assembly.
• Loosenedscrews
The screws may loosen as time passes after assembly.
You should periodically check whether any screws have
become loose. If you feel that the stand vibrates exces-
sively, it is possible that screws have come loose. If so, re-
tighten them.
• Whenmovingthedigitalpianotoanotherlocation
To move the assembled stand, remove the AC adapter
cord and the pedal cord from the stand, close the key
cover, and then move it slowly with at least two people
keeping it as level as possible.
• Disassembly
If you need to disassemble the stand, do so by reversing
the steps of the assembly procedure. Aer disassembly,
keep the screws and other parts in a safe place so that
they are not lost.
The LP-180 should always be laid down before it’s
disassembled.
Assembly procedure
You’ll need a Phillips (+) screwdriver.
1. Puttheprotectivesheet,whichhadcoveredtheLP-180,
onaatoor,andplacetheLP-180onthatsheetwith
itsrearfacingtheoor.
Ensure that the LP-180’s key cover will not to open
until the end of the assembly.
Protective sheet
LP-180
2. Makesurethatallofthefollowingpartsareavailable.
Pedal unit
Back board
Side panel (right)
Side panel (left)
Pedal cord
Screws (M6) x 8 pcs.
Caps x 8 pcs.
3. FastentheLP-180andthebackboradtotherightand
lesidepanelsusingeightscrews(M6).
First temporarily tighten* the screws on the right side
panel, and then temporarily tighten* the screws on the
le side panel.
* To temporarily tighten the screws is to tighten them
leaving a clearance of about 2 mm.
LP-180
Screws
(M6)
Screws
(M6)
Side panel (right)
Side panel (left)
Be careful not to pinch your ngers.
4. Raisetheassembledstandslowlywithtwopeople.
5. Then,rmlytightenallthescrewsthataretemporarily
tightenedinstep3.
When tightening the screws on the LP-180, adjust the up/
down and front/rear positions on the le and right side
panels so that they are equal.
6. Ensurethatthestandhasnogapsandisnottilted,and
thatallthescrewsaretightenedrmly.
7. Putcapsonthescrewheadsontherightandleside
panels.
Caps