37
Quick Start
Power on/offDemo songPlaying
programs
Playing
combinations
Using
controllers
ArpeggiatorRPPRProgram
editing
Combination
editing
SamplingSong
Sampling (recording a sample)
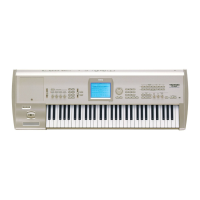
The TRITON STUDIO can record 48 kHz stereo 16-bit
samples. Sampling can be performed in Sampling, Pro-
gram, Combination, and Sequencer modes. (Open Sam-
pling System)
The various functions of each mode can be used while
sampling.
Here are some examples.
• Sample a vocal from a mic, and play it back using
“one-shot” playback.
• Apply insert effects to the audio input, and sample the
result.
• Name multisamples or samples.
• Save the data you sampled.
• Convert a multisample into a program.
• Sample and loop-playback a drum phrase, etc.
• In Program mode, resample a phrase played by the
arpeggiator.
• In Program mode, listen to drum phrases played by
the arpeggiator while you sample the external input
from a guitar.
The example procedures described here begin from
the initial settings of the TRITON STUDIO immedi-
ately after power-on.
For other procedures and more detailed explanations,
refer to p.99 or PG p.87.
Sampling a vocal from a mic, and
playing it as a “one-shot” sample
1. Connect a mic and make input settings
(Input)
1 Connect a mic to the AUDIO INPUT 1 jack located on
the rear panel.
Set the AUDIO INPUT [MIC/LINE] switch to the MIC
position, and set the [LEVEL] knob to the center.
2 Press the [SAMPLING] key to enter Sampling mode.
3 Press the Input Setup tab to select the P0: Recording,
Input/Setup page.
4 Set “Input” to Analog.
5 In the Input1 area, set “BUS” to L/R, specifying the
bus to which the AUDIO INPUT 1 jack will be input.
Make sure that the Input1 level (“Level”) is 127, and
the “Pan” is L000.
Be aware that when “BUS” is changed from Off to L/
R or IFX1–5, the volume level to the AUDIO OUT L/
MONO and R jacks or to the headphones may rise
abruptly.
2. Set the recording level
(Recording Level [dB])
1 Speak into the mic at the volume that you will use for
recording.
If the display indicates “ADC OVERLOAD !!” (AD
converter input overload), turn the rear panel [LEVEL]
knob toward MIN to adjust the level appropriately.
The best audio quality will be obtained at the highest
possible level that does not cause an overload; i.e., a
level that is slightly below the point where “ADC
OVERLOAD !!” is displayed.
2 Press the SAMPLING [REC] key.
Speak into the mic at the volume that you will use for
recording.
The level meter will show the input volume.
If the display indicates “CLIP!!,” use the VALUE con-
troller to lower the “Recording Level” slider (located
in the right of the display) from the +0.0 setting down
to an appropriate level.
3 When you have finished making adjustments, press
the SAMPLING [REC] key again.
Mic
 Loading...
