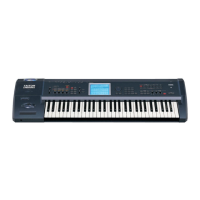
TRITON STUDIO Easy Start
8
3. Make sure that the Input 1 X
XX
X popup is set to Analog
Ä Check that Input 1’s Level is set to 127 and that Pan is set to
L000
Ä Set the X
XX
X popup for BUS (IFX/Indiv.) Select to 1/2. Ä Set Mode to Mono.
4. In the Sampling Setup field set Source BUS to Indiv. 1/2
Ä Unplug the cable from AUDIO OUTPUT R and insert it into
INDIVIDUAL OUTPUT 1 – to monitor what is sent to the sampler.
5. Press the upper right corner ▼ popup and press Select Bank & Sample No.
Ä Check the Convert to Program box and
select a Program (for example: E-G127)
Ä Check the Convert to Seq. Event box and select an empty track (Track 16
for example)
Ä Press OK.
6. Check the recording level by “arming” the sampler: Press the SAMPLING [REC] key and speak into the mic, and adjust
the level as needed
Ä Press the SAMPLING [START/STOP] key Ä Press the SEQUENCER [START/STOP] key and
sing or speak into the mic
Ä Press the SAMPLING [START/STOP] key and the Sequencer [START/STOP] key to halt
sampling and song playback.
7. Press the [LOCATE] key, then press the SEQUENCER [START/STOP] key to hear your song with its in-track sample!
8. Unplug the cable from the INDIVIDUAL OUTPUT 1 jack, and insert it back into the AUDIO OUTPUT R jack.
NEW!! Resampling your entire performance as a WAV file to the internal hard disk
TRITON STUDIO lets you easily resample the above performance (sequence and all in-track samples) as a WAV file to
the internal hard drive, or via SCSI to an external drive. A maximum of 80 minutes can be written in one operation!
With the CDRW-1 option, the WAV files you’ve re-sampled can be burned to an audio CD! (See the Getting Started
Guide, pp.115-116 for more info.)
1. Remain in Sequence mode, re-selecting the song you created in the steps above Ä Press the Sampling tab Ä In the
Sampling Setup field set Source BUS to L/R
Ä Set Trigger to Seq. START SW. Ä Set Save To to DISK Ä Set Mode to
Stereo.
2. Press the upper right corner ▼ popup and press Select Directory
Ä Name your file, leaving Take No. checked (This
Take number becomes the final two characters of your file name.)
Ä Press Done.
3. In the Sampling Setup field set Sampling Time to a figure slightly greater than the song’s length
Ä Set level: Press the
SAMPLING [REC] key, wait until it is solidly lit, then press the SEQUENCER [START/STOP] key and adjust the
sampling level.
4. Press the [LOCATE] key to return to the beginning of the song
Ä Press SAMPLING [START/STOP] , then press
Sequencer [START/STOP]
Ä Press SAMPLING [START/STOP] and Sequencer [START/STOP] when done.
5. Press the upper right corner ▼ popup and press Select Directory
Ä Press the file name you chose, and press the
SAMPLING [START/STOP] key to audition the WAV file. That’s it!
NEW!! Creating an audio CD from WAV files
With the CDRW-1x8 option or an external CDRW drive connected via SCSI, the TRITON STUDIO lets you assemble a
list of WAV files and burn them to an audio CD!
1. Press the [DISK] mode key Ä Press the Make Audio CD tab Ä Press ====End===== and press Insert Ä Select the
Drive and desired WAV file (you can audition it by pressing the SAMPLING [START/STOP] key) and press Insert
.
2. Insert a blank CD-R or CD-RW into the CDRW-1x8 drive (or connected external CDRW drive)
Ä Press the lower left X
popup
to select the drive CDD Ä Press the upper right ▼ popup and press Write to CD Ä Specify the writing speed -You
can choose to run a test for errors at selected writing speed
Ä Set Mode to Write Ä If this is the only, or final WAV file to
be burned to this CD,check Execute Finalize too
Ä Press OK.
3. The resulting audio CD, once finalized, can be played by pressing the Play Audio CD tab.
 Loading...
