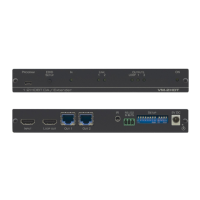
VM‑4HDT, VM‑3HDT, VM‑2HDT – Connecting the VM‑4HDT, VM‑3HDT and VM‑2HDT
Always switch off the power to each device before connecting it to your VM‑4HDT. After
connecting your VM‑4HDT, connect its power and then switch on the power to each
device.
1. Connect an HDMI input source (for example, a Blu-ray disk player) to the HDMI IN
connector .
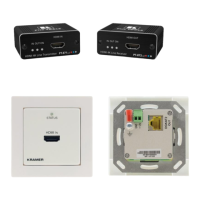
2. Connect each HDBT output to an HDBT receiver (for example, The TP-580R or the
TP-588D).
If a Mac computer is connected as a source, it will output an HDCP-secured
signal that will not passed-through to any connected non-HDCP acceptors.
3. For VM‑3HDT and VM‑2HDT only, connect the LOOP HDMI connector to an HDMI
acceptor (for example, a VM-4HDT or a local display).
4. If required, connect the IR 3.5mm mini jack to an IR sensor or emitter (for example,
an emitter, to control, with its IR remote controller, the projector that is connected to an
HDBT receiver). See IR and RS-232 Signal Routing on page 9 for further details.
5. If required, connect a controller (for example, the RC-206 control keypad) to the RS-232
3-pin terminal block connector to control a remote display that is connected to an
HDBT receiver. See IR and RS-232 Signal Routing on page 9 for further details.
6. Connect the 5V DC power adapter to the power socket unit and then connect the
adapter to the mains electricity (not shown in Figure 4).
The ON LED lights.