The K2000 Kreg Jig
®
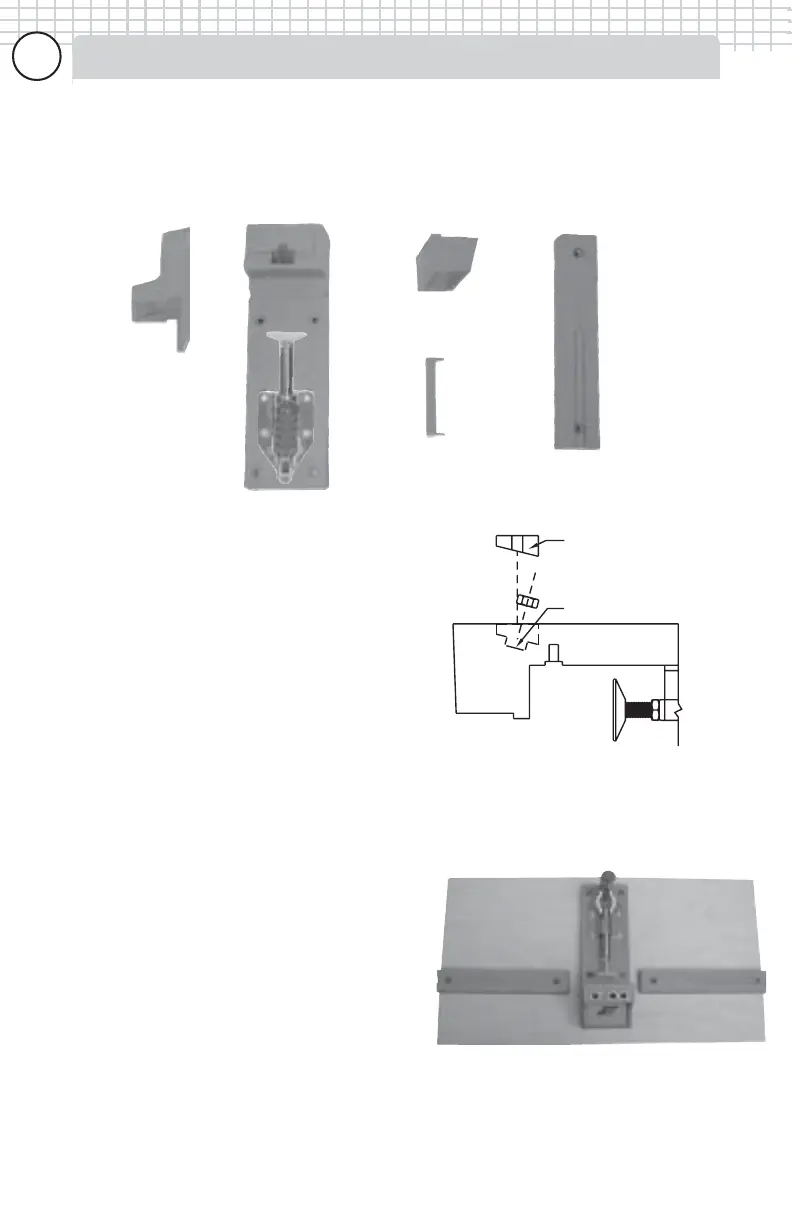
consists of 5 main components; the upright (A), base (B),
K2000 riser block (C), step block (D) and two indentical support wings (ProPack
only) (E).
Setting up -- K2000 Kreg Jig®
Before drilling any holes you must first
assemble the 1/4” hex nut into the base of
the jig. Turn the jig over so that the toggle
clamp faces away from you, next place the
1/4” hex nut loosely into the hex recess on
the base of the jig. Finally, place the blue
plastic nut retainer over the ribs of the
opening and press into place to capture the
hex nut (you may need to tap the retainer
with a rubber mallet to fully seat it into
position.
What size of board should IWhat size of board should I
What size of board should IWhat size of board should I
What size of board should I
mount my K2000 to?mount my K2000 to?
mount my K2000 to?mount my K2000 to?
mount my K2000 to?
Mounting the K2000 Kreg Jig
®
to a piece of
scrap wood is a good way to ready it for
use and allow it to be easily removed from
your work area to hang on a wall or shelf.
We recommend cutting a 3/4” thick piece
of plywood to approximately 13" X 24". This
will allow you to space the support wings
about 1" from each edge of the jig as
shown FIG 7. The K2000 Kreg Jig
®
can
also be mounted directly to a workbench.
Step 2
Press blue plastic nut
retainer firmly onto ribs.
Step 1
Place hex nut into
hexagonal recess.
Figure
(6)
Figure
(7)
(B)
(A)
(D)
(C)
(E)
77
77
7