GB-8
16 Set the start gas rate, see page 6 (Setting
the start gas rate on VAS../L, VCS..L). The con-
nection between solenoid actuator and damping
unit must then be checked for tightness.
N
2
<
–
1,5 x p
u max
18
17
Gewindestifte
M3 fest
einschrauben.
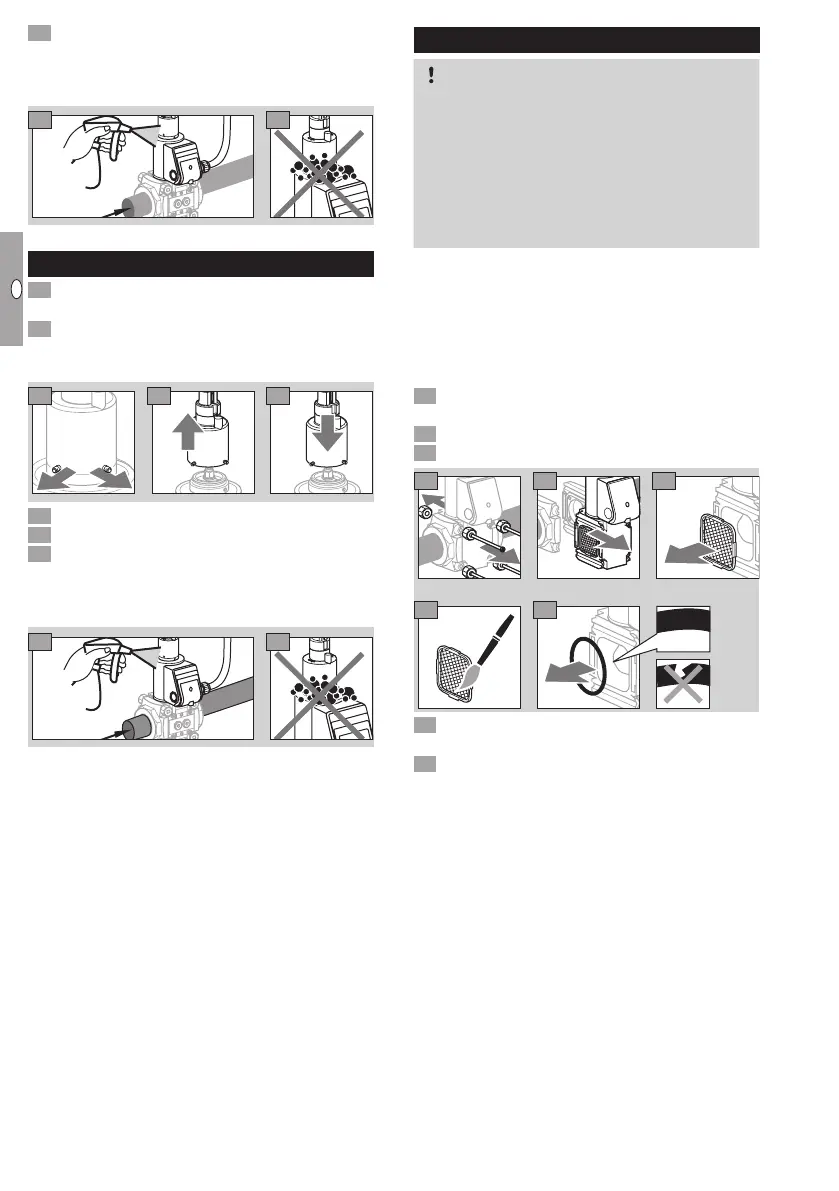
Replacing the damping unit
1 Disconnect the system from the electrical power
supply.
Shut off the gas supply.
▷
Loosen the M3 setscrews (1.5 mm hexagon
socket), but do not unscrew completely.
M3
4
5
3
6 Screw the M3 setscrews back in again.
7 Open the solenoid valve and the gas supply.
8 Set the start gas rate, see page 6 (Setting
the start gas rate on VAS../L, VCS..L). The con-
nection between solenoid actuator and damping
unit must then be checked for tightness.
N
2
<
–
1,5 x p
u max
10
9
Maintenance
CAUTION
In order to ensure smooth operation, check the
tightness and function of the VAS:
– Once per year, twice per year in the case of
biogas; check for internal and external tightness,
see page6 (Tightness test).
– Check electrical installations once a year in line
with local regulations; pay particular attention
to the PEwire, see page4 (Wiring).
▷ If the flow rate has dropped, clean the strainer.
▷
If more than one valVario control is installed in
series: the controls may only be removed from
the pipeline and reinstalled on the inlet and outlet
flange all at once.
▷ We recommend replacing the seals, see acces-
sories, seal set for sizes 1 – 3.
1 Disconnect the system from the electrical power
supply.
Shut off the gas supply.
Undo connection parts.
4 5
87
6
9 Once the seals have been replaced, follow the
reverse procedure to reassemble the unit.
10 Then check the unit for internal and external
tightness, see page6 (Tightness test).
 Loading...