R E P A I R
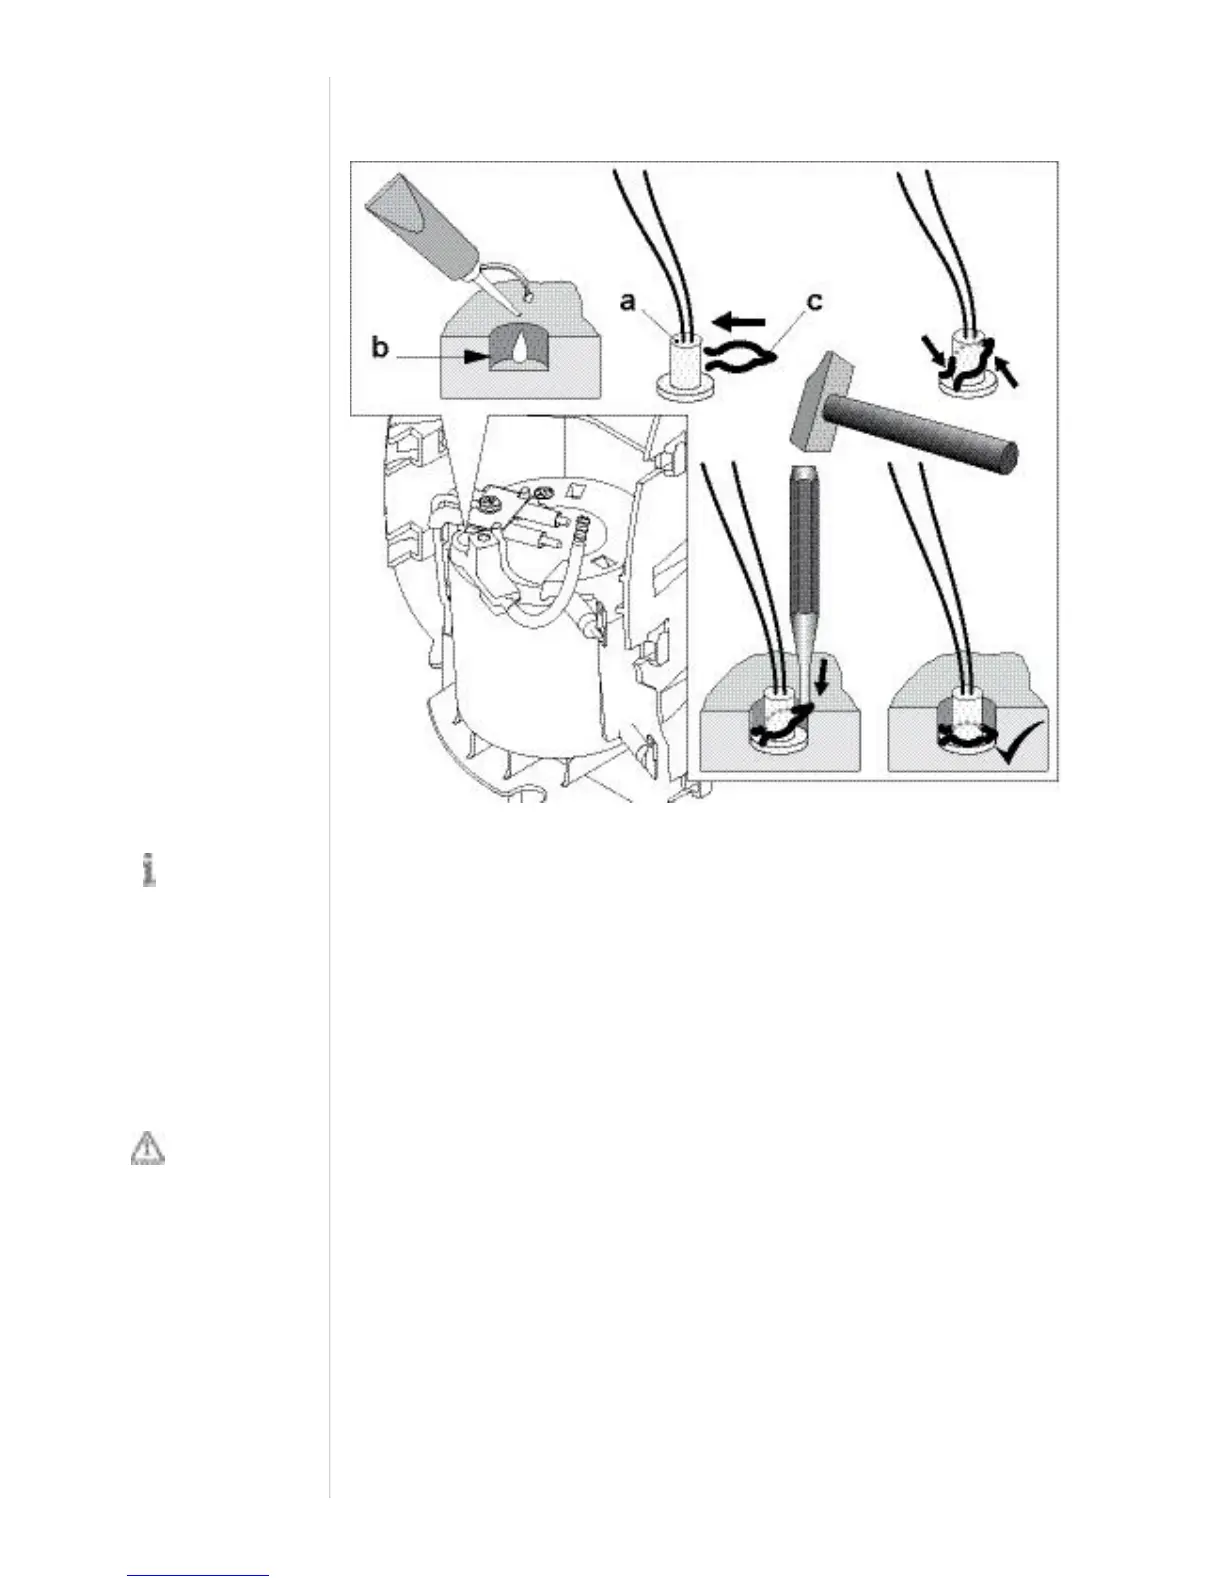
7. Applyasufficientamountofstandardheatconductingpasteintosoc ket(b).
8. Attachanewclampspring(c )onthenewNTCtemperaturesensor(a).
9. Tiltclampspringon sensorbody.
10. InsertNTCtem peraturesensor(a)insocket(b)partlysothatbothspringendsare
inthesocketalready.
11. Placeapiercer(orthebladeof ascrewdriver)onoppo siteclampshoulder.
12. Driveclampspringdownt hesocketwithlightblowsofahammer.
Assemblyinformation
• CheckthatthenewNTCtemperaturesensorispr esseddownattheb ottomofthe
socket.
• RouteN TCwiresaccordingtomachineversion.
• PluginNTCconnector inmainPCB.
Useapairofpliersto
fixthespring.
Wrong NTC wire
routing can cause
malfunctions.