BRAKES 69
11.1Checking free travel of hand brake lever
Warning
Danger of accidents Brake system failure.
– If there is no free travel on the hand brake lever, pressure builds up in the front brake circuit. The front brake can fail due
to overheating. Adjust free travel on hand brake lever according to specifications.
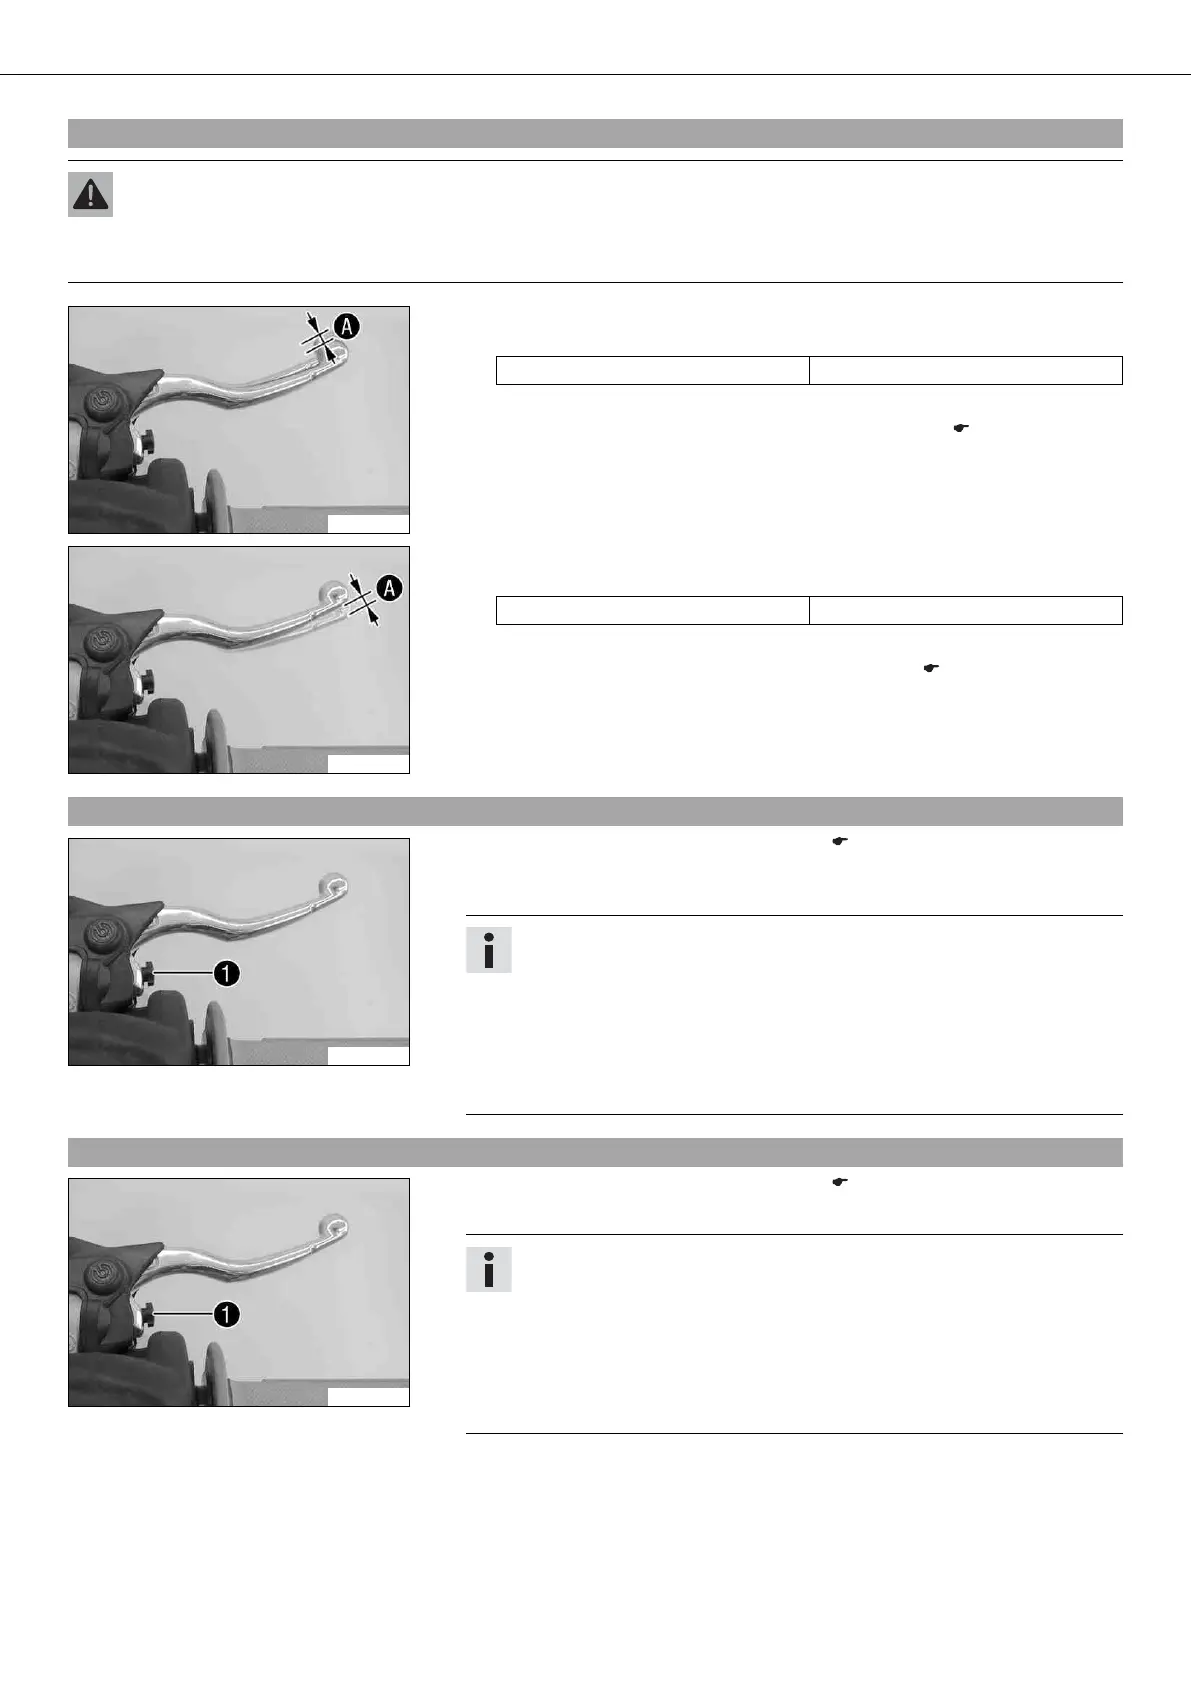
400196-11
(XC-W)
– Push the hand brake lever forwards and check free travel .
Free travel of hand brake lever ≥ 3 mm (≥ 0.12 in)
» If the free travel does not meet specifications:
– Adjust the basic position of the hand brake lever. ( p. 69)
400196-13
(All EXC models)
– Push the hand brake to the handlebar and check free travel .
Free travel of hand brake lever ≥ 3 mm (≥ 0.12 in)
» If the free travel does not meet specifications:
– Adjust the free travel of the hand brake lever. ( p. 69)
11.2Adjusting the basic position of the hand brake lever (XC-W)
400196-12
– Check the free travel of the hand brake lever. ( p. 69)
– Adjust the basic setting of the hand brake lever to your hand size by turning adjust-
ing screw .
Info
Turn the adjusting screw clockwise to increase the distance between the
hand brake lever and the handlebar.
Turn the adjusting screw counterclockwise to decrease the distance between
the hand brake lever and the handlebar.
The range of adjustment is limited.
Turn the adjusting screw by hand only, and do not apply any force.
Do not make any adjustments while riding!
11.3Adjusting free travel of hand brake lever (All EXC models)
400196-12
– Check the free travel of the hand brake lever. ( p. 69)
– Adjust the free travel of the hand brake lever with the adjustment screw .
Info
Turn the adjustment screw clockwise to reduce free travel. The pressure
point moves away from the handlebar.
Turn the adjustment screw counterclockwise to increase free travel. The
pressure point moves towards the handlebar.
The range of adjustment is limited.
Turn the adjusting screw by hand only, and do not apply any force.
Do not make any adjustments while riding!






 To Next Page