- 6 -
GB
DE
GB
FR
ES
IT
PT
NL
SE
DK
NO
FI
GR
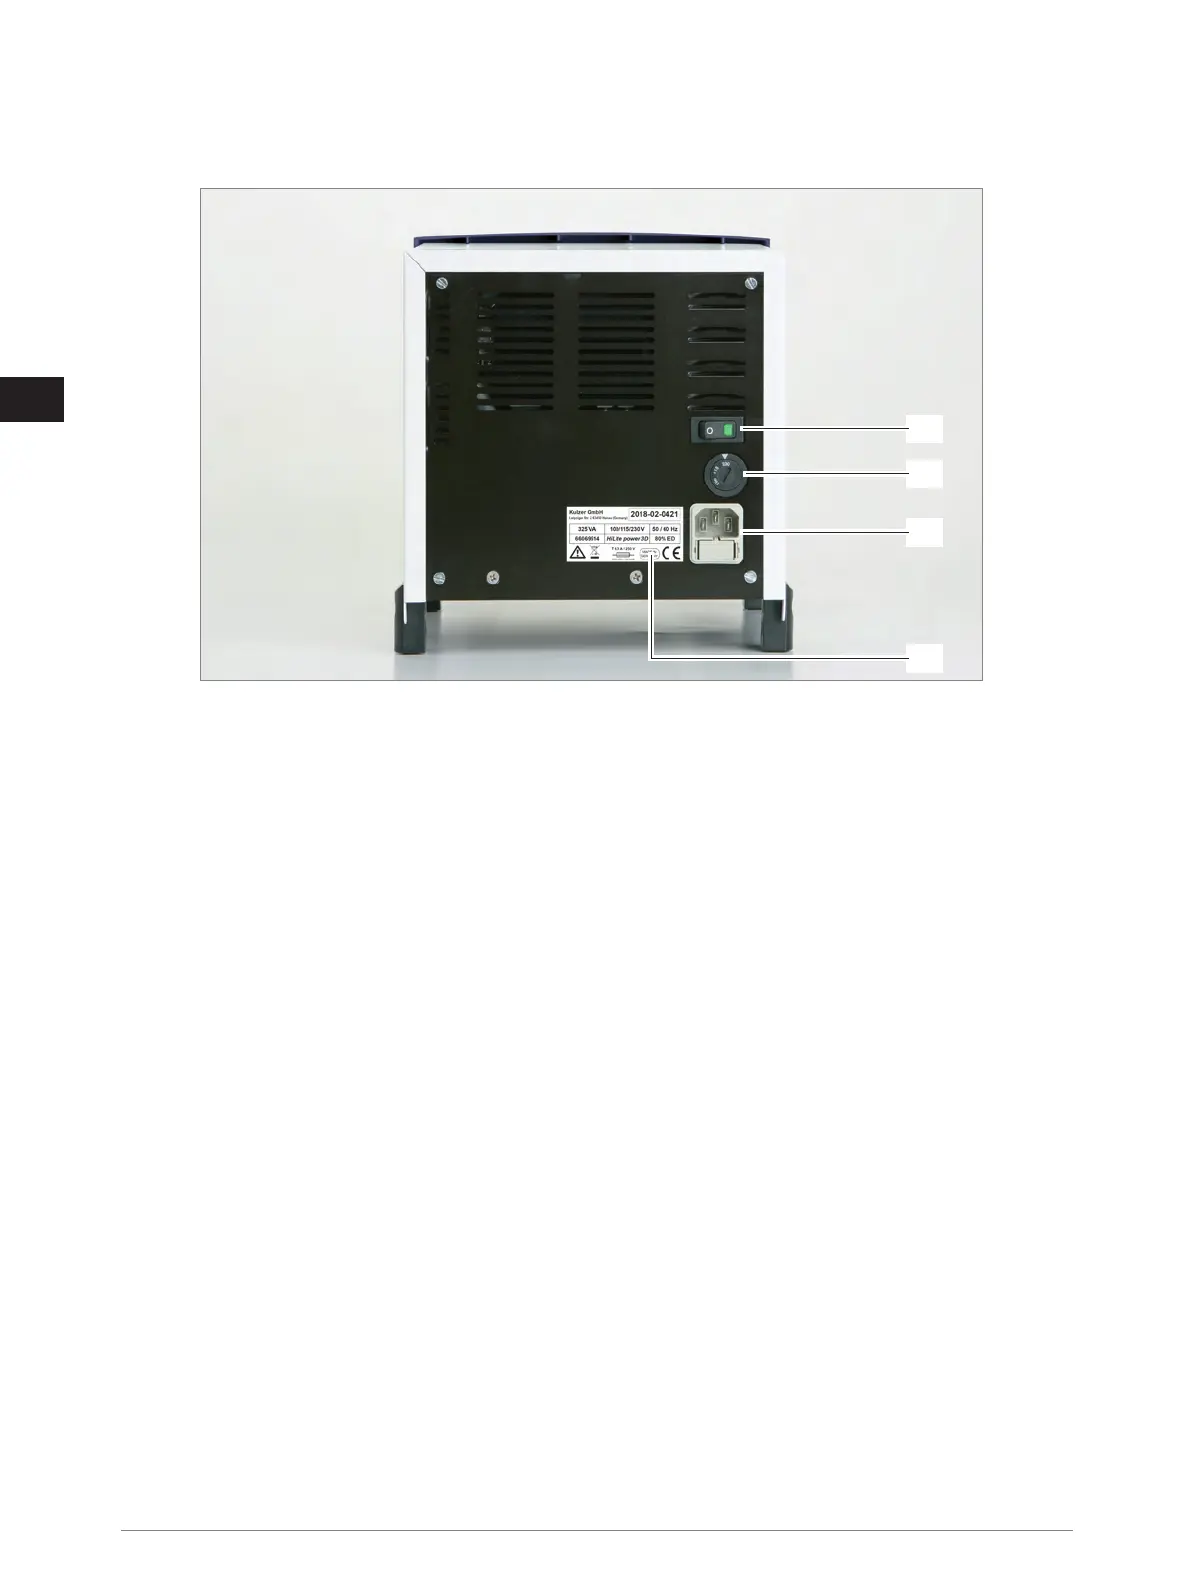
5.3 Rear view
15) Power switch
16) Voltage selector
17) Plug for non-heating apparatus (with fuses)
18) Rating plate
6 Device description
The material to be polymerised is cured using a flash lamp in the light reflector. A filter disc reduces the radiation emitted by
the flash lamp – this radiation is not required for polymerisation. The keys and displays for setting and monitoring the device
functions are on the control panel.
The push buttons are used to select times of 6 seconds, 90 seconds or 180 seconds (composite objects – Mode 1) resp. 5,
10 or 15 minutes (3D print objects – Mode 2). The corresponding LED ring flashes (Mode 1) or lights up permanently (Mode 2)
while the unit is operated; the drawer containing the material to be polymerised is locked (not in the 6 second cycle).
Any accidentally started cycle can be aborted by again single push of active button within first 15 seconds. Green status LED is
blinking during first 15 seconds.
At the end an acoustic signal is heard and the drawer is unlocked again. The fan which is activated automatically during
operation continues to run so that the interior of the unit is cooled down adequately.
For cleaning the light reflector and the filter disc see paragraph 9 Cleaning.
The detachable light reflector is mounted in the drawer for the polymerisation material. The prosthetic material resp. the 3D print
object is inserted here with / without the object holder. There are holes in the floor of the light reflector. These are required to
ensure free air circulation to dissipate the heat generated by the flash lamp. The light reflector is designed in such a way that the
light is reflected so that it also penetrates the areas not directly illuminated.
To protect the interior of the unit against the penetration of dust and contamination, a filter is inserted into the filter drawer.
7 Putting the unit into operation
7.1 Transport
Transport the device carefully in a horizontal position. Avoid jerking it!
For sizes and weight see paragraph 13 Technical Data.
15
16
17
18