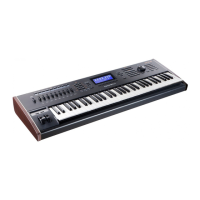
PC88 Internal Diagnostics
G-1
Appendix G
PC88 Internal Diagnostics
This appendix contains instructions on (1) how to use the PC88Õs internal diagnostics to test the
unit and (2) how to perform a hard reset.
Be sure to read all of the following instructions
before using the diagnostics.
Otherwise, damage to external equipment may occur.
Entering Diagnostics
To start the PC88 diagnostics, power up the unit while simultaneously holding the
1
,
2
, and
3
buttons. Release the
1
,
2
, and
3
buttons within two seconds of turning on the PC88. After a brief
introductory message, the display will appear as follows:
Press <<< to Reset
Press >>> for Diags
At this point, you can do one of three things:
1. Press the
<<<
button, which will erase the non-volatile memory.
Any user sounds or
setups in the instrument will be lost!
The following message will be displayed:
RAM has been erased.
Cycle the power now.
After this message appears, remove power from the unit. When power is re-applied, the
non-volatile memory will be reset.
2. Press the
>>>
button, which will enter diagnostics.
Note that some diagnostic tests
destroy the RAM; therefore, anything stored in the non-volatile memory will be lost!
3. Remove power from the instrument.
This is the only way to guarantee that user sounds
and setups stored in the non-volatile RAM will be retained.
Running the Debug Sequence
If you pressed the
>>>
button in step 2 above, the following will appear in the display:
Menu
CPU Test
Before continuing, set the PC88Õs volume slider to its minimum setting.
Some tests produce
loud, potentially destructive test tones. When these tones begin to sound, if you wish, you can
adjust the volume slider to hear them.
Press the
Zone
3
button. This will run all of the available tests in sequence, displaying the
name of each as it executes. After each test Þnishes, the LCD will show
Pass
or
Fail
in the upper,
right-hand corner. You must press any button (or keyboard key) to continue with the next test
in the sequence.
Three tests in the sequence require special treatment: the
MIDI UART Test
, the
VGM Port Test
,
and the
Sound Test
. The
MIDI UART Test
requires that a MIDI cable be connected between the
MIDI Out and MIDI In connectors on the back of the unit. If this MIDI cable is not installed, the

 Loading...

