TracNet H90 Installation Guide
8
Prepare the Antenna Site
Prepare the Antenna Site
Once you have identified a suitable antenna mounting site,
according to the guidelines provided in “Plan the Antenna
Installation” on page 4, follow these steps to prepare the
site for installation.
Drill the Mounting Holes
1. Unfold the antenna mounting template (supplied in the
Customer Welcome Kit) and place it onto the mounting
surface. Make sure the “FWD” (forward) arrow points
toward the bow and is parallel to the vessel’s
centerline.
Note: You don’t need to mount the antenna exactly on the
vessel’s centerline, but the antenna’s forward arrow must
be parallel to it.
Figure 7: Mounting Bolt Hole Pattern Examples
2. Using a light hammer and center punch, mark the
locations for the four mounting holes on the mounting
surface in the locations indicated on the template.
3. Drill a 5/8" (16 mm) hole at the four mounting hole
locations you marked in Step 2. Later, you will insert
four 1/2"-13 bolts through these holes to secure the
antenna to the mounting surface.
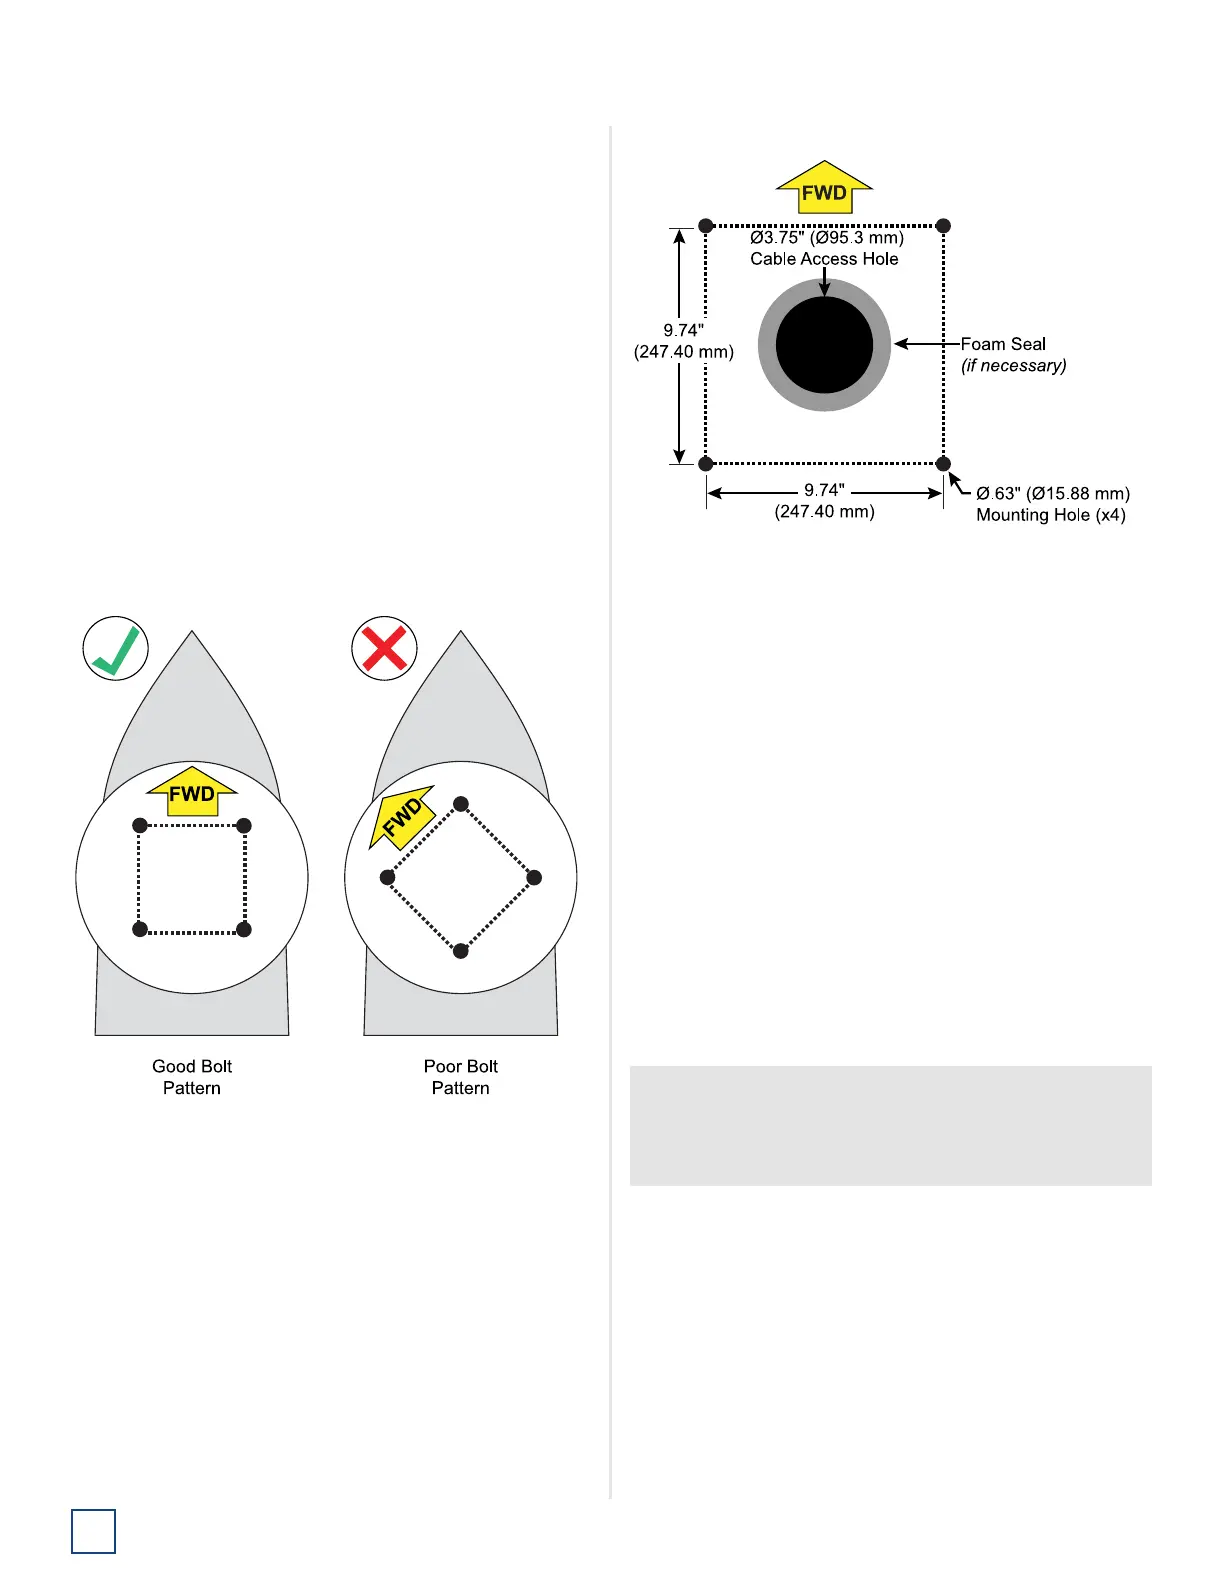
Figure 8: Antenna Mounting Holes Layout
Cut Out the Cable Access Hole, If
Needed
1. Using the supplied template, mark the location of the
cable access hole in the center of the mounting hole
pattern.
2. Cut out the 3.75" (95 mm) cable access hole in the
location you marked in Step 1. Smooth the edges of
the hole to protect the cable. Later, you will route the
antenna cable through this hole and into the vessel.
(You may also apply anti-chafe material around the
cable to protect it from abrasion.)
3. Clean and dry the antenna mounting surface.
4. Peel off the paper backing from the supplied foam seal
to expose the adhesive. Then press the foam seal
down firmly onto the mounting surface, ensuring the
hole in the foam seal aligns with the cable access hole
in the mounting surface (see Figure 8).
IMPORTANT!
Use only the KVH-supplied foam seal. Do not use any
seals that may come with a third-party antenna mount,
as they may block the drain holes in the baseplate.
 Loading...

