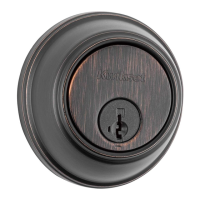
This document provides installation instructions for a Kwikset deadbolt, identified by model number 61876/01 and product code 665. It outlines the steps for preparing the door, installing the latch and deadbolt, and securing the strike plate on the door frame. The manual emphasizes the importance of proper alignment and adjustment for optimal security and functionality.
Function Description
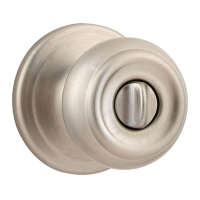
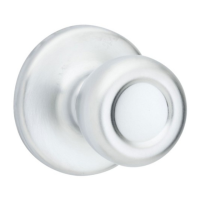
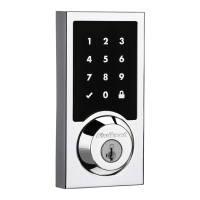
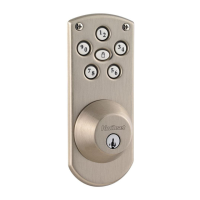
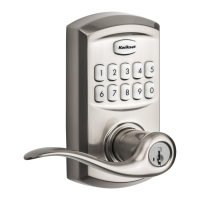
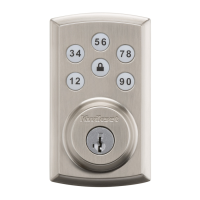
The Kwikset deadbolt is a security device designed to provide enhanced protection for residential doors. It consists of a latch mechanism, a deadbolt assembly, and a strike plate. The latch secures the door in a closed position, while the deadbolt, when engaged, extends a solid bolt into the door frame, offering a higher level of resistance against forced entry compared to a standard spring latch. The lock operates with a key from the exterior and typically a thumbturn or key from the interior, depending on whether it's a single or double cylinder model. The SmartKey® feature, if applicable, allows for rekeying the lock to an existing key without needing to replace the entire cylinder, offering convenience and flexibility for homeowners. The system is designed for easy installation by homeowners, with clear instructions and diagrams provided to guide the process.
Usage Features
The Kwikset deadbolt offers several features aimed at ease of use and enhanced security:
- Adjustable Backset: The latch mechanism is designed to accommodate common door backsets of 2-3/8" (60 mm) or 2-3/4" (70 mm). This adjustability ensures compatibility with a wide range of pre-drilled doors, eliminating the need for specialized parts or extensive modifications. The adjustment process is straightforward, involving a simple rotation of the latch front to extend or retract the bolt as needed.
- Universal Latch Options: The deadbolt comes with two types of latch faceplates: a rectangular faceplate (Type A) and a drive-in collar (Type K). This allows for installation on doors with either a mortised edge or a drive-in bore, providing flexibility for different door preparations.
- Door Thickness Compatibility: The deadbolt is designed for standard door thicknesses ranging from 1-3/8" (35 mm) to 2-1/4" (57 mm). For doors thicker than 2-1/4" (57 mm), a service kit can be ordered from Kwikset to ensure proper fit and function.
- SmartKey® Technology (if applicable): For models equipped with SmartKey®, users can rekey their lock in seconds using the provided SmartKey® tool. This feature is particularly useful for homeowners who want to match their new deadbolt to an existing house key or rekey their locks after moving into a new home, without the expense and inconvenience of calling a locksmith or replacing the entire lock.
- Clear Installation Guidance: The manual provides detailed, step-by-step instructions with corresponding illustrations, making the installation process accessible for DIY enthusiasts. It includes tips for preparing the door, checking dimensions, and correctly orienting components like the "UP" marking on the latch.
- Security Warnings: The manual includes important warnings regarding the limitations of any lock in providing complete security and advises consulting qualified professionals for enhanced security measures. For double cylinder models, specific precautions are highlighted, such as keeping a key readily accessible on the interior for emergency exits when the home is occupied.
- Durable Construction: While not explicitly detailed in the provided excerpt, Kwikset products are generally known for their durable construction, designed to withstand daily use and provide reliable security over time. The use of screws for securing the latch and strike plate ensures a robust installation.
- Aesthetic Integration: The design of Kwikset deadbolts typically aims for seamless integration with various door styles and finishes, contributing to the overall aesthetic appeal of the home while providing essential security.
Maintenance Features
The Kwikset deadbolt is designed for minimal maintenance, focusing on reliable operation once properly installed:
- Robust Installation: The use of multiple screws to secure the latch and strike plate ensures a firm and stable installation, reducing the likelihood of loosening over time due to repeated use. This robust attachment minimizes the need for frequent re-tightening.
- Adjustable Components: The adjustable backset and universal latch options simplify initial installation and ensure a proper fit, which contributes to long-term smooth operation. Correct alignment during installation, as guided by the manual, is key to preventing wear and tear on the internal mechanisms.
- SmartKey® Rekeying: For SmartKey® enabled locks, the rekeying feature can be considered a maintenance benefit. It allows users to easily change the keying of their lock without disassembling the entire unit or requiring a locksmith, which can be useful if keys are lost or security is compromised. This simplifies key management and extends the useful life of the lock.
- Clearance Requirements: The instructions emphasize drilling the strike plate hole to a minimum depth of 1" (25 mm). This ensures adequate clearance for the deadbolt to fully extend into the door frame, preventing the bolt from binding or failing to engage properly, which can lead to premature wear or security vulnerabilities.
- Material Durability: While not explicitly stated, Kwikset typically uses materials that resist corrosion and wear, contributing to the longevity of the deadbolt. Regular cleaning of the exterior components with a soft cloth and mild cleaner can help maintain its appearance and prevent buildup that might impede operation.
- Lubrication (General Lock Maintenance): Although not mentioned in this specific excerpt, general lock maintenance often includes occasional lubrication of the internal mechanisms and the bolt itself with a graphite-based lubricant. This helps ensure smooth operation and prevents sticking, especially in varying environmental conditions.
- Troubleshooting Guidance: The detailed installation steps implicitly serve as a guide for troubleshooting common issues. For example, if the deadbolt is not extending properly, reviewing the steps for latch adjustment or strike plate alignment can help identify and resolve the problem. The manual's emphasis on correct alignment of the torque blade and D-shaped hole is crucial for the deadbolt's internal mechanism to function correctly.
In summary, the Kwikset deadbolt is a user-friendly security device designed for straightforward installation and reliable performance. Its adjustable features, clear instructions, and emphasis on proper alignment contribute to its ease of use and long-term functionality, with the SmartKey® option adding significant convenience for key management.