E Paper Output Slot
If Paper misfeed in Eject section Remove
paper appears and the jam location indicator
shown in the illustration blinks, a paper jam
has occurred in the paper output slot. Per-
form the following procedure to remove the
jammed paper.
Important
The drum section inside the
main body is sensitive to scratches and
contaminants. When removing paper, be
careful not to touch it or scratch it with
your watch, ring, etc.
➊
If jammed paper is seen through the
paper output slot, pull it out to remove
it.
Note If the paper does happen to tear,
remove any loose scraps from inside the
machine.
➋
Pull the left cover handle up to open the
left cover.
➌
Remove any jammed paper without
tearing it.
Note If the paper does happen to tear,
remove any loose scraps from inside the
machine.
➍
Close the left cover.
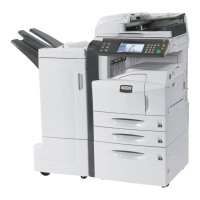
KM-1650/2050/2550
Location
Indicator
Jam
Location
Jam number
A Cassette 1 JAM11, JAM21
B Cassette 2 to 4 * JAM12, JAM13, JAM14, JAM15,
JAM16, JAM22, JAM23, JAM24
C Multi-bypass tray JAM10, JAM20
D Inside the left cover JAM30, JAM40, JAM41, JAM42,
JAM43, JAM44, JAM45, JAM60,
JAM61
E Paper output slot
Finisher (Option)
Job separator (Option)
JAM50, JAM52, JAM53, JAM54,
JAM80, JAM81, JAM83, JAM84
JAM51
F Document Processor
(Option)
JAM70, JAM71, JAM72, JAM73,
JAM74, JAM75
Clearing Paper Jams
If a paper jam occurs, copying or printing stops. At this time,
jam location indicators are displayed as well as an error message
indicating a paper jam. Leave the main power switch on ( | ) and
refer to Removal Procedures to remove the jammed paper.
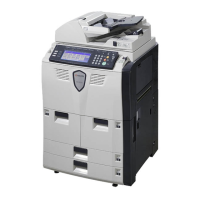
Jam Location Indicators
If a paper jam occurs, the location of the jam will be displayed by
the alphabet, which corresponds to the specific component in the
machine as the following figure with clearing instructions.
Precautions of the Paper Jam
•
Do not reuse jammed papers.
•
If paper is torn during removal, be sure to remove any loose scraps of
paper from inside the machine. Failure to do so may cause another
paper jam later.
•
Once all jammed paper has been removed, warm-up will begin. The
error message will disappear and the machine will return to the same
settings as prior to the paper jam.
•
CAUTION Never use sharp tools like knifes, screwdrivers or cutters to
clear paperjams. Be aware of rings or watches as well.
•
CAUTION Do no store paperclips or staples on any device.
•
WARNING High voltage is present in the charger section. Take suffi-
cient care when working in this area, as there is a danger of electrical
shock.
•
CAUTION The fixing unit is extremely hot. Take sufficient care when
working in this area, as there is a danger of getting burned.
* For the 16 ppm model, cassettes 2 to 4 are included in the optional paper feeder.
For the 20 ppm model and the 25 ppm model, cassettes 3 and 4 are included in
the optional paper feeder.
F Optional
Document Processor
If Misfeed in DP. Remove original(s) appears
and the jam location indicator shown in the
illustration blinks, a paper jam has occurred
in the optional document processor. Perform
the following procedure to remove the jam
-
med original(s).
➊
Remove all of the originals remaining in
the original table.
➋
Open the left cover.
E Optional Finisher
If Paper misfeed in Finisher, lower Process
Tray and remove paper appears and the jam
location indicator shown in the illustration
blinks, a paper jam has occurred in the optio-
nal finisher. Perform the following procedure
to remove the jammed paper.
Important
The drum section inside the
main body is sensitive to scratches and
contaminants. When removing paper, be
careful not to touch it or scratch it with
your watch, ring, etc.
➊
Turn the lever to lower the process tray.
➋
Remove any paper.
➌
Raise the process tray.
➍
Remove the finisher tray.
➎
Pull the left cover handle up to open the
left cover.
➏
Remove any jammed paper.
Note If the paper does happen to tear,
remove any loose scraps from inside the
machine.
➐
Close the left cover.
➑
Reattach the finisher tray.
➒
Lower the process tray temporarily and
return it. The error message disappears.
E Optional Job Separator
If Paper misfeed at Job separator. Remove
paper appears and the jam location indicator
shown in the illustration blinks, a paper jam
has occurred in the optional job separator.
Perform the following procedure to remove
the jammed paper.
Important
The drum section inside the
main body is sensitive to scratches and
contaminants. When removing paper, be
careful not to touch it or scratch it with
your watch, ring, etc.
➊
If jammed paper is seen through the
paper output slot of the job separator,
pull it toward your side to remove it.
Note If the paper does happen to tear,
remove any loose scraps from inside the
machine.
➌
Remove any jammed paper without
tearing it.
Note If the paper does happen to tear,
remove any loose scraps from inside the
machine.
➍
Close the left cover.
➌
Remove any jammed original without
tearing it.
Note If the original does happen to tear,
remove any loose scraps from inside the
document processor. Failure to do so
may cause another paper jam later.
➍
Raise the paper feed unit A.
➎
Remove any jammed originals without
tearing them.
Note If the original does happen to tear,
remove any loose scraps from inside the
document processor.
➏
Turn the dial as shown in the illustration
to remove the jammed original.
➐
Close the left cover to its original positi-
on.
Reset all the originals and start copying
again.
➋
Pull the left cover handle up to open the
left cover.
A

 Loading...