—
11
—
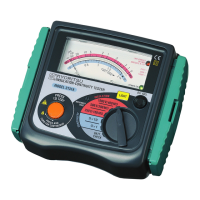
5-2 Mechanical Zero Adjustment
Check that the pointer lines up with the middle of the mark on the scale
correctly. If not, adjust it by rotating the meter movement zero adjust with
a screwdriver, etc.
5-3 Battery Voltage Check
① Set the range selector switch to BATT. CHECK position.
② Press the test button.
③ Then the pointer deflects. Judge the battery status with BATT.GOOD
mark on the scale plate.
If the pointer does not move to BATT.GOOD mark, the batteries are
exhausted. Replace them with new batteries according to section 8 for
battery & fuse replacement.
5-4 Test Probe Connection
Insert the test probe fully into the terminal of the instrument.
Connect the earth clip of the test probe (black) to EARTH terminal and
the line probe (red) to LINE terminal of the connector terminal.
5-5 Test Probe Check
Set the range selector switch to x1Ω position and press and turn the Test
button to lock it down. When the test probe are connected together, the
pointer should move from the ∞ position towards the 0position on the
blue continuity scale. If not, the probe or fuse may be faulty. Release the
Test button after completion.
#
CAUTION
Do not keep the test button pressed or locked by turning it clockwise during
battery check.
www.GlobalTestSupply.com
Find Quality Products Online at: sales@GlobalTestSupply.com