Do you have a question about the La Crosse Technology 616A-1908 and is the answer not in the manual?
States the physical height of the projected time numbers.
Explains how to switch between 12-hour and 24-hour display.
Details projection behavior with USB or battery power.
Provides instructions for setting the alarm time.
Troubleshooting for segments missing on the display.
Troubleshooting for a dim or unclear display.
Troubleshooting for distorted numbers or screen artifacts.
This document provides a comprehensive guide for the 616A-1908 Projection Alarm Clock, covering its functions, usage, and maintenance. It is designed to help users understand and troubleshoot their device effectively.
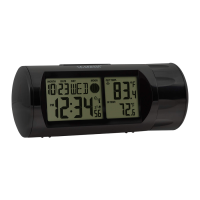
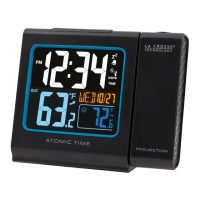
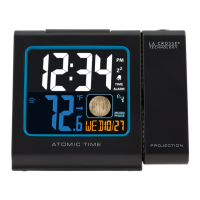
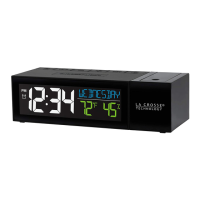
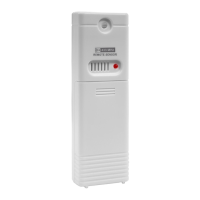
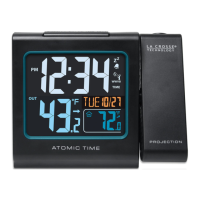
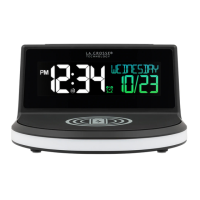
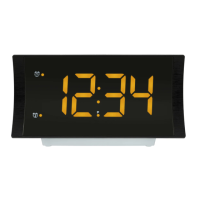
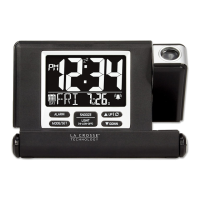
The 616A-1908 is a versatile projection alarm clock primarily powered by a Micro USB cord, though it can also operate on batteries. Its core function is to display time, which can be projected onto a wall or ceiling for easy viewing. The clock includes an alarm feature with snooze capabilities, a backlight for the LCD display, and a USB charging port for external devices. It also allows for manual setting of time and calendar information.
The device operates optimally when connected via the Micro USB cord. If using batteries, it requires two AAA alkaline batteries. It is crucial to use fresh, good-quality batteries with a minimum voltage of 1.48V for proper performance. Batteries dated at least six years in advance of the current year are recommended to ensure stability. Good brand-name batteries also help reduce RF interference.
In case of persistent issues, a factory restart can resolve many problems. To perform a factory restart:
The time numbers on the display are 0.86 inches tall. Users can choose between a 12-hour or 24-hour time format, with 12-hour being the default. The time format can be changed via the Program Menu.
When powered by the Micro USB cord, the time will project continuously. In battery operation, pressing and releasing the SNOOZE/LIGHT button will activate the projection for 3 seconds; continuous projection is not available on battery power. The projection arm can rotate 180 degrees to direct the projection onto a wall or ceiling. The projected time can also be rotated in 90-degree increments by pressing and releasing the UP button.
To set the alarm:
To view the alarm time, press the ALARM button once. Pressing it again will activate the alarm, indicated by a bell icon. Pressing it a third time will deactivate the alarm, and the bell icon will disappear.
When the alarm sounds, press the SNOOZE/LIGHT button to silence it for 10 minutes; "Zz" will appear above the time. To stop the alarm for one day while in snooze mode, press SNOOZE/LIGHT again. The alarm features a crescendo sound and will automatically shut off after 2 minutes if not silenced.
The LCD backlight has three stages: HI, LOW, and OFF. Press the SNOOZE/LIGHT button to cycle through these brightness settings.
The clock includes a power-output USB charging port. When the clock is plugged into a USB outlet with the Micro-USB cord, it can charge smartphones, cameras, or other devices. This port does not supply power to the clock itself. Note that mobile devices cannot be charged when the clock is operating on battery power. Users will need their mobile device's USB charging cable (not included). Charging times may vary.
To access the Program Menu:
Press the MODE/SET button to toggle between displaying the Alarm Time and the Calendar.
If the time is incorrect, it is likely due to manual setting. Enter the Program Menu to adjust the time.
Missing segments usually indicate a power-related issue.
Most clocks have a gray background. If the display appears dim, check it at eye level. Clocks exposed to sunlight can develop a cloudy film over time. Dimness is often a power-related issue.
For a brand-new clock with a distorted display, check for thin plastic films of printed scratch guard on the upper and lower screen. These films often have printed numbers for store displays and can be easily peeled off the LCD. With all power removed, the clock should be blank. If numbers still appear, a scratch guard is likely present.
| Display Type | LCD |
|---|---|
| Power Source | AC Adapter |
| Alarm Function | Yes |
| Temperature Display | Yes |
| Humidity Display | Yes |
| Time Format | 12/24 Hour |
| Snooze | Yes |
| Weight | 0.5 lbs |
| Backup Battery | CR2032 Coin Cell Battery |