EasyManua.ls Logo

Labau TM200 - User Manual

Labau TM200
19 pages
Print Icon
To Next Page IconTo Next Page
Loading...
USER’S MANUAL
for
THERMAL RECEIPT
PRINTER
TM200 USER’S MANUAL

Questions and Answers

  • B
    Brenda KingAug 1, 2025
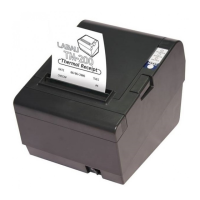
    What to do if paper is jammed inside the Labau Printer?
    • C
      Christopher MarshallAug 1, 2025
      If the paper is jammed inside the Labau Printer, turn the printer off and press the cover open button. Remove the jammed paper, put the roll back in, and close the cover. If the paper is caught in the automatic cutter, open the cutter cover and turn the knob until the cutter blade is back to the lowest position. Close the cutter cover, open the printer cover, and remove the jammed paper.
  • C
    Christian MendozaAug 6, 2025
    Why is printing poor on my Labau TM200 Printer?
    • F
      Felicia SpencerAug 6, 2025
      If printing is poor on your Labau Printer, it could be due to paper dust on the heating element of the thermal print head. Try cleaning the print head.
  • T
    Tanya SmithAug 10, 2025
    What to do if the ERROR light is blinking on Labau TM200 Printer?
    • K
      Kimberly HorneAug 10, 2025
      If the ERROR light is blinking on your Labau Printer, make sure that the printer cover is properly closed until you hear an audible click.
  • S
    Susan RobbinsAug 14, 2025
    What to do if the PAPER “Orange” light is On for Labau Printer?
    • M
      Michael HaneyAug 14, 2025
      If the PAPER “Orange” light is On for your Labau Printer, check your stock to prepare a new paper roll.
  • D
    David WalkerAug 18, 2025
    How to fix the auto cutter if it is jammed on the Labau TM200?
    • J
      Joseph BryantAug 18, 2025
      If the auto cutter on your Labau Printer is jammed, and it's due to a foreign object, the printer will attempt to recover automatically. If it doesn't return to normal, pull the cutter cover toward you to access the cutter motor knob. Rotate the knob as instructed on the label until the cutter blade is back to its normal position. If the paper jams, turn the knob clockwise until the cutter blade is at its lowest position, then close the cutter cover.
  • M
    Mary RamirezAug 22, 2025
    What to do if the ERROR light is Off, but nothing prints on my Labau Printer?
    • A
      Alexis ReyesAug 22, 2025
      If the ERROR light is Off, but nothing is printed on your Labau Printer, try running a self-test. If the self-test doesn't work, the interface cable between the printer and the computer should be checked at both ends to make sure that it meets the specifications for both devices. Ensure that the printer’s DIP switch settings for data transmission match the computer's settings. You can print the printer’s interface settings using the self test.
  • J
    Jennifer GilmoreAug 27, 2025
    How to troubleshoot if the lights on the control panel do not come on on Labau TM200 Printer?
    • C
      Crystal MorrisAug 27, 2025
      If the lights on the control panel of your Labau Printer do not come on, ensure that the power supply cables are correctly plugged into the printer, the power unit, and the power outlet. Also, verify that power is supplied to the outlet. If the outlet is controlled by a switch or timer, try using another outlet.

Summary

Setting Up the Printer

Unpacking

Illustration of items included in the standard TM200 printer package.

Printer Handling Features

Lists key operational features and handling aspects of the printer.

Options and Accessories

Lists optional components and accessories available for the TM200 printer.

Connecting Cables and Peripherals

Connecting the Computer

Steps to connect the printer to a computer via interface cable.

Connecting the Cash Drawer

Instructions for connecting the cash drawer to the printer's kick-out connector.

Connecting the Power Supply

Power Supply Notes

Important notes regarding paper roll specifications and data reception.

Installing the Paper Roll

Paper Roll Installation Steps

Visual guides and steps for correctly inserting and feeding the paper roll.

Adjustments and Settings

DIP Switch Configuration

Explains how DIP switches adjust communication settings and print density.

Near-End Paper Sensor

Information about the near-end sensor for paper and how to adjust its setting.

Using the Printer

Control Panel Overview

Overview of the printer's control panel, buttons, and indicator lights.

Control Panel Indicator Status

POWER and ERROR Lights

Status and meaning of POWER and ERROR indicator lights.

PAPER Indicator Status

Status of the PAPER light indicating paper roll status (present, near end, or absent).

Chapter 2: The Self Test

Running the Self Test

Step-by-step instructions on how to perform the printer self-test.

Chapter 3: Reference Information

Printing Specifications

Detailed table of printing specifications like method, density, width, and character structure.

Printer Specifications and Conditions

Paper Specifications

Specifications for paper width, maximum outside diameter, and spool diameter.

Reliability Metrics

Details on mechanism, head, cutter lifespan, and MCBF.

Electrical Requirements

Specifies supply voltage and current consumption in different modes.

Environmental Operating Conditions

Specifies operating and storage ranges for temperature and humidity.

Chapter 4: Troubleshooting

General Problems

Solutions for issues where control panel lights do not illuminate.

Printing Problems

Troubleshooting steps for common printing issues like errors or no output.

Print Head and Paper Handling

Cleaning the Print Head

Instructions and safety precautions for cleaning the printer's thermal print head.

Paper Handling Problems

Guidance on clearing paper jams within the printer.

Auto Cutter Problems

Resolving Auto Cutter Jams

Steps to correct a jammed auto cutter by manual intervention.

Hexadecimal Dump Feature

Using the Hex Dump Feature

Instructions for activating and using the hexadecimal dump mode for diagnostics.

Appendix A: DIP Switch and Paper Near End Settings

DIP Switch Settings Overview

Details on configuring DIP switches for various printer functions.

DIP Switch Settings (Set 2)

Transmission Speed Settings

Table showing DIP switch settings for various transmission speeds (BPS).

Print Density Selection

DIP Switch Notes

Important notes regarding the effect of DIP switch changes on printer settings.

Parallel Interface Specification

DIP Switch Sets (1, 2, 3)

DIP switch settings for parallel interface, buffer capacity, and buzzer functions.

Changing DIP Switch Settings

DIP Switch Adjustment Caution

Safety warning about turning off the printer before changing DIP switches.

Appendix B: Connectors

TM200 Connector Diagrams

Diagrams and descriptions of serial and parallel interface connectors.

Serial Interface RS-232 Pinout

Pinout details for the RS-232 serial interface connector.

Interface Connector Pinouts

Parallel Interface IEEE-1284 Pinout

Detailed pinout for the IEEE-1284 parallel interface.

Drawer Connector Pinout

Pinout details for the drawer connector.

Labau TM200 Specifications

General IconGeneral
Print Resolution203 DPI
Memory8 MB Flash, 8 MB SDRAM
Print TechnologyThermal Transfer and Direct Thermal
Maximum Print Width4.09 inches
ConnectivityUSB
Supported Barcode TypesPDF417, Data Matrix, QR Code